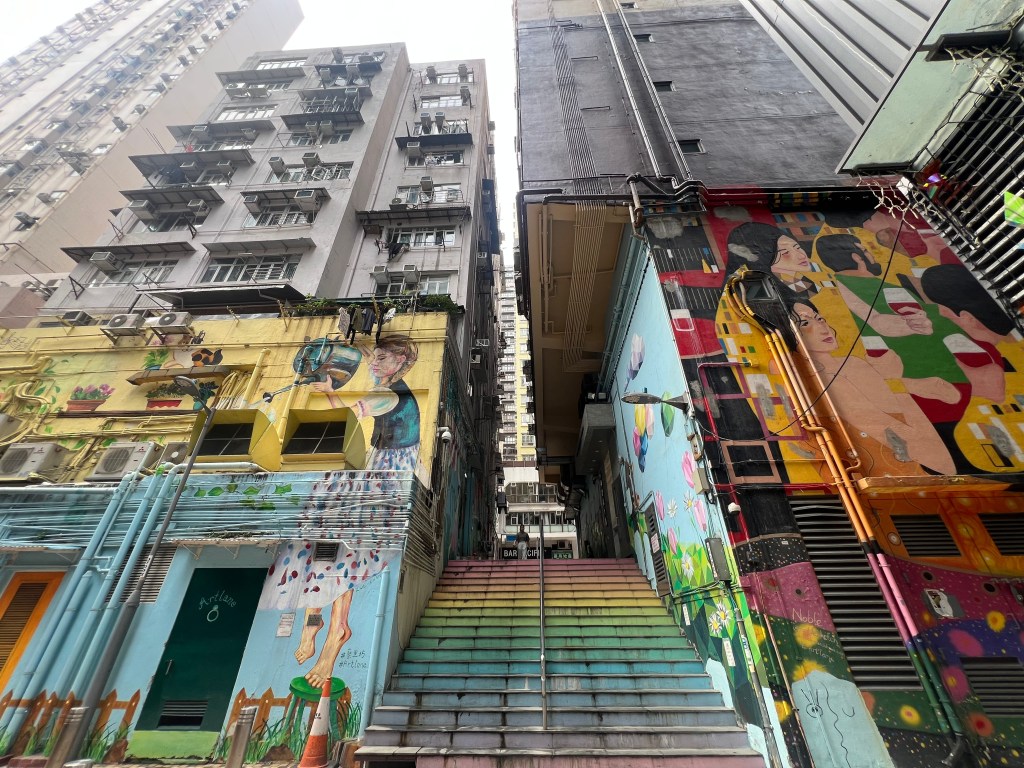
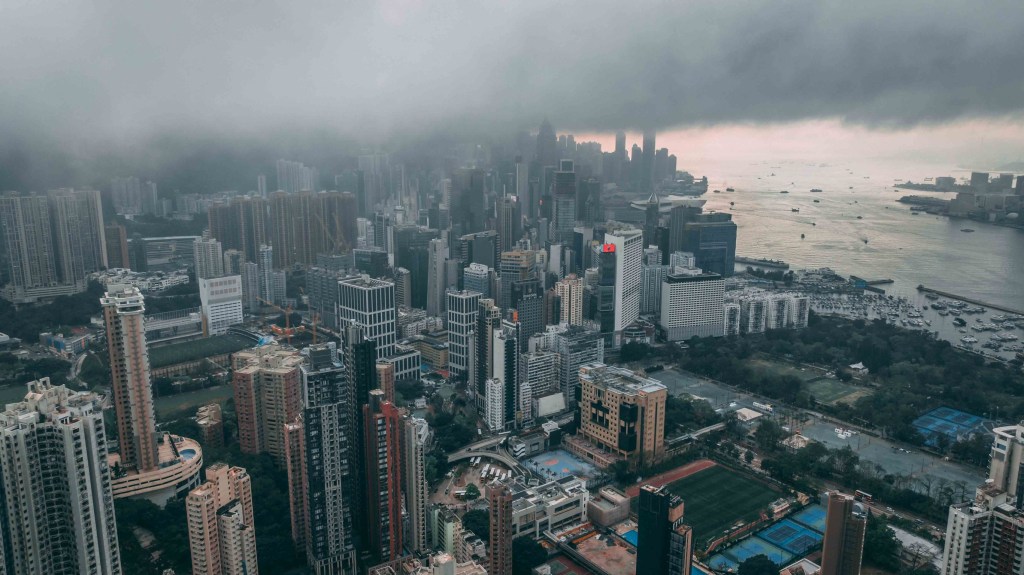
This post is to help you get to the famous rock where you have probably seen many instagram pictures, here’s our experience so let’s start.
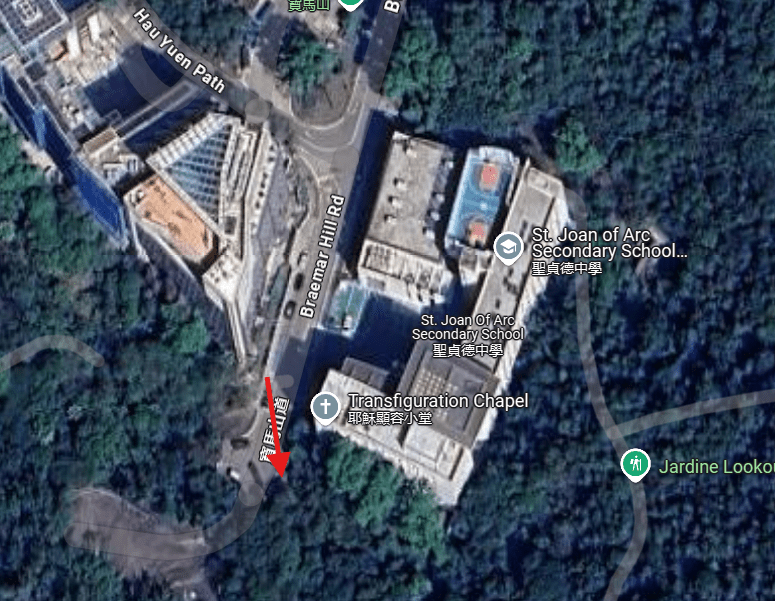
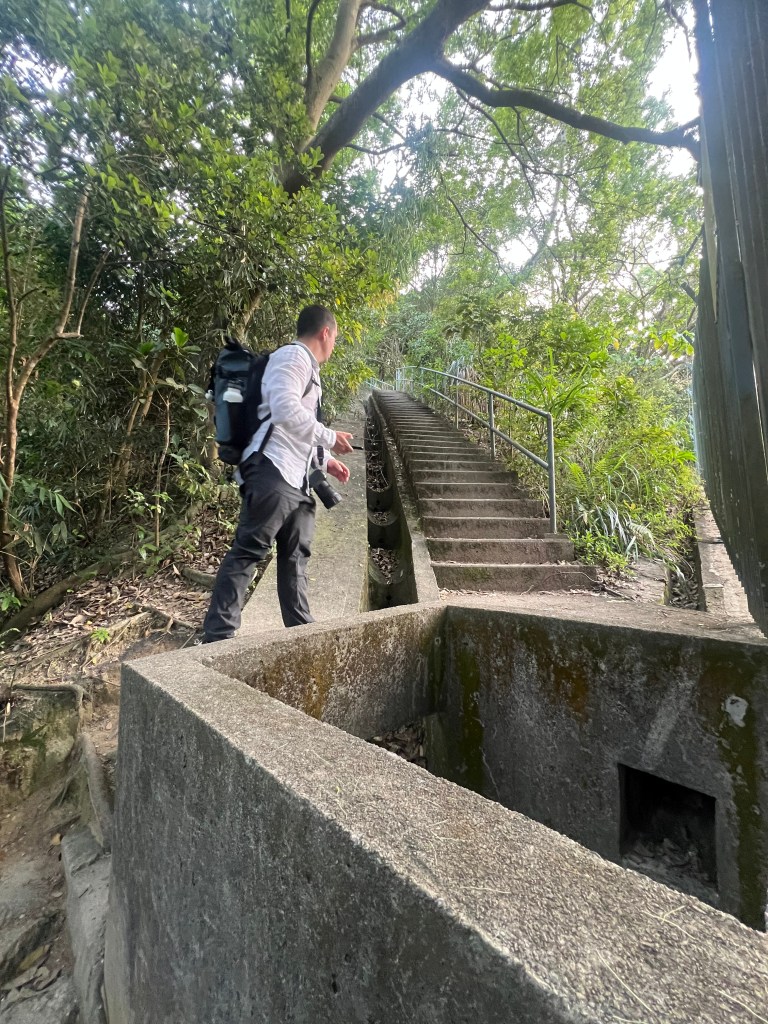
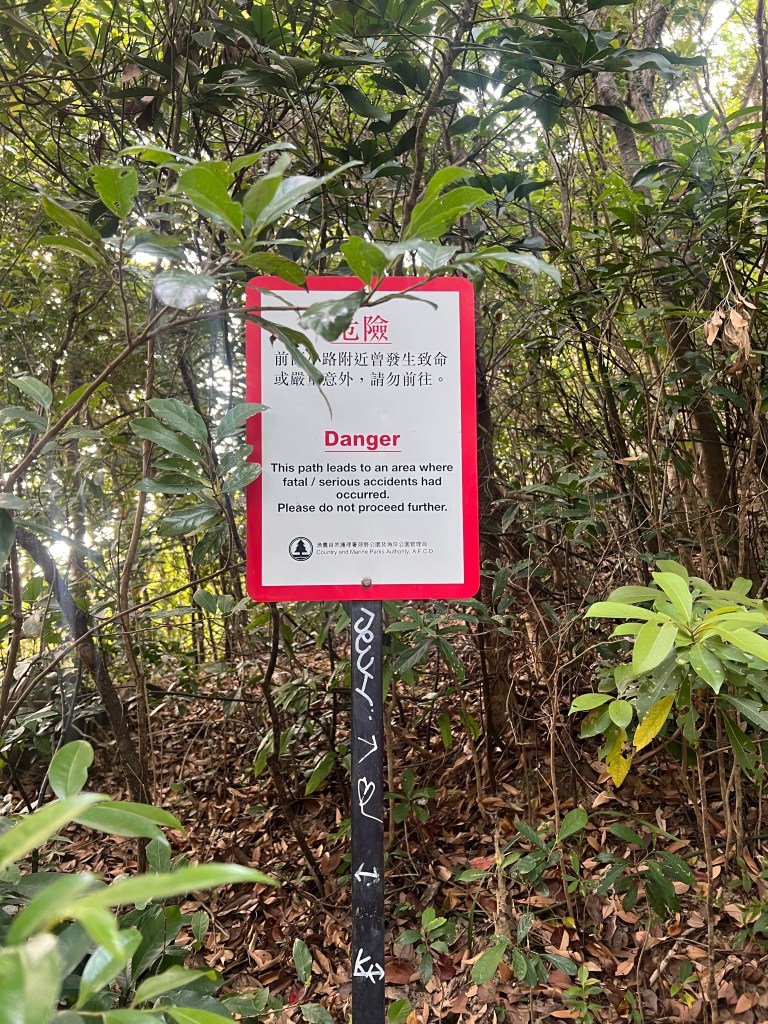
First thing you should know, is that the way to take once you get to Braemar Hill Road, is the one on the left! Yes, you are going to have to jump the fence. I start with this because when we get there the first time we went to the right and then the second time we saw people doing exactly the same thing, so keep reading and you won’t make the same mistake.
Braemar Hill Peak starting point
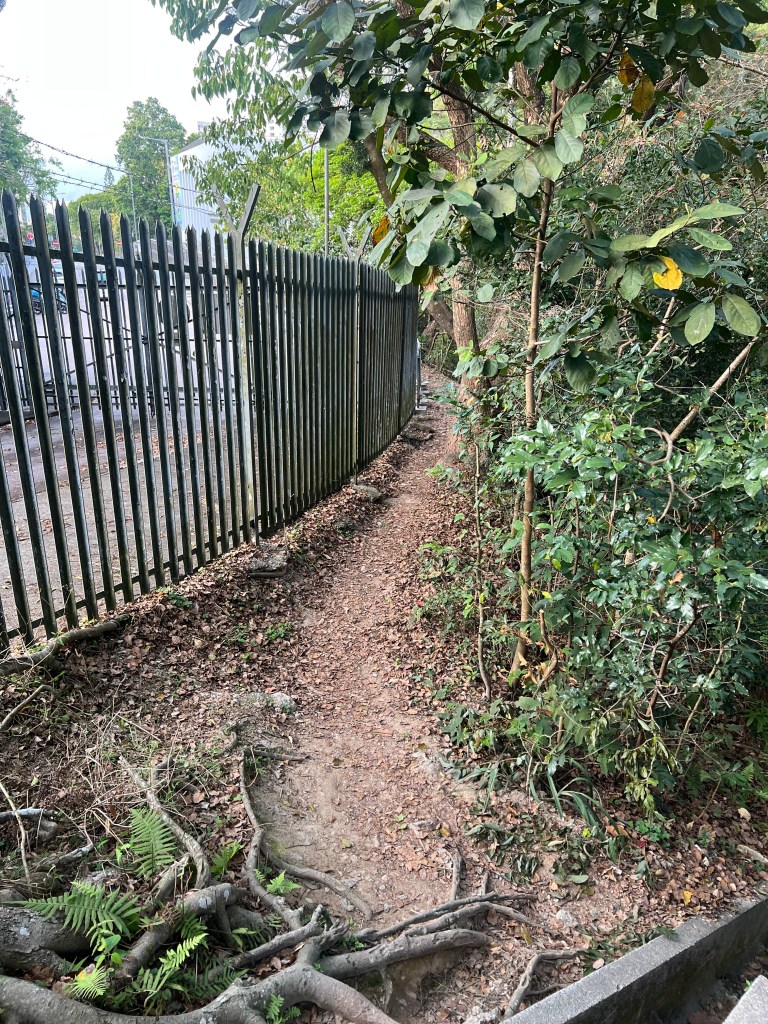
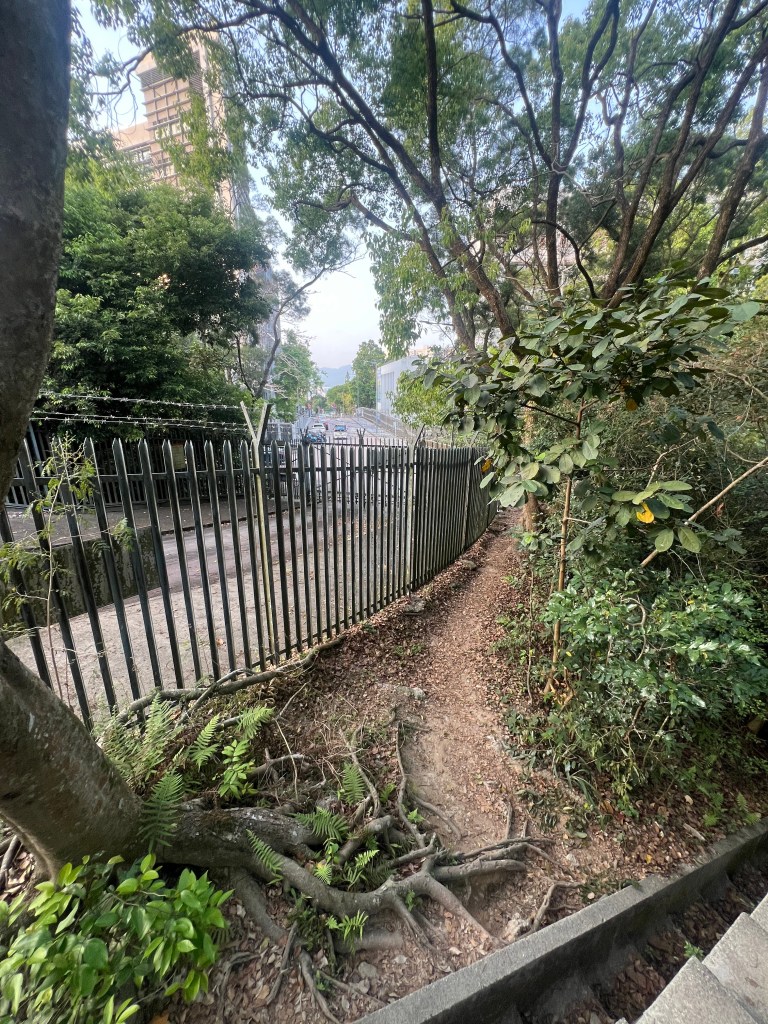
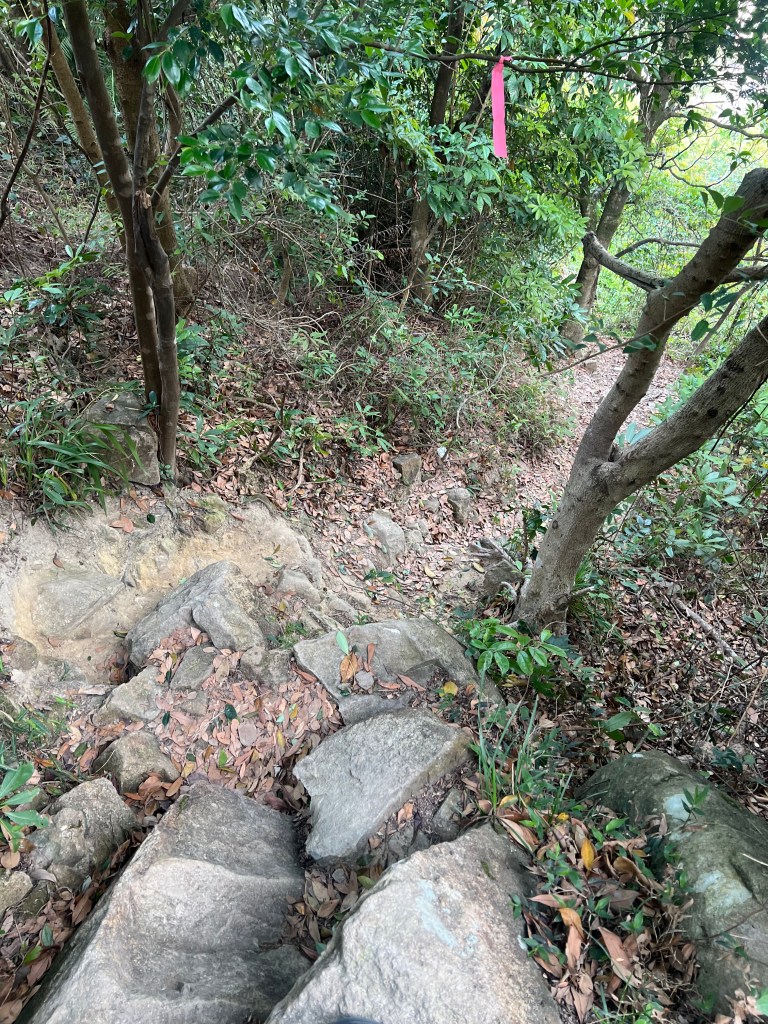
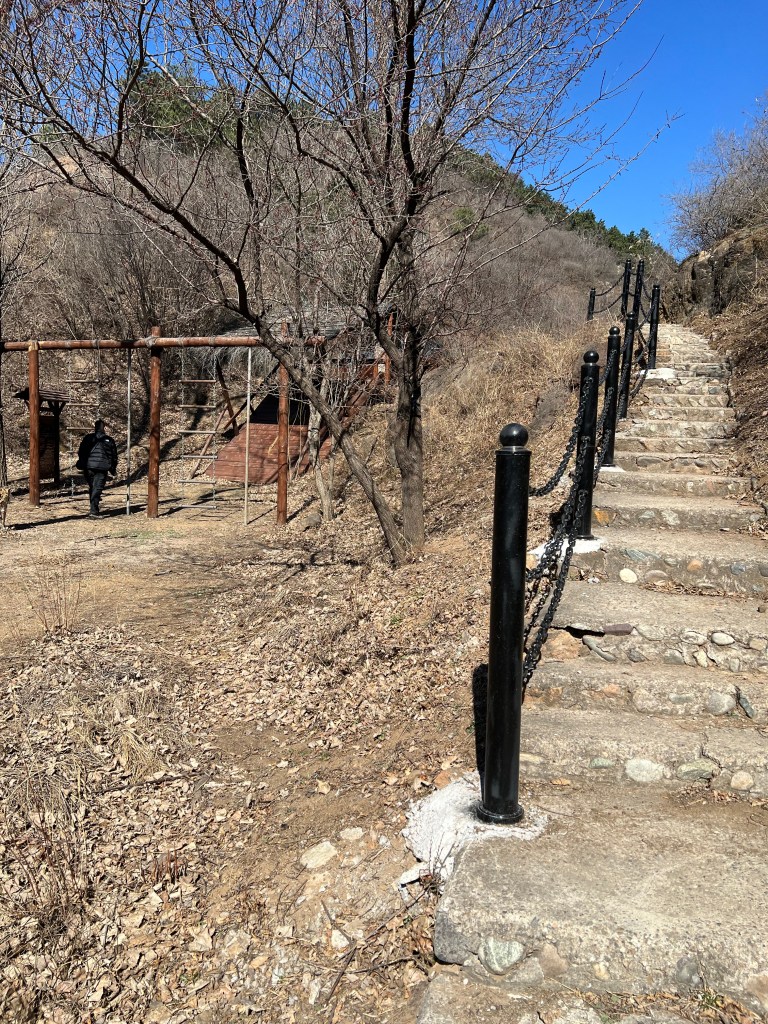
To Braemar Hill Rd you can get by any public transport or by Uber, just make sure you get to the very end of the road (you will need to pass the school). Once you there you will see a small fence on the left, just jump the fence and keep walking, you will see some steps, start to follow them up until you get to this point (see pictures).
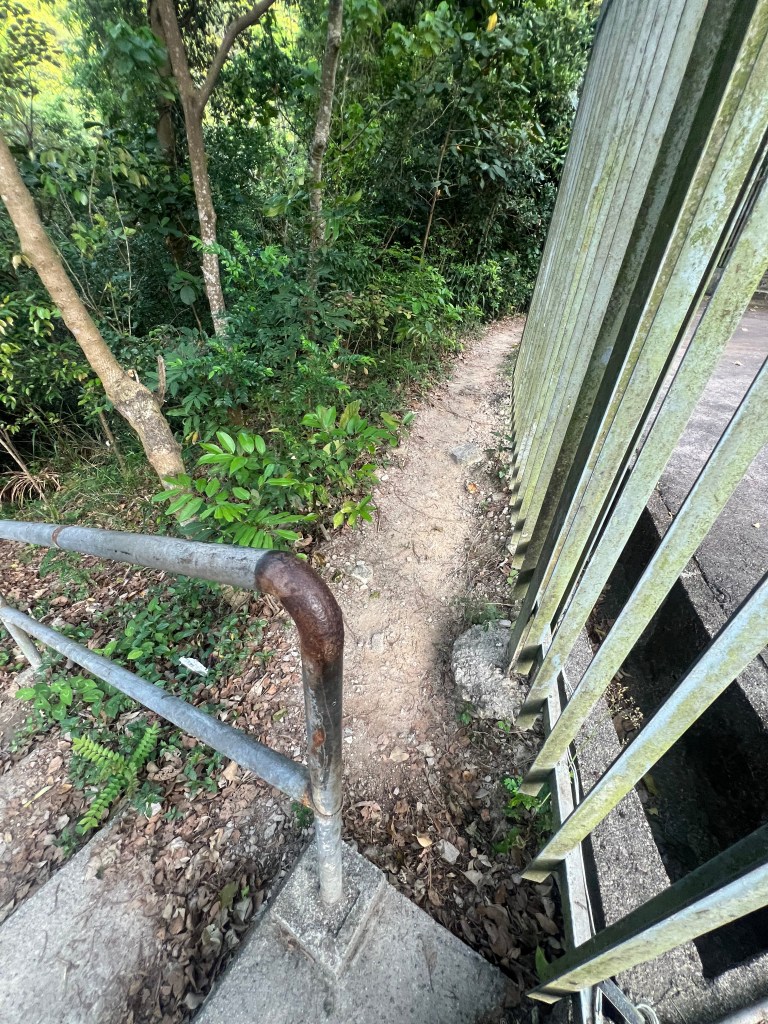
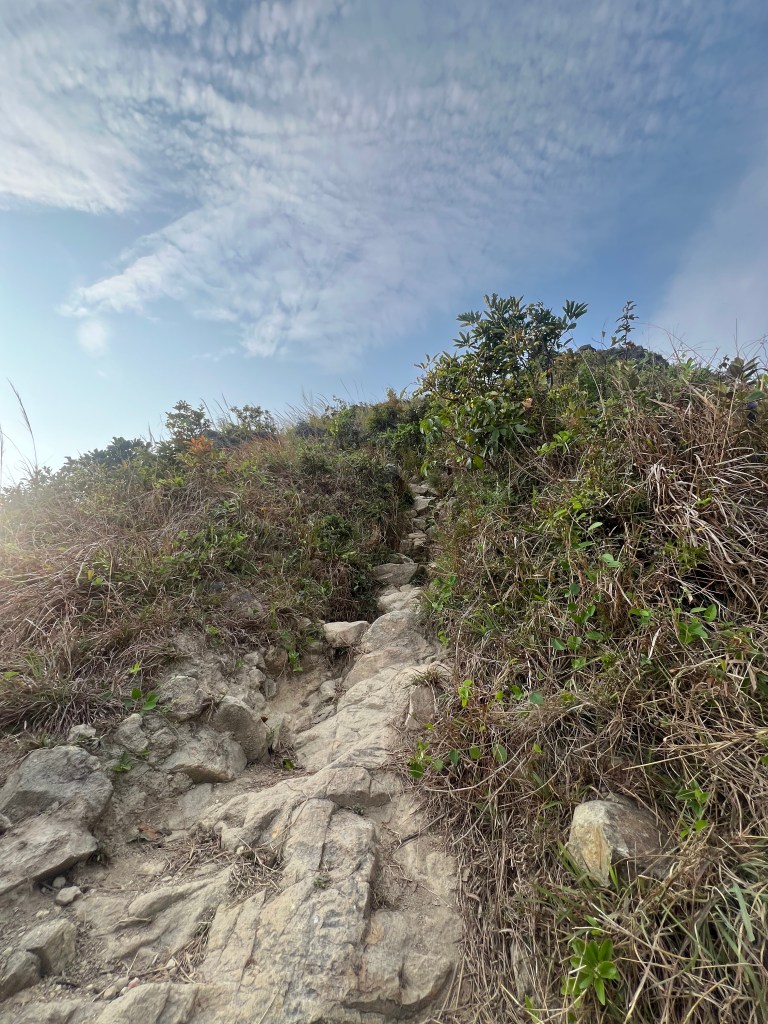
Starting pointThis is the fence you need to jump overOnce on the top of the steps, go left follow this pathGo all the way up
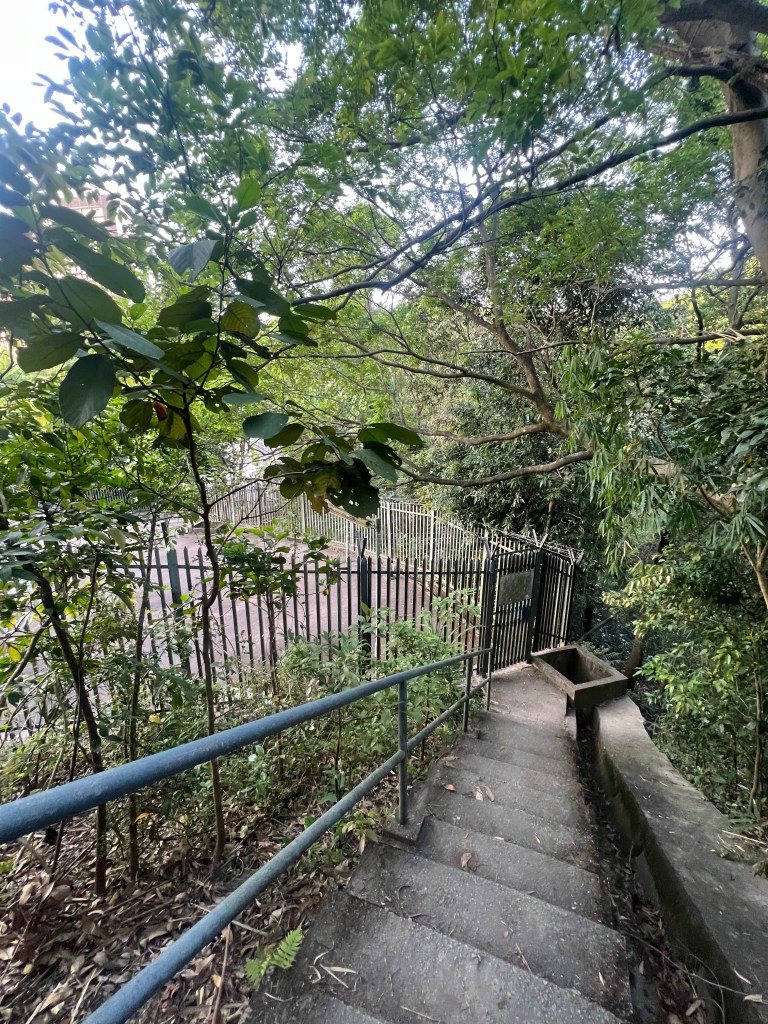
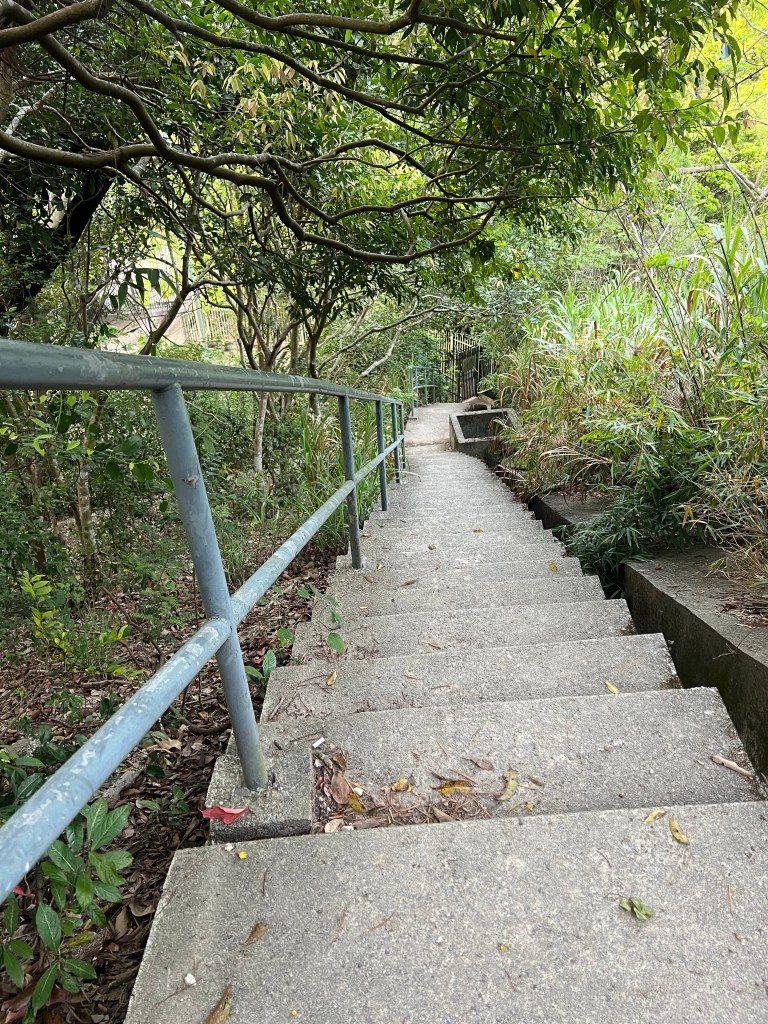
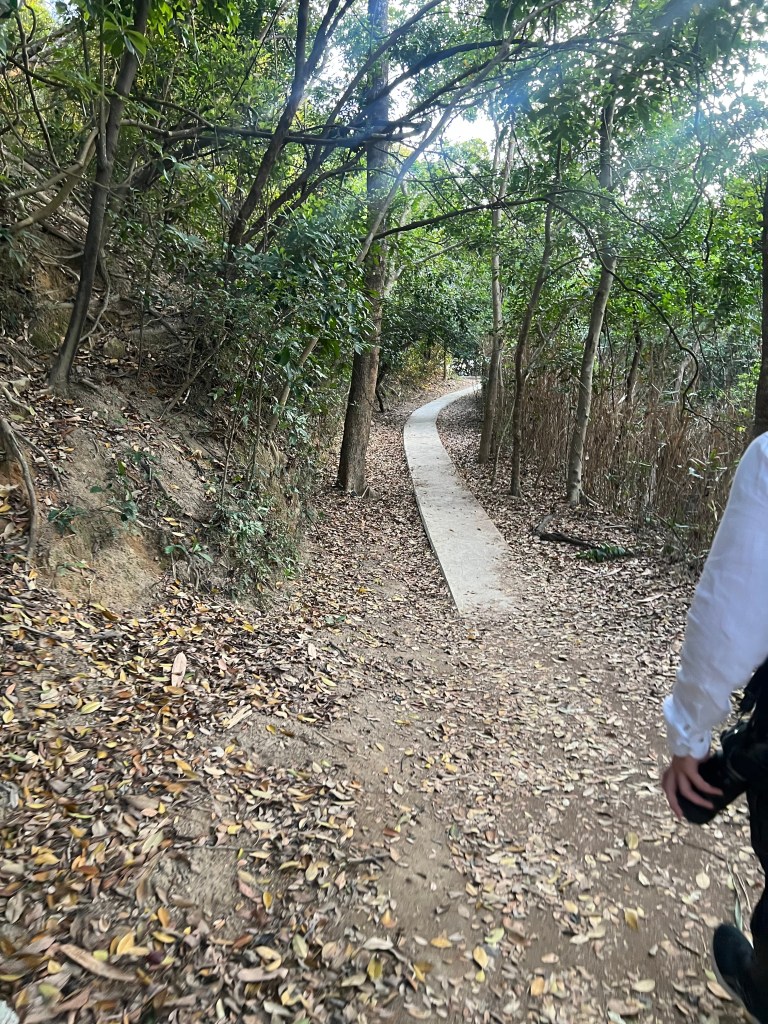
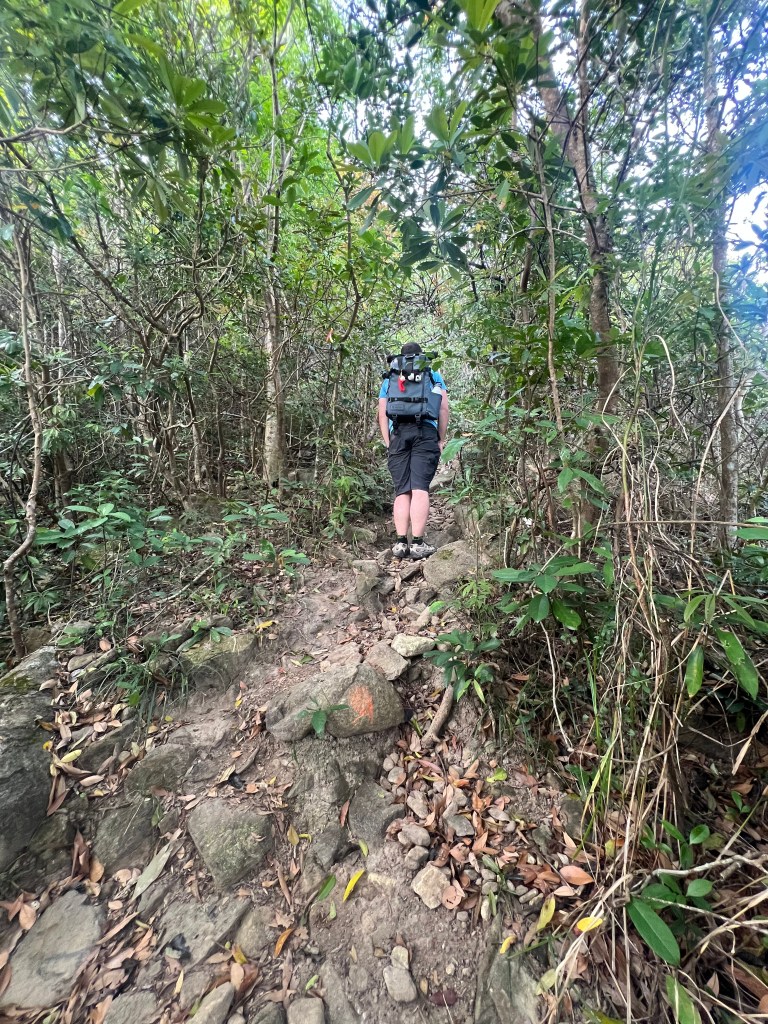
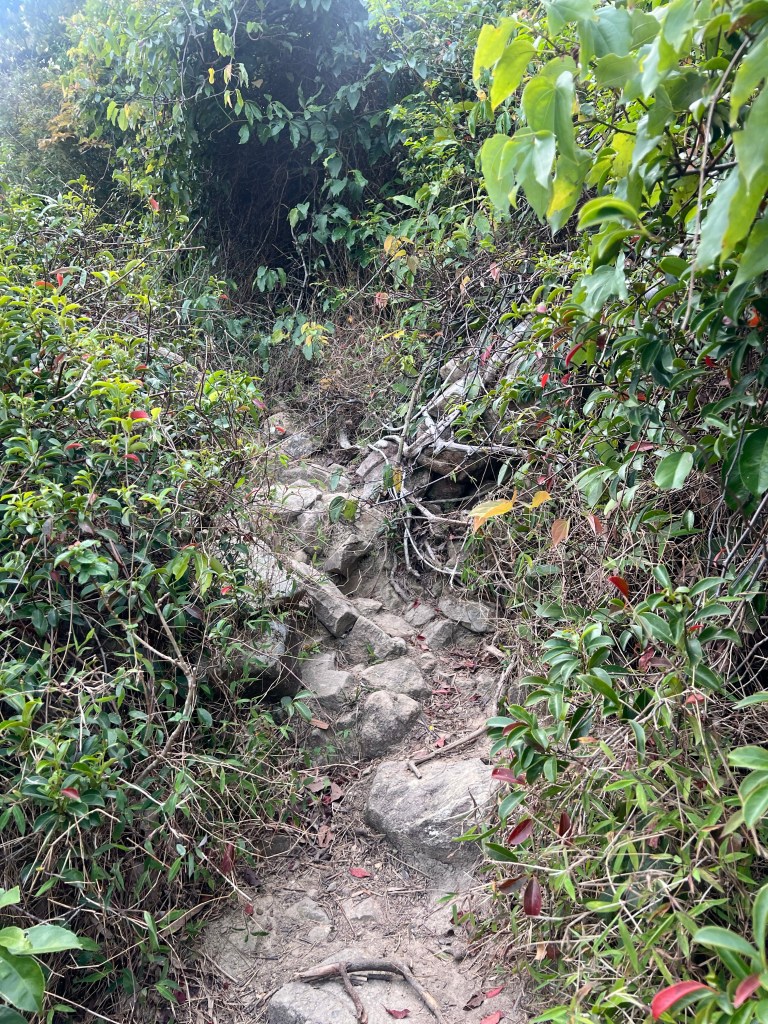
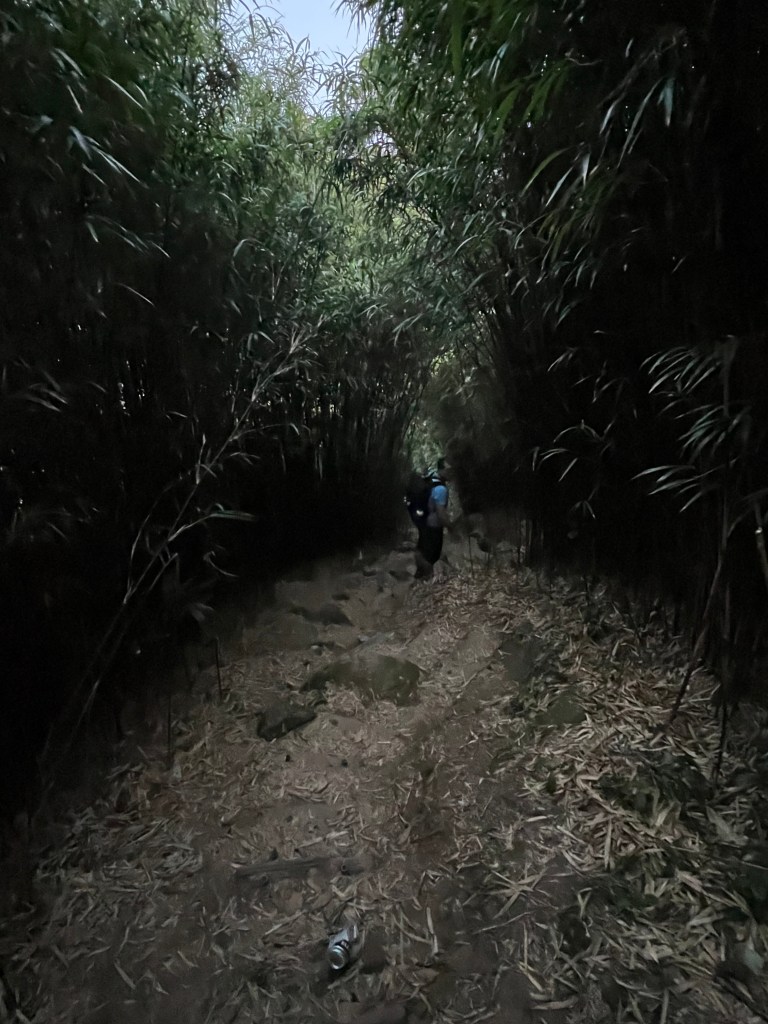
Right, now when you get to the very top of this steps, you will see there is a pathwalk, take right and keep walking.
This is how it will lookPathwalkHere the path starts to clear
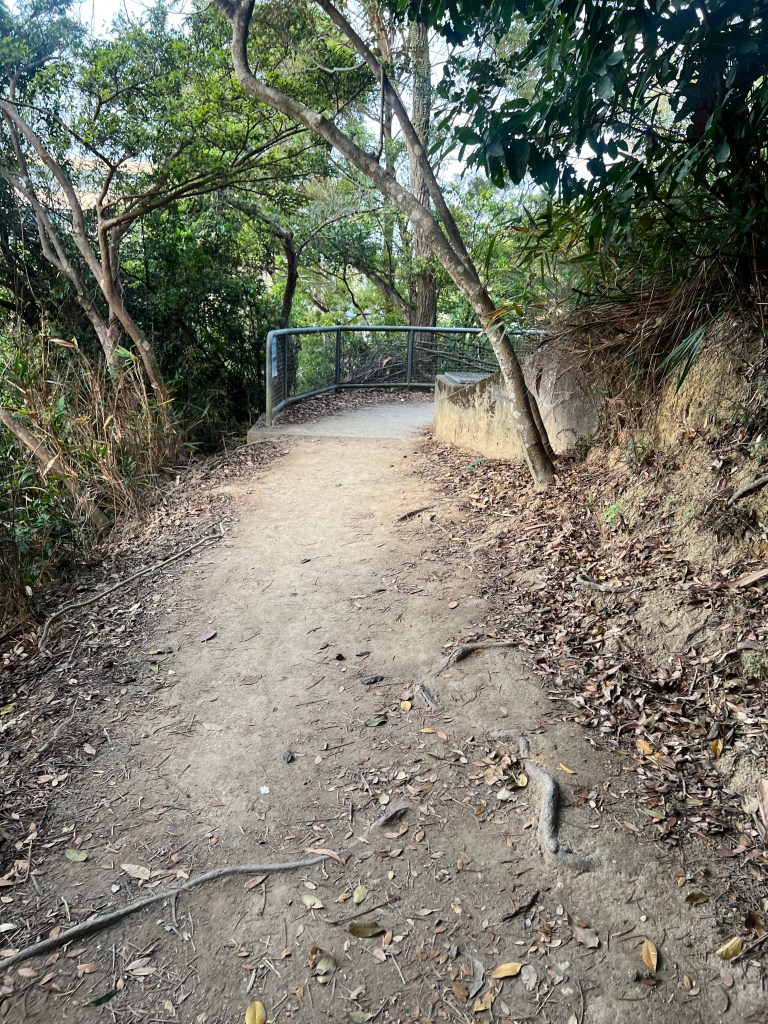
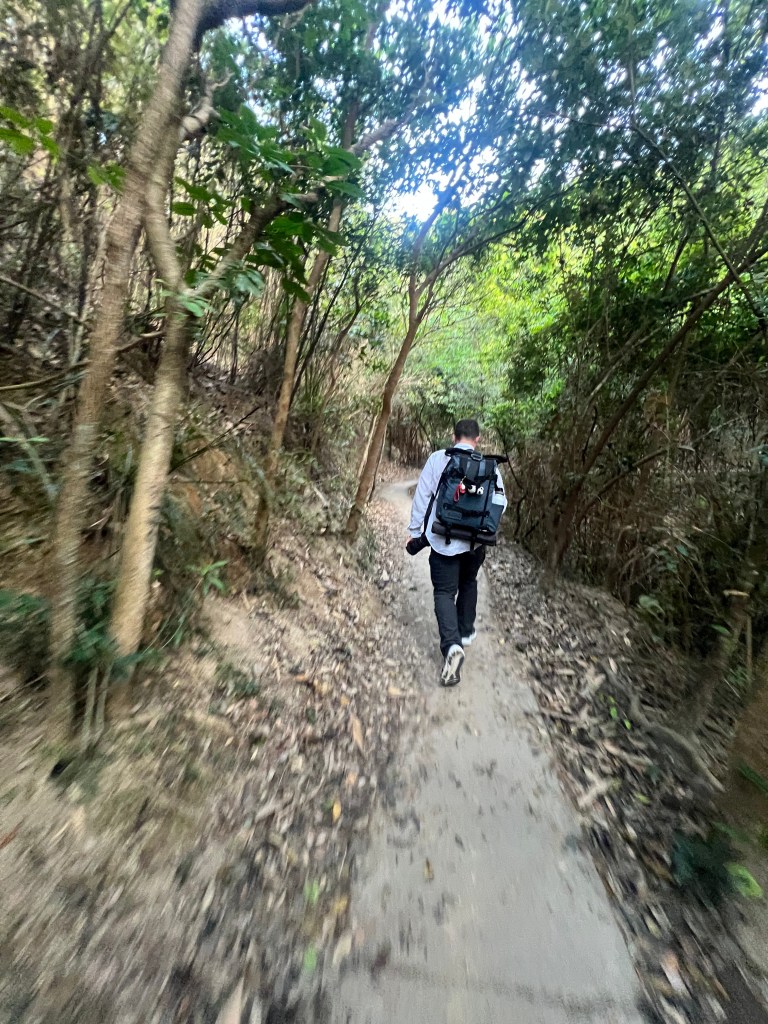
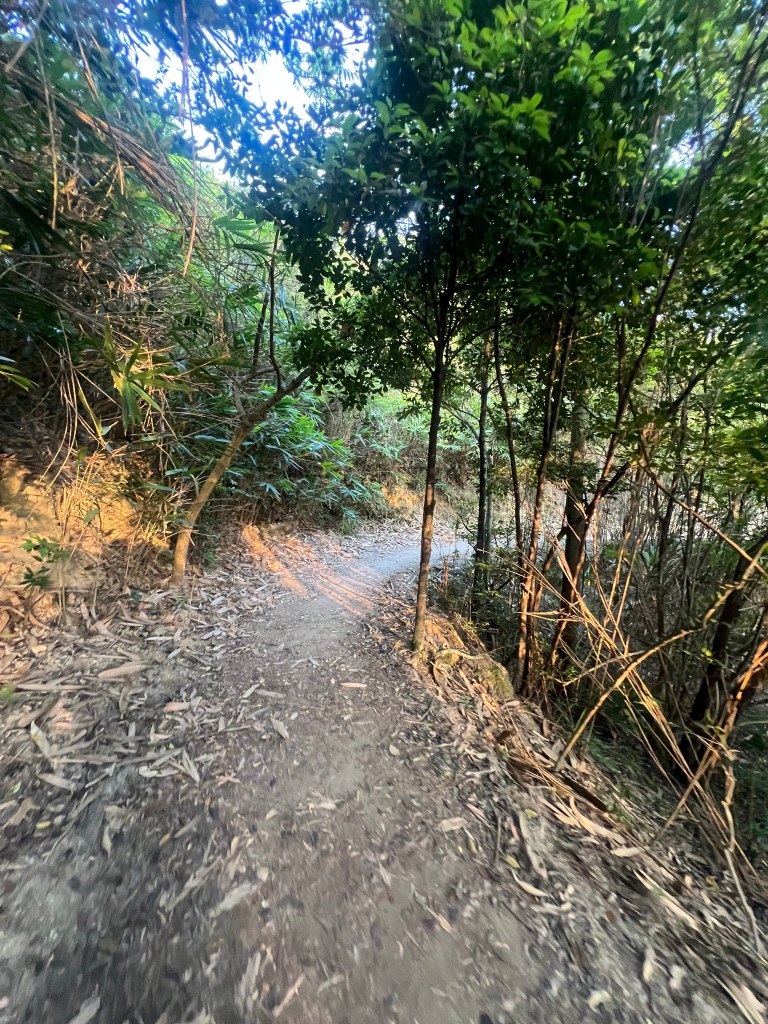
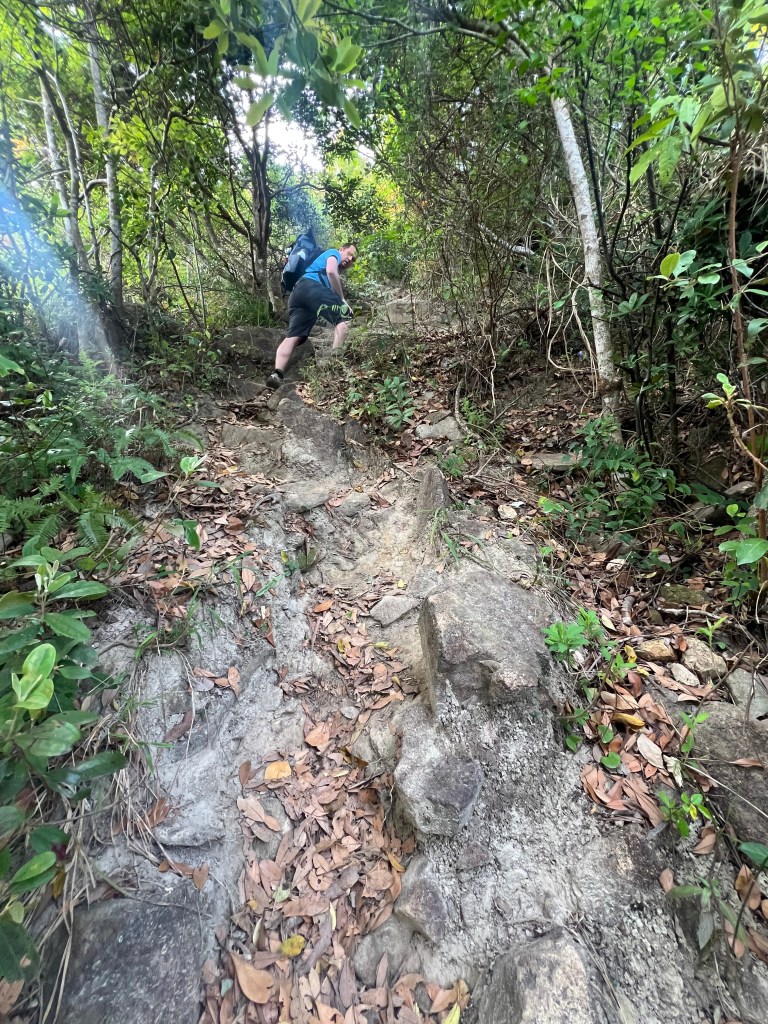
To walk this path it takes about 15 minutes, along the way you will see different spots where you can take pictures. Also, you will leave behind some rocky area in the pathwalk, after this you are basically there.
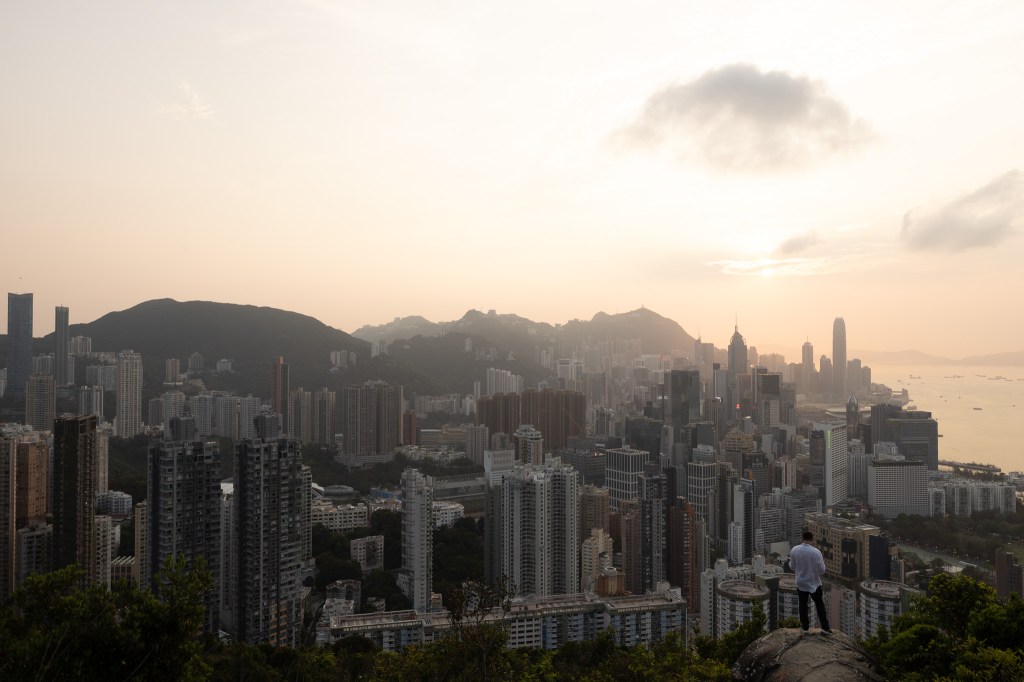
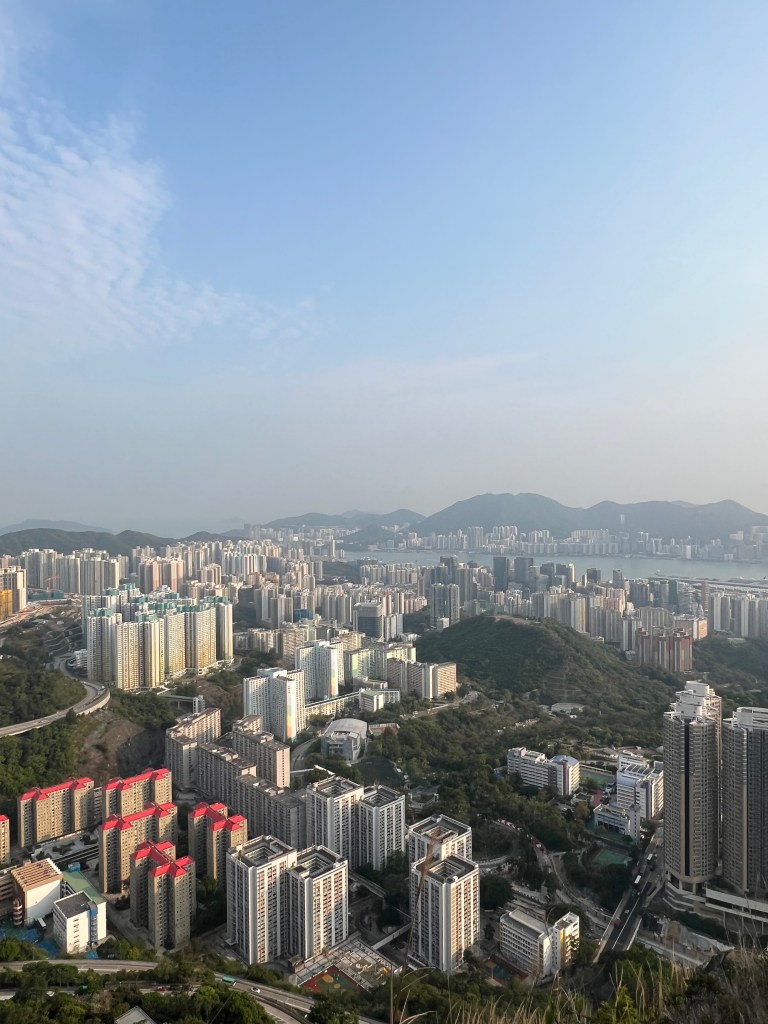
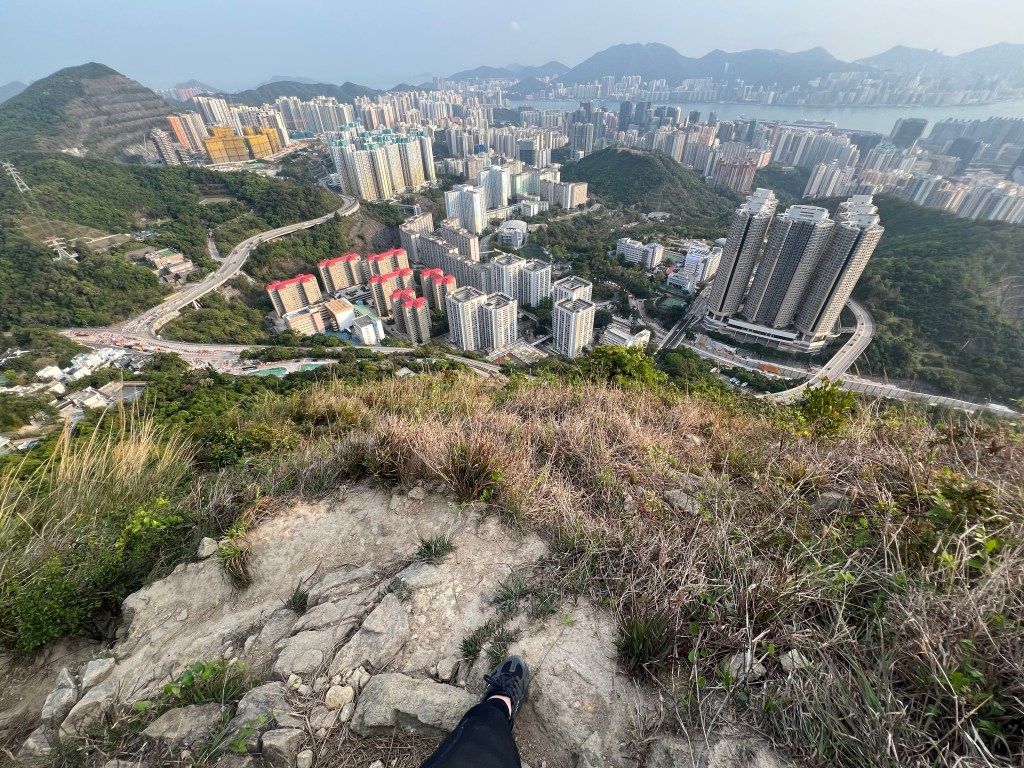
You will know you get there because on the right you will have a whole view of the buildings. Next thing you have to do to get to the Rock viewpoint, is walk up the hill, it’s not anything difficult and you don’t have to walk much but the ground might be very slippery. The views you will get are these, you probably recognise the spot since it’s quite popular.
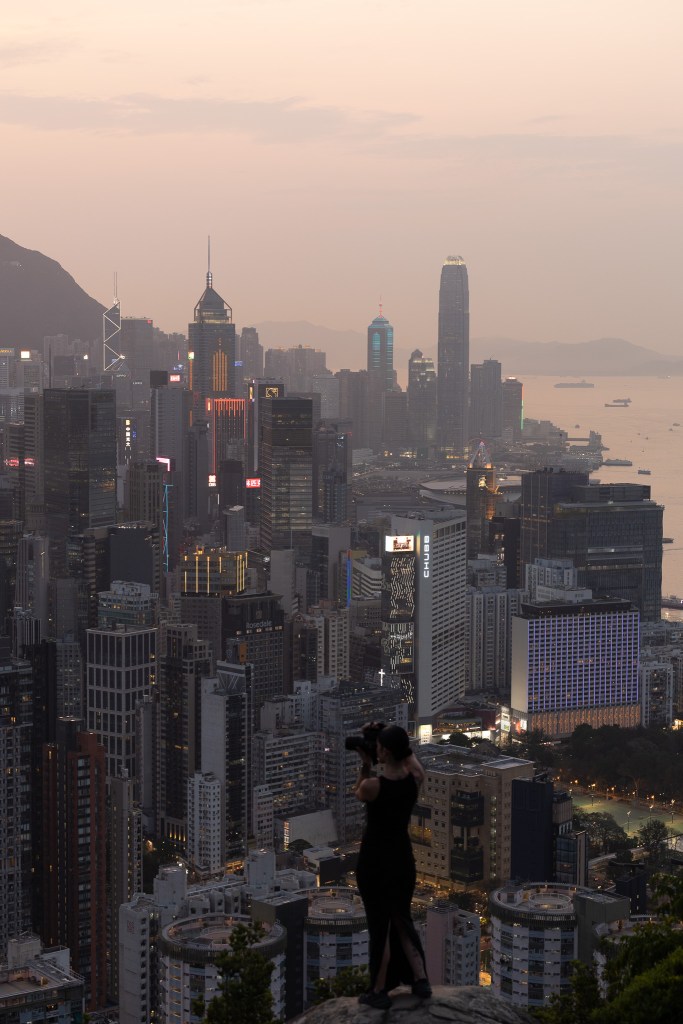
Braemar Hill Peak (Photo Rock)
Worth it, right? I hope this post serves you as a guide to get there and if you already been there and have any comments just leave them below, we will be waiting to see what you would like to add.
To do this hike you have a few options, in one of them you can visit Kowloon Peak, stop at Elephant Hill and finish in Suicide Cliff, but for us our main goal was to get to Suicide Cliff for sunset and we didn't have much time, so here I will explain just what we did and how was our experience. Just for the record, it wasn't our intention to do this the hard way, but it just happened to be and we just moved ahead with it!
Before I start, first things first, you should pack light and wear proper hiking shoes. The hike can get a bit tricky in some parts and this is in my opinion, without any doubt, is one of the most important things.
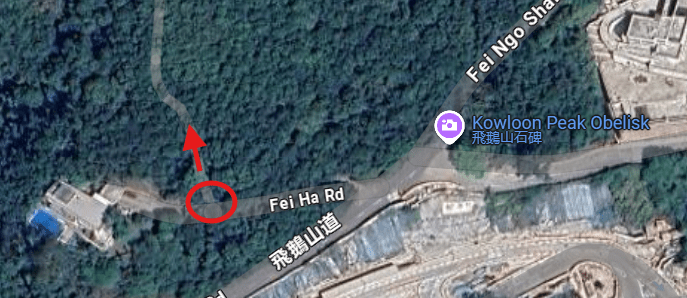
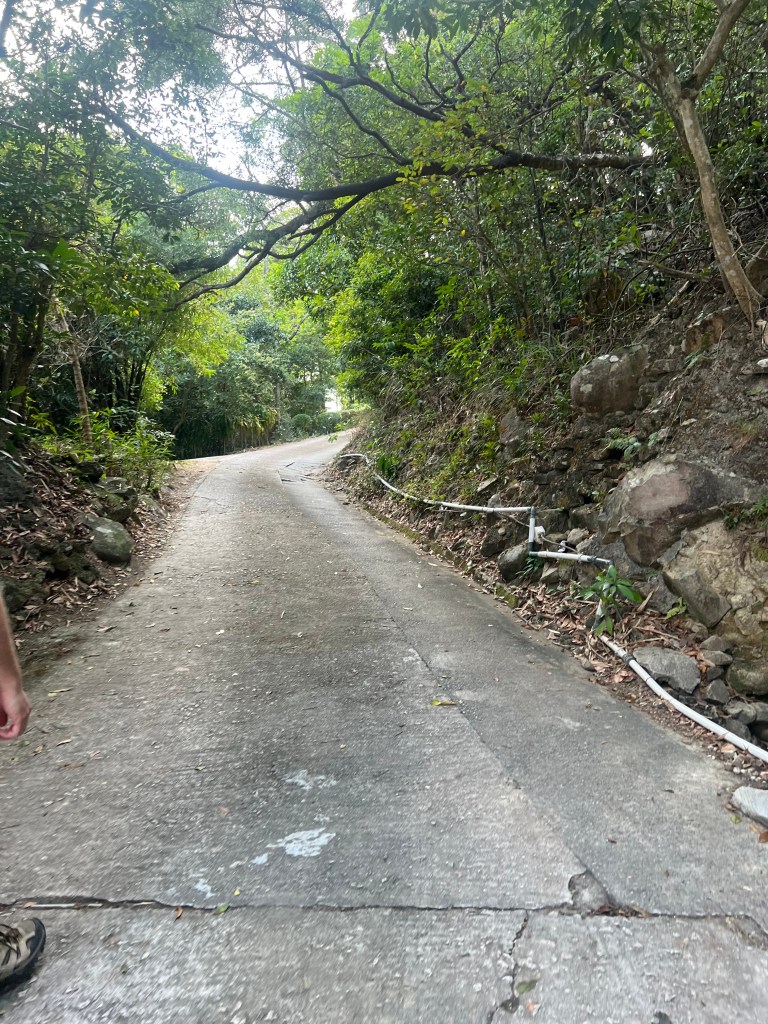
Our hike started in Fei Ngo Shan Rd, if you ubicate your map where the Kowloon Peak Obelisc is, you will see that opposite to this there's a small road without an exit, it's called Fei Ha Rd. and here in the right is the start of the trail that will take you to Suicide Cliff.
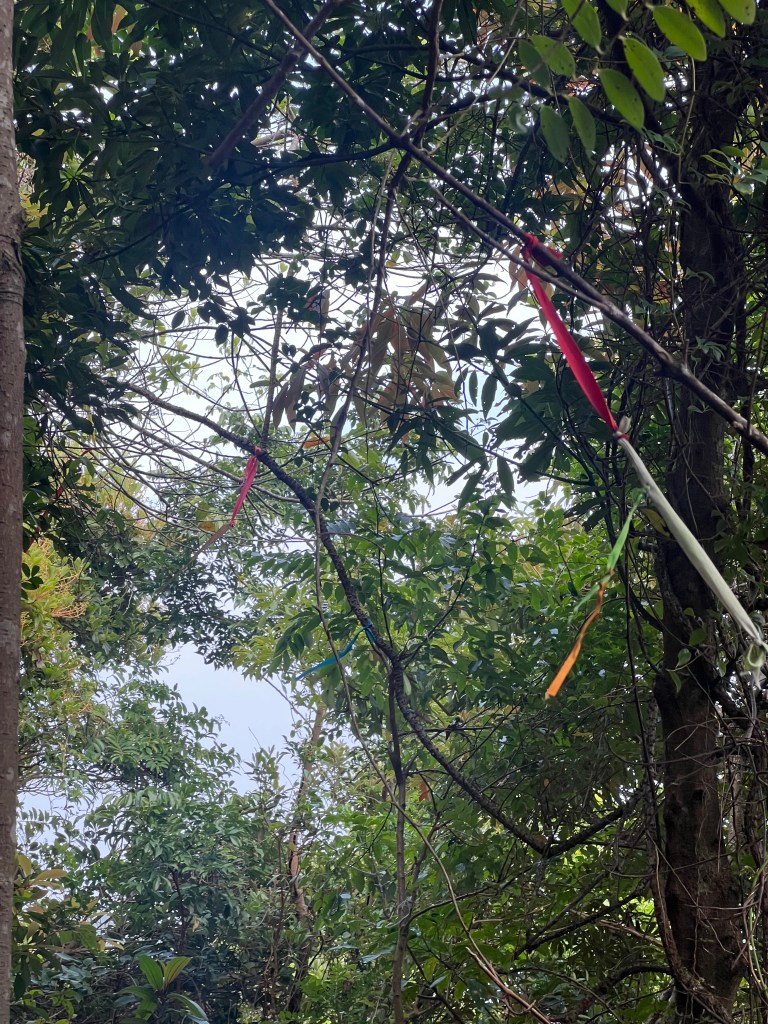
Here it might look a bit confusing at the start since there's not a properly marked route, but once you start to go up you will see that the path is easy to identify. You will also find strings that another hikers tied to the trees to mark the way up (it was actually helpful!).
Fei Ha Rd
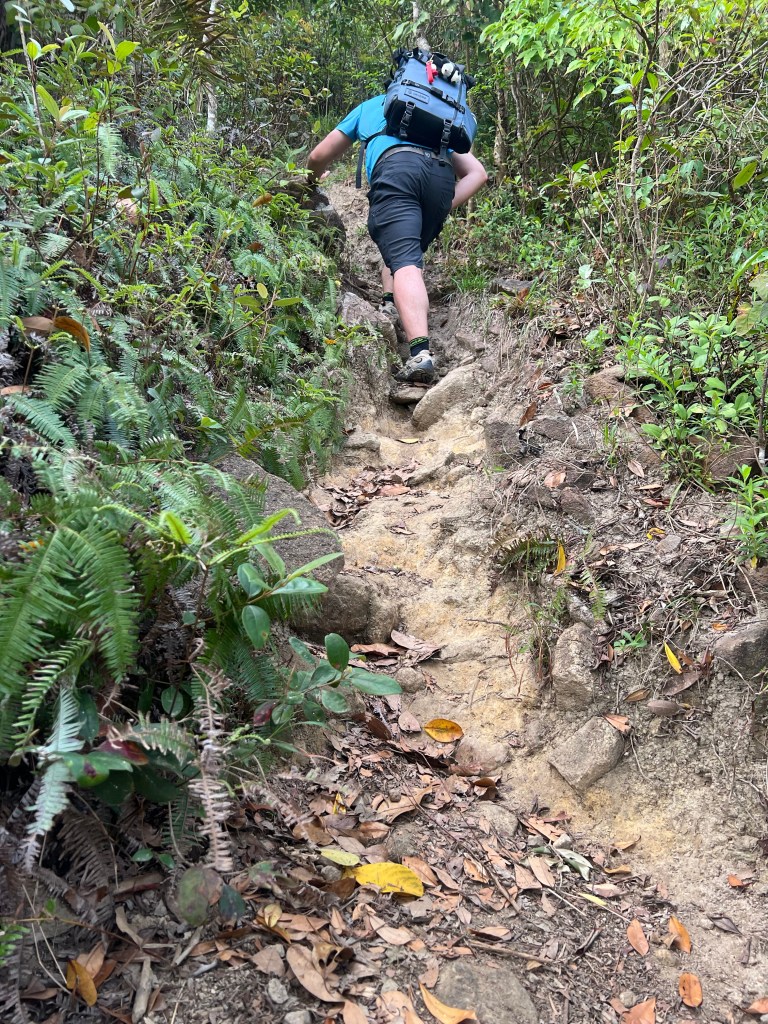
What you see above is the beginning of the trail, is not too bad here but then it starts to get more complicated, overall because of the vegetation in some parts and there's some areas where the path is almost vertical.
Steep part during the hikeStrings on the trees
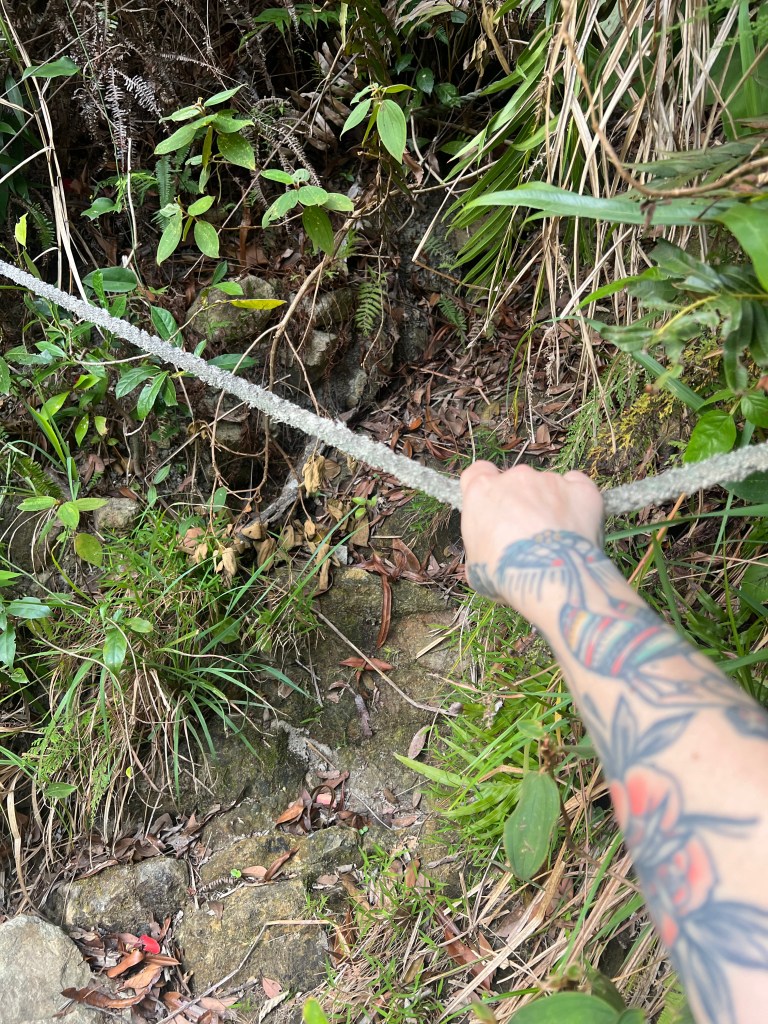
As you can see the path is quite well signalised and there you will find also ropes that will help you to go up if needed.. Here we were hiking for about 20min.
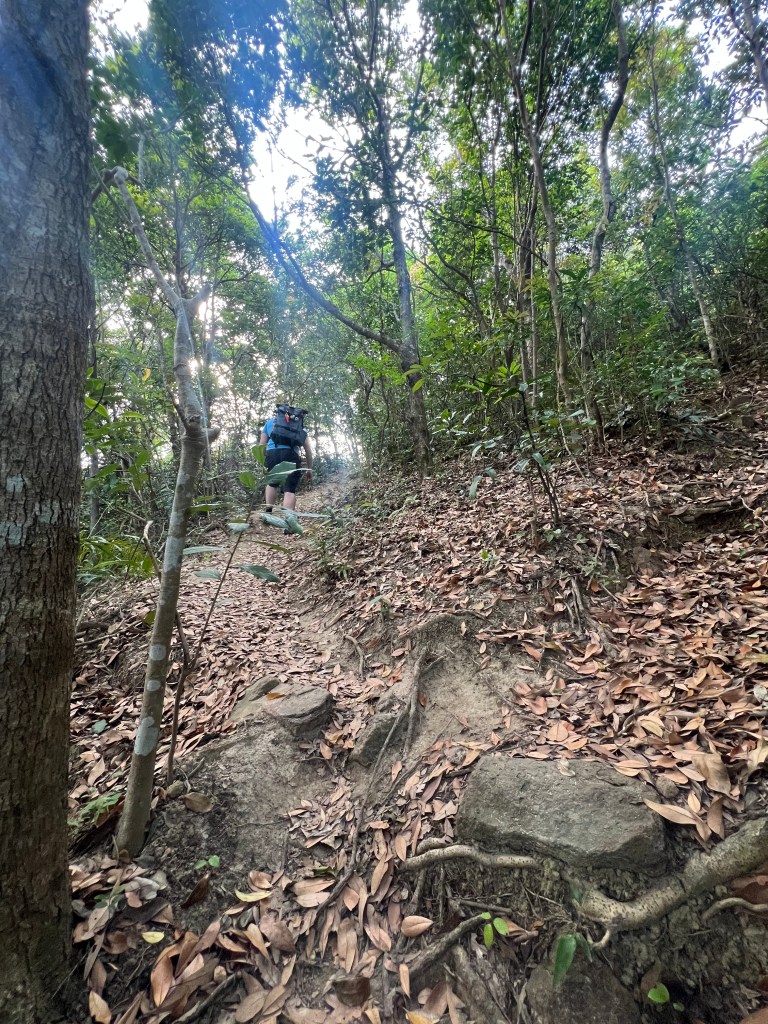
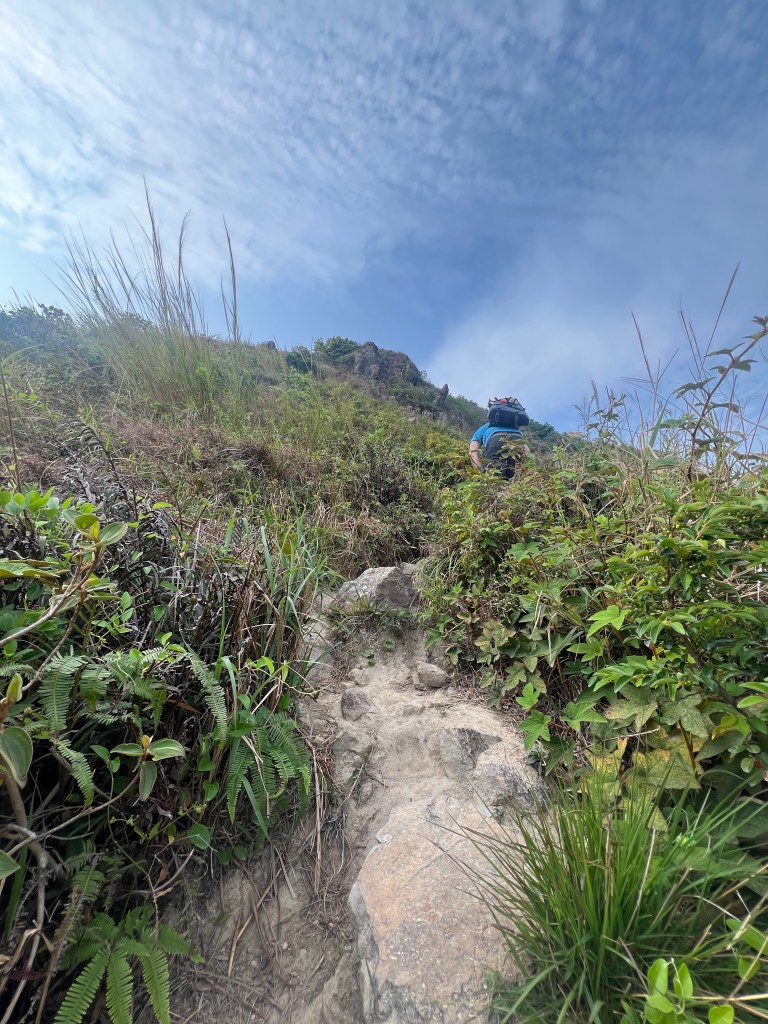
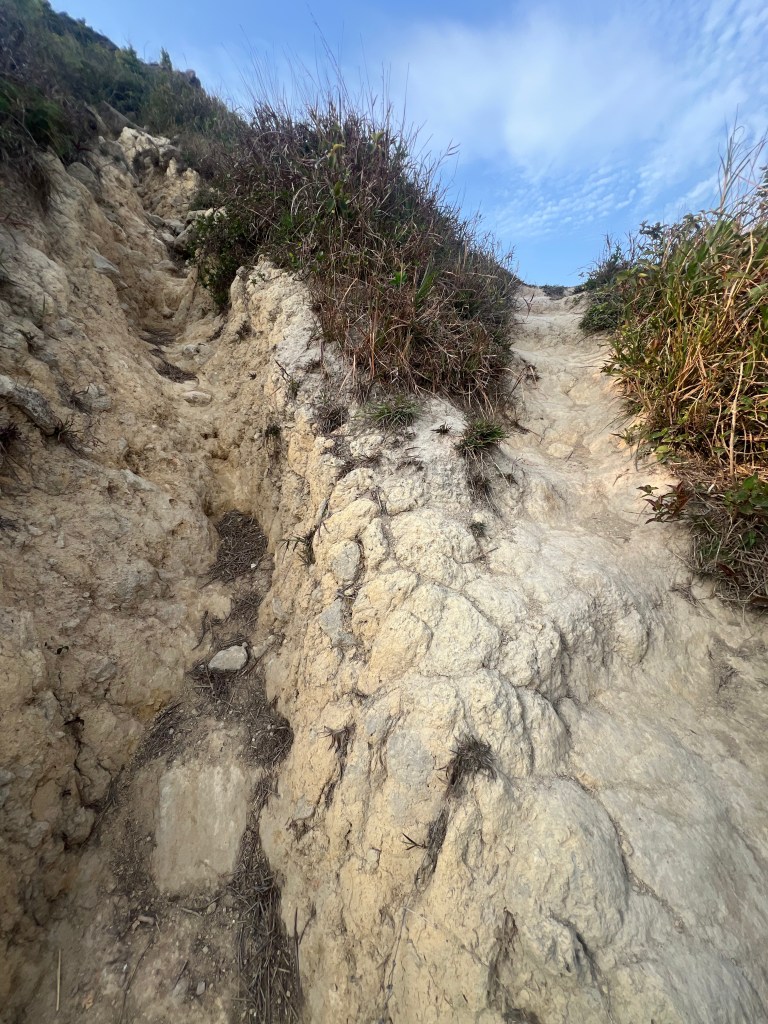
After approximately 30 minutes we started to see a bit of the views, but the hardest part was about to come so we put our phones away and headed straight up! We didn’t face any big drops but the path is made of rocks and is very steep so you need to watch where you are stepping.
Dense vegetationAlmost there (we thought)Very steep partViews are promisingThe rock here is a bit more slipperyParrot Beak rock
In the first picture above you can see how dense the vegetation gets at some points, we stopped for a minute and we found that we had ticks in our legs (ugh!). After you pass the worst part, the path is clearly visible again. Here the rock becomes a bit more slippery and the slope doesn't make it easier so just pay attention and you will be fine.

In your way up you will pass on your left Parrot Beak rock, this is also a popular viewpoint and many people take pictures here as well so see how you feel about it, you might feel brave and want to take a shot there!
On the left were my favourite views
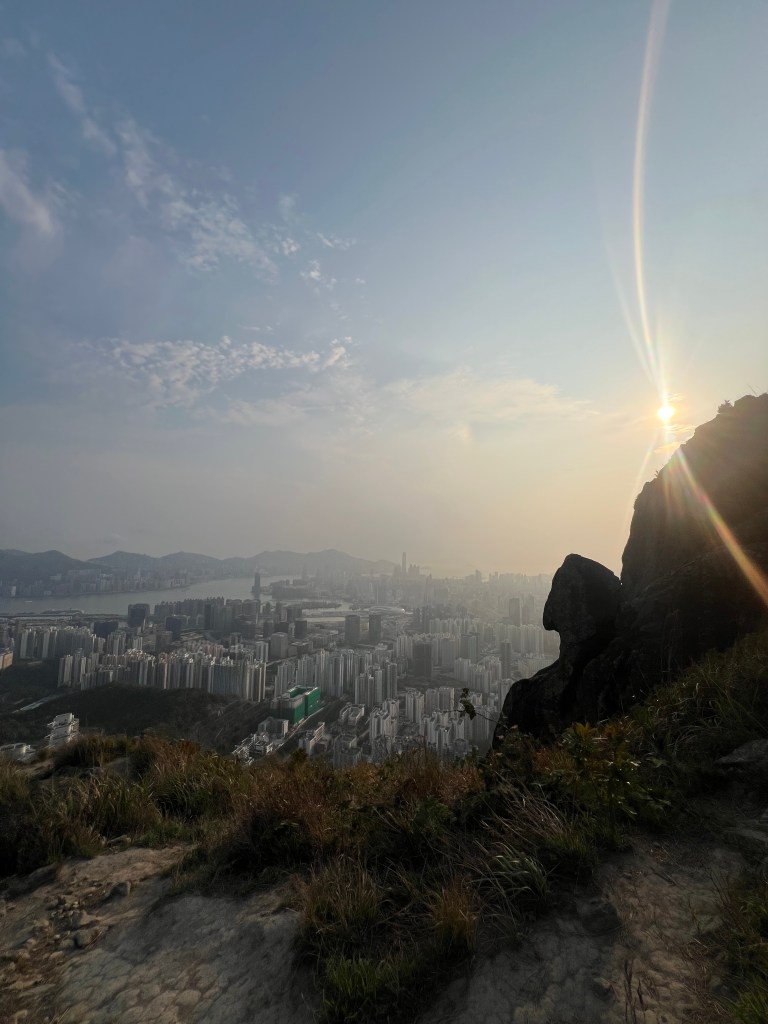
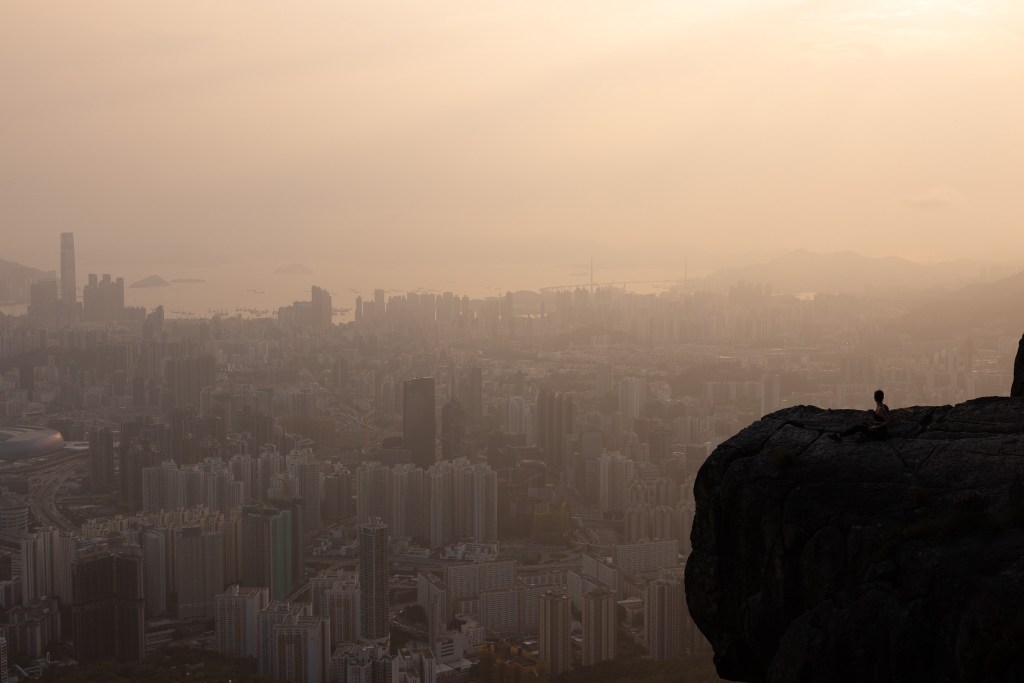
After about 50-60min, we finally reached the top! It was very windy and I seriously considered walking to the rock since there's a big drop on the right side of it and you have to walk a short but narrow way to get there, but after all and after Tom did it as well, I decided I would do it and I have no regrets!
Suicide Cliff at sunset
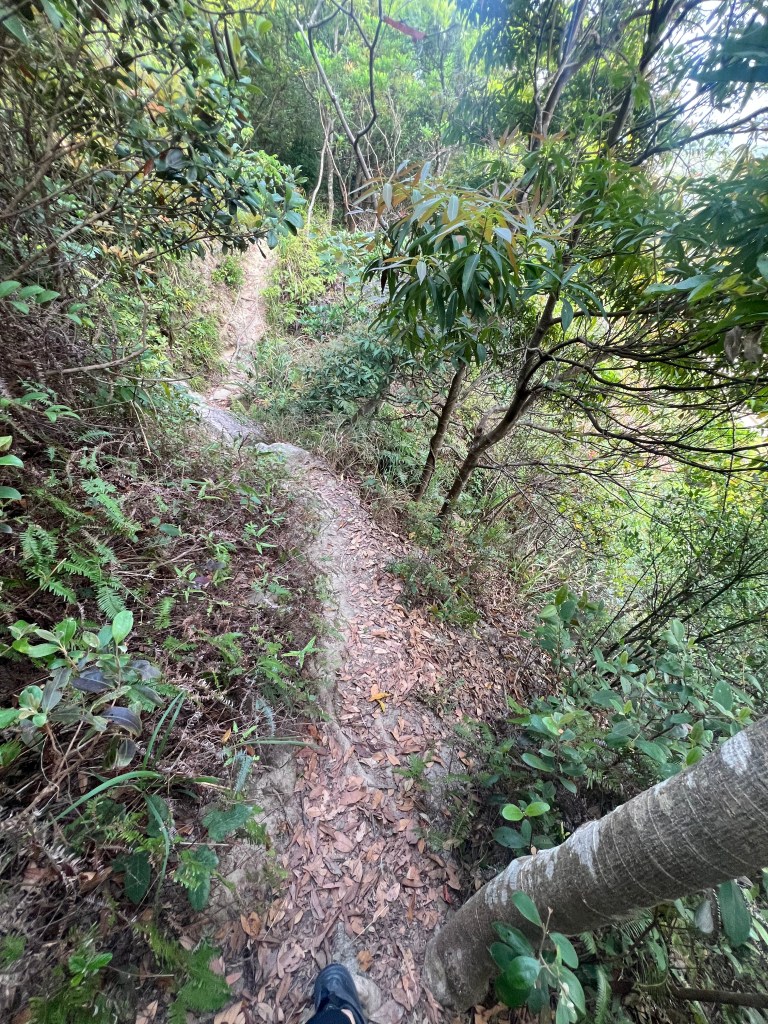
The way down was definitely easier, it took us over an hour though but its all steps and here we explain you what way did we take.
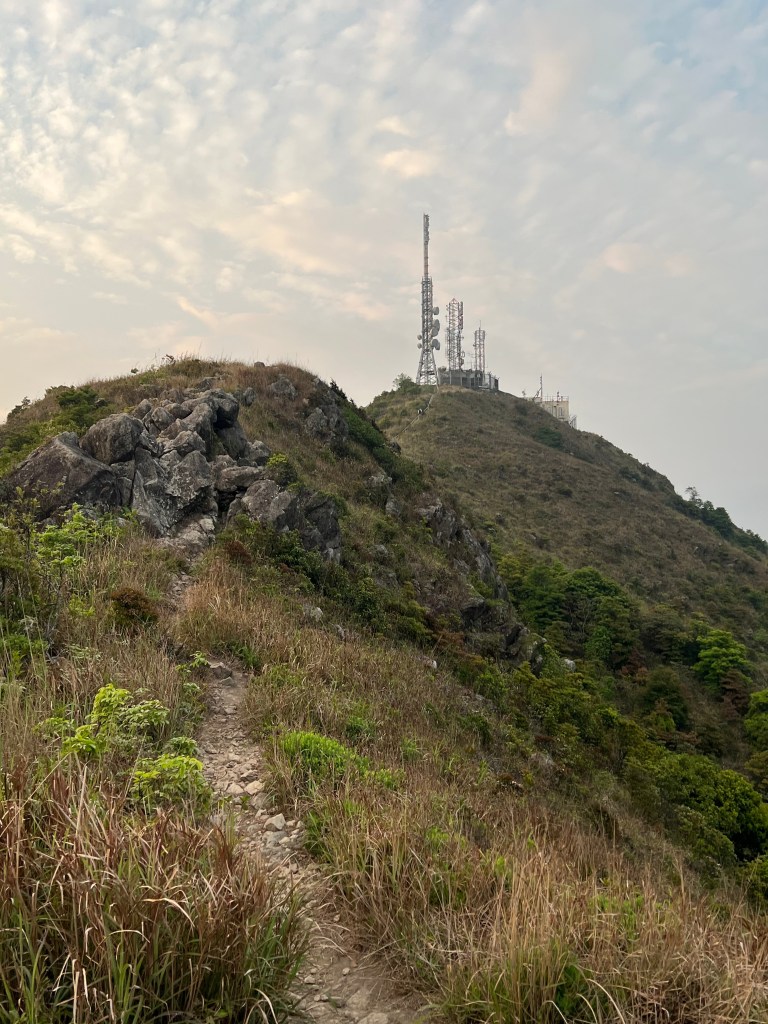
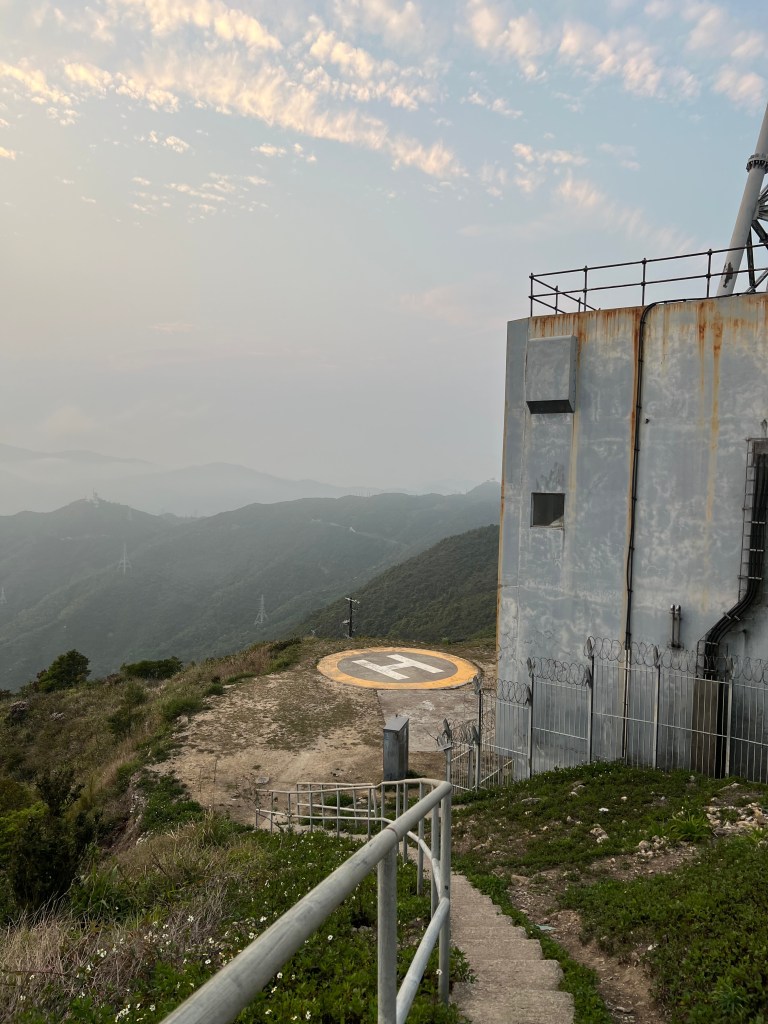
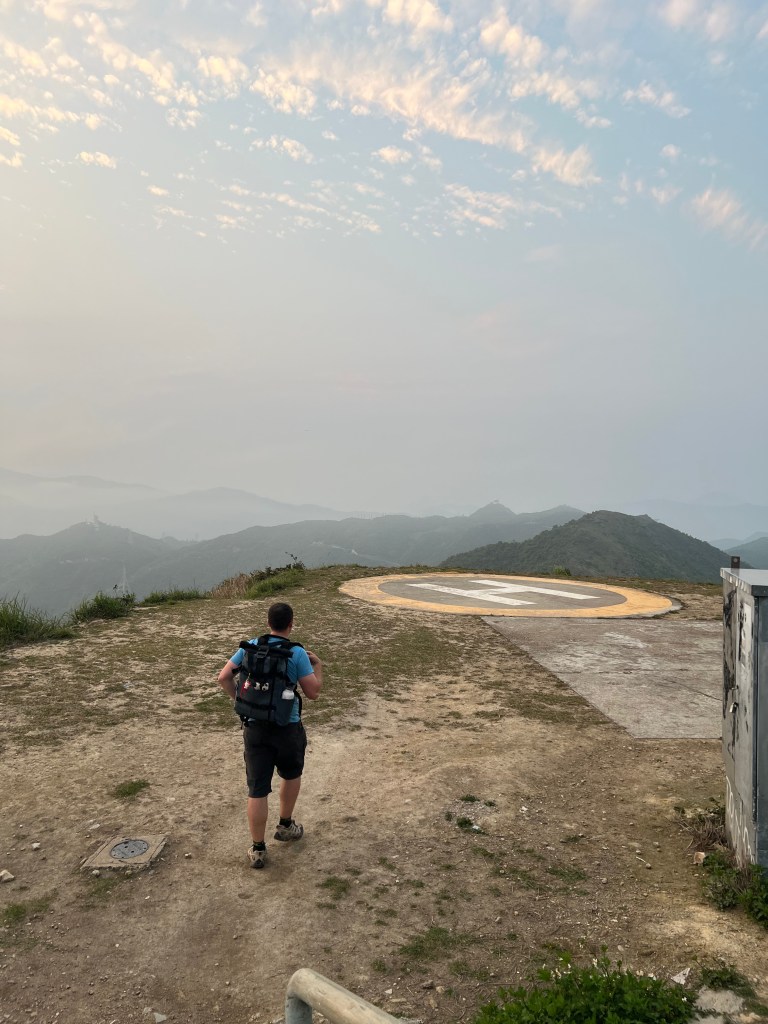
After we finished in Suicide Cliff, all what we had to do was to walk in the direction of the big Radio Station (impossible to miss!) and keep on the right of the way. There's some steps to the right of the station that will take you to the top, just follow all the way up. Once you reach the top you will see a helipad (really cool for a shot too!), you need to follow the path that is just after the helipad.
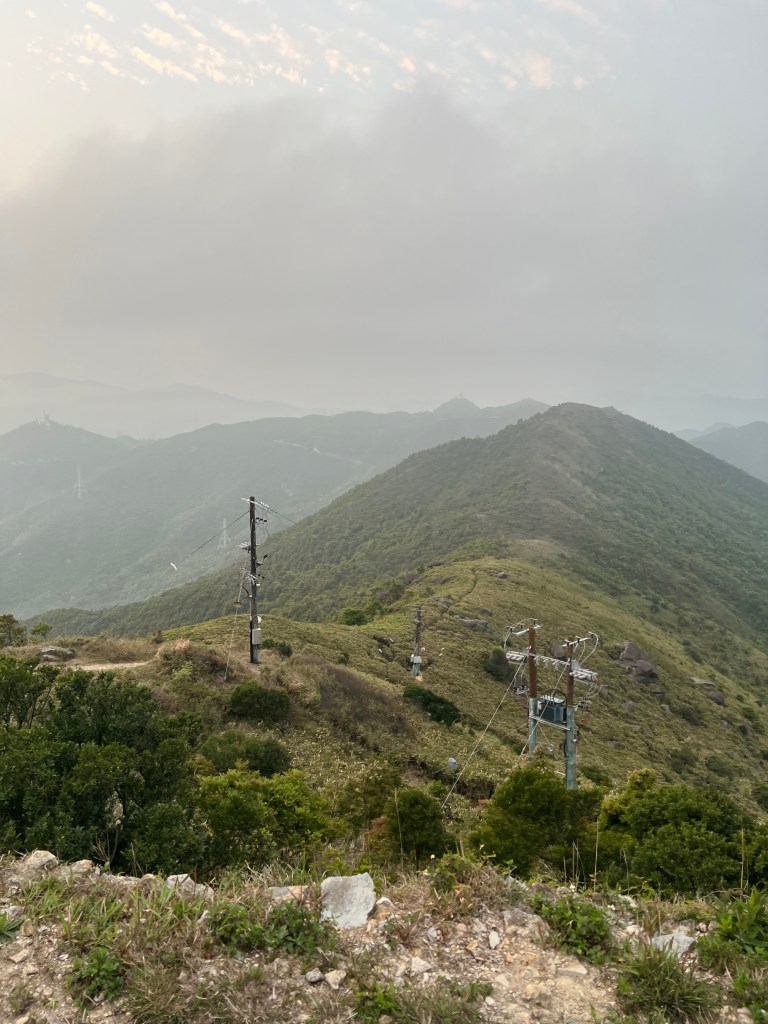
Radio StationAt the top of the stationHelipadViews from the radio stationPathway after helipad
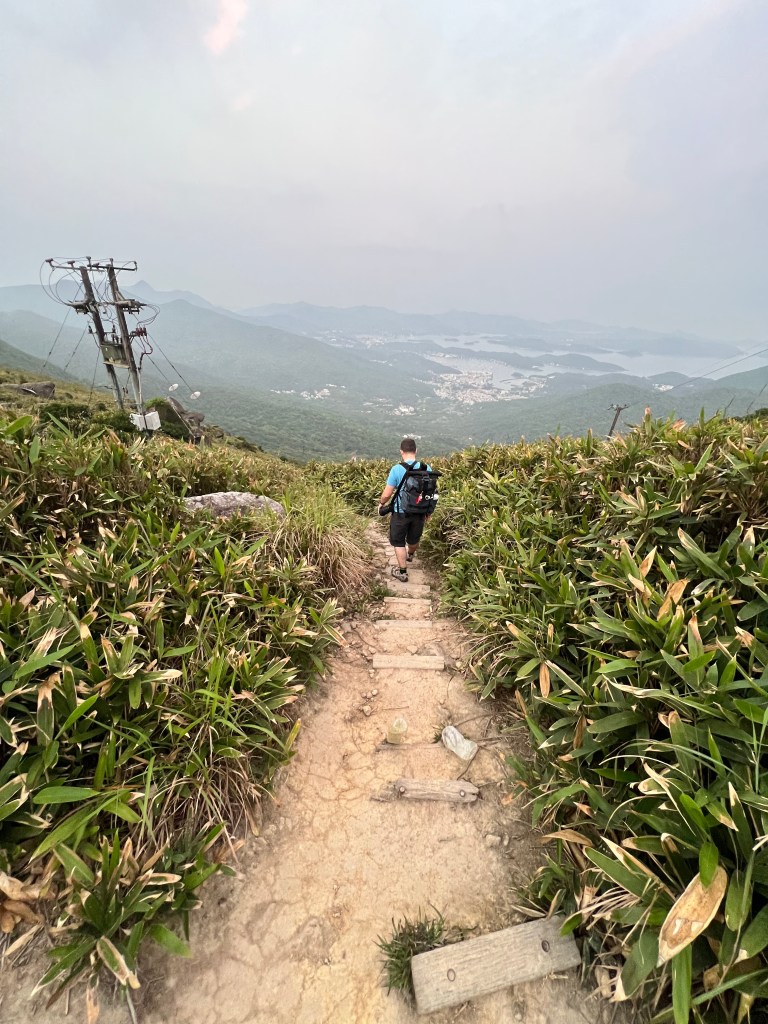
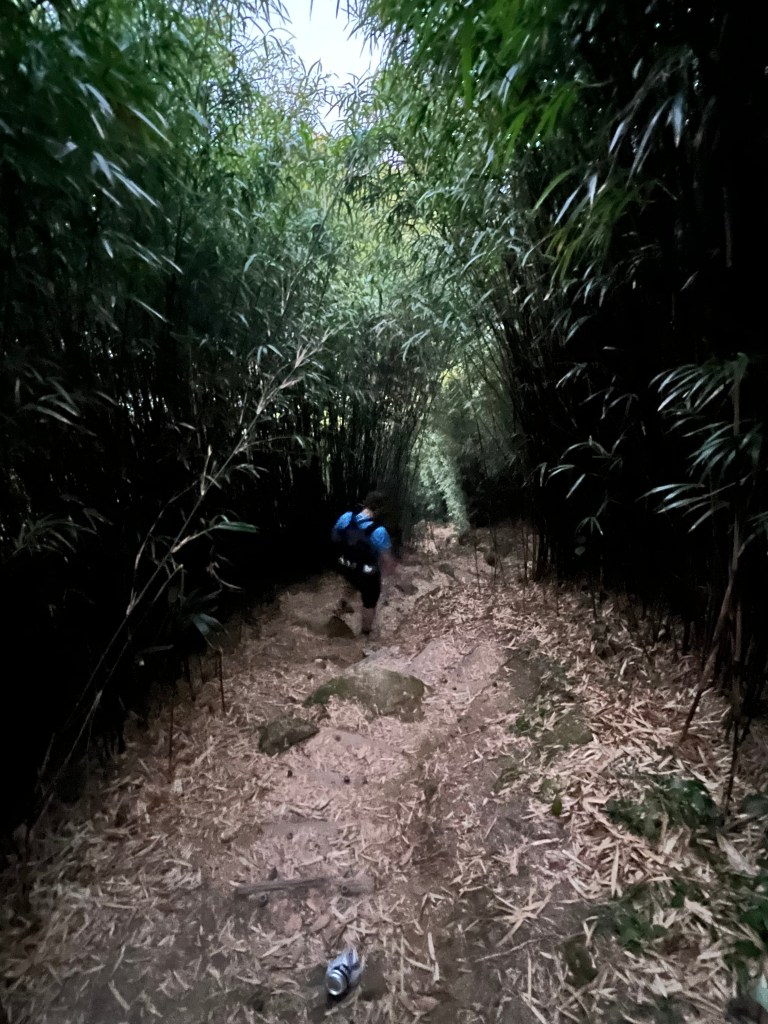
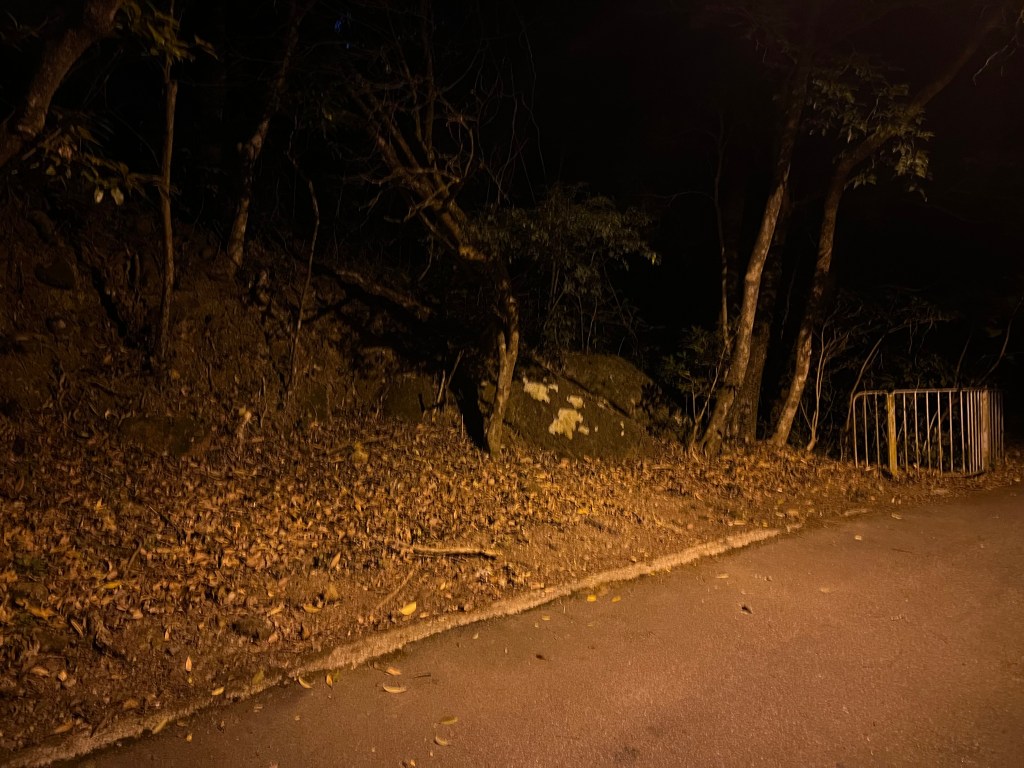
After this as I mentioned above, just keep to the right of the way and follow the steps, it will eventually take you back to Fei Ngo Shan Road. When we get to the end it was already dark, so having a torch with you or having enough battery to use the one in your phone will be really helpful.
On the way downThe path is easy to followEnd of the path, you come out next to the fence on the right of the picture
Overall, I would say this is the hardest hike we did in Hong Kong but if you take your time going up and pay attention to what you are doing, trust me all the effort is well paid off once you reach the top, so if you feel tempted to do this hike, this is your sign to go for it. Also, remember that there's a longer but an "easier" way of getting there, so there's not excuses!

Do you have any comments or suggestions? Leave them below, we will love to hear about it!
We spent just over three days in Hong Kong which was definitely not long enough, here is what we managed to pack into our short stay.
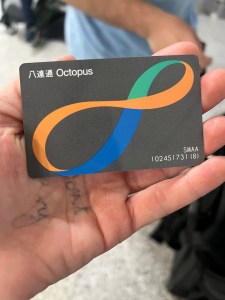
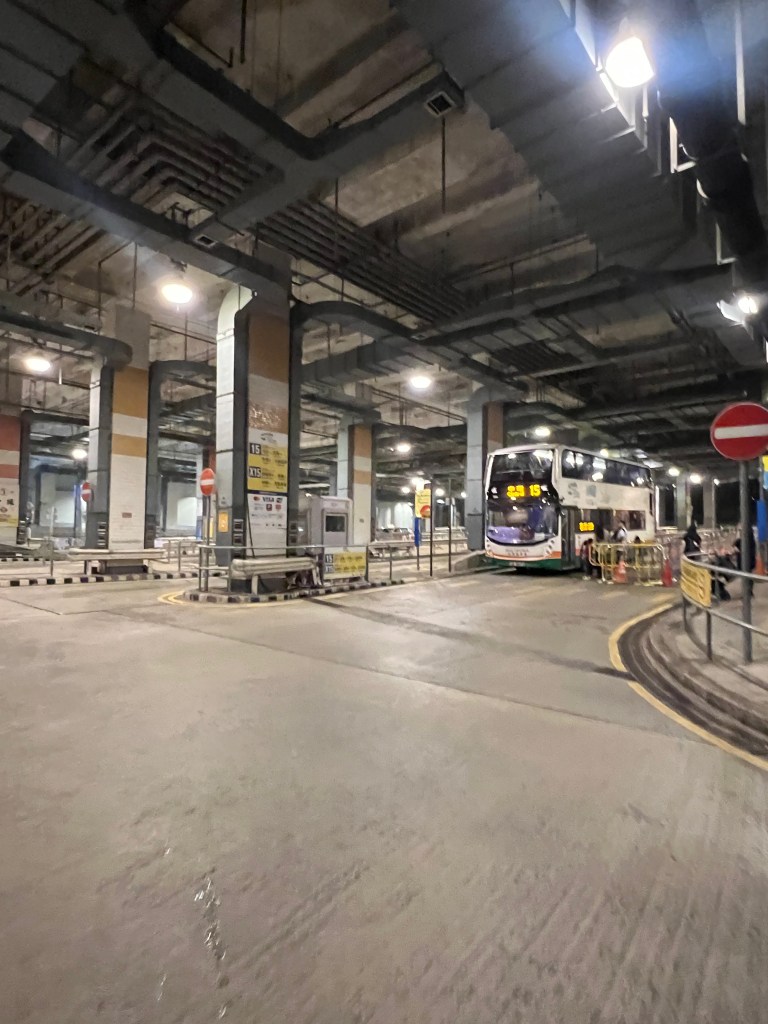
Travelling around HK is so easy, their public transport system is really well organized and always runs to time what make everything so easy. We used the MTR (subway/metro) and buses/trams for nearly everything, our advice? Get an Octopus card! It is like the Oyster card in London but for HK and you will find yourself using it almost all the time. There's some places where you can even pay with it. Do you want to know more? Keep scrolling down!
Octopus Card
Here is a more detailed explanation about our itinerary:
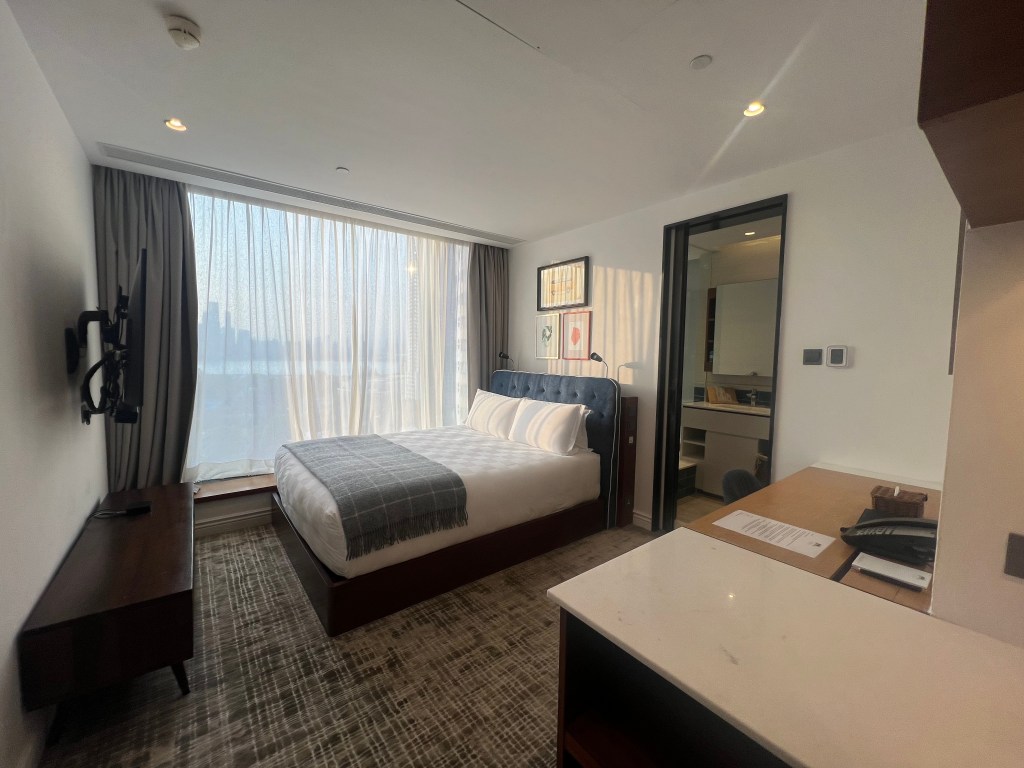
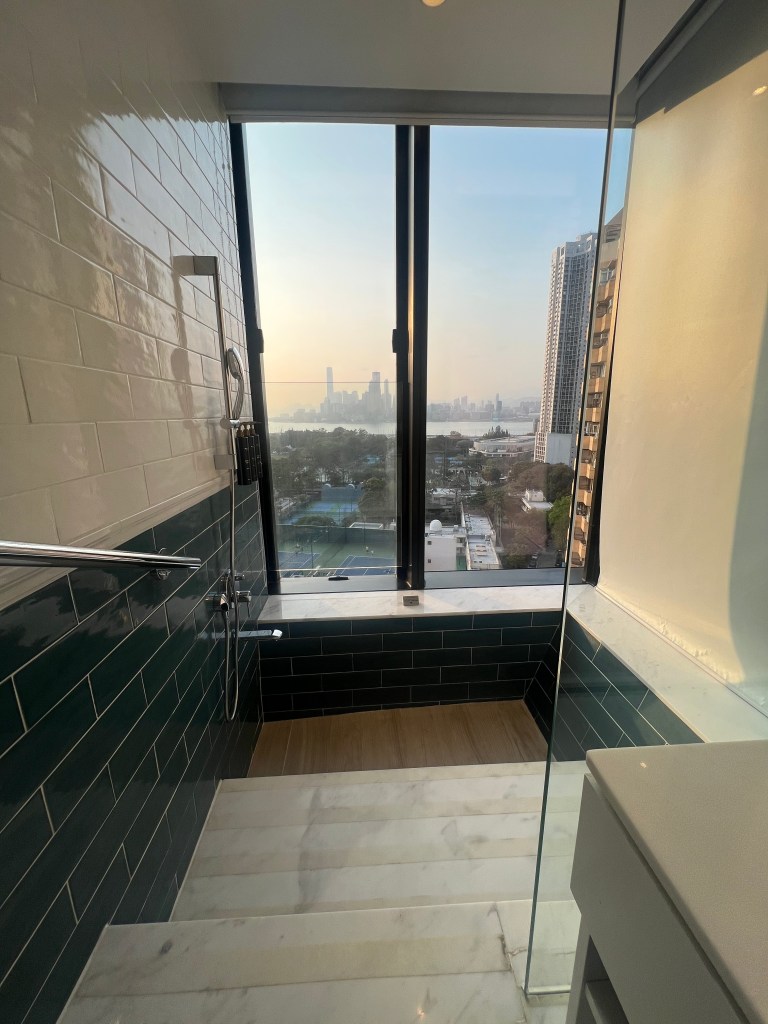
Day 1 – we arrived late afternoon, HK has one of the most efficient airports I’ve ever been to and disembarking the aircraft to leaving the airport took just 25 minutes! The airport express train then takes you to Central (the main transport hub) in about the same amount of time, for you to carry on to your hotel (we stayed in Little Tai Hang aparthotel, located in the Eastern District in the HK Island and the room, the area, the price and the location was perfect!)
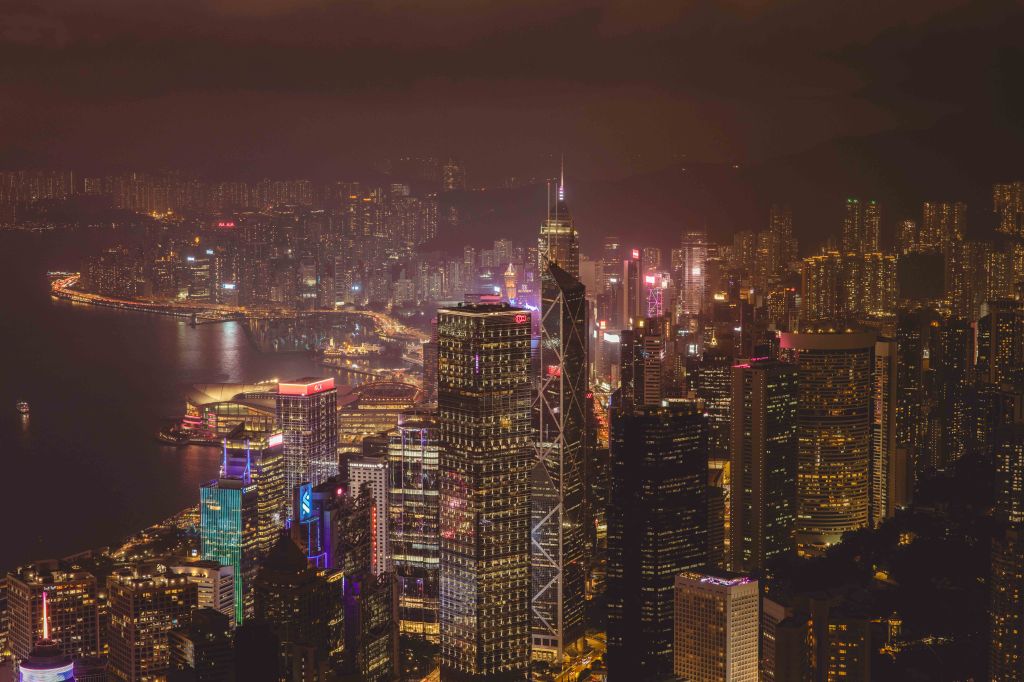
Once we got to our hotel we dumped our bags and headed straight out to try and catch the sunset at Victoria Peak, if you want a more bougie experience you can go to the Sky Terrace 428 on top of The Peak Tower but expect it to be packed at sunset! Otherwise for a slightly quieter spot we opted to walk to the Luggard Road Lookout which takes about 15 minutes from the Peak Tower, it offers amazing views out to Victoria Harbour day or night and surprisingly, it wasn't too busy so we had a perfect spot! Just as a note, if you coming here expecting to see the light show, don't expect much! From here it is basically not visible and the best spot for this is in the Kowloon side.
Victoria Peakat night
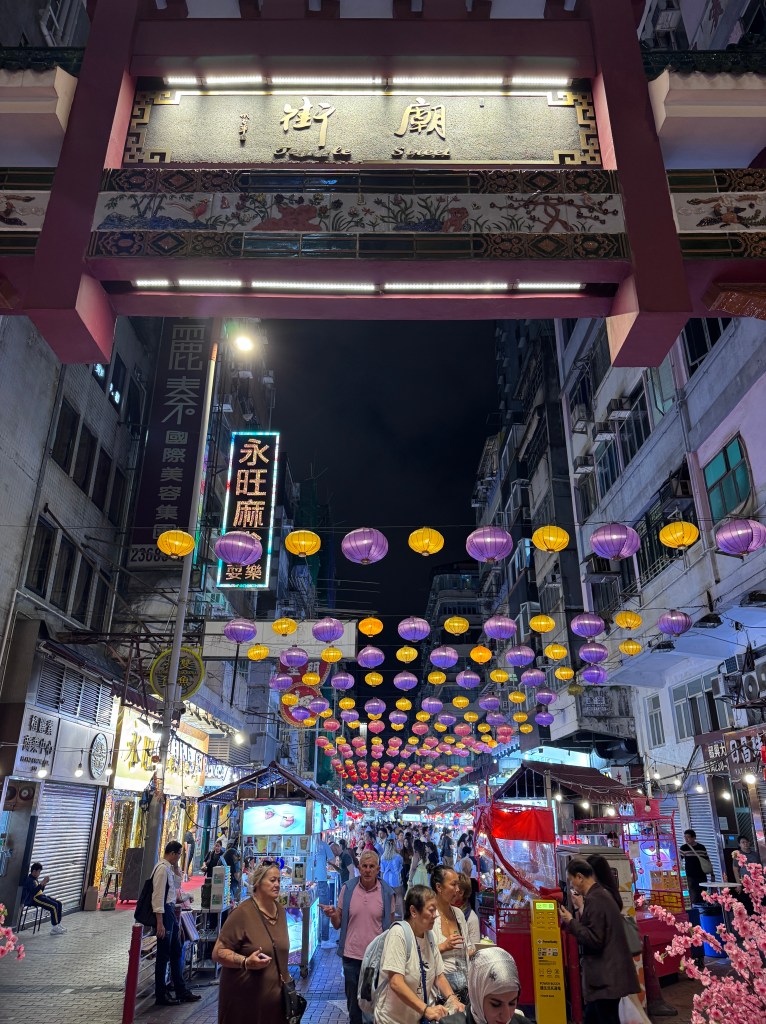
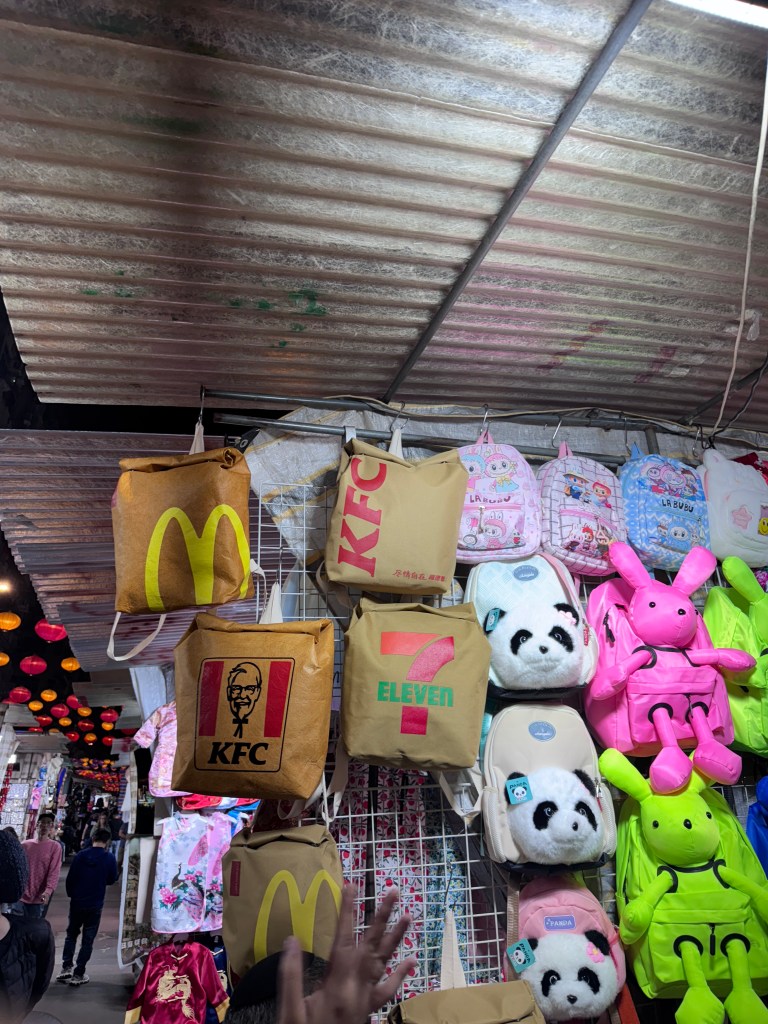
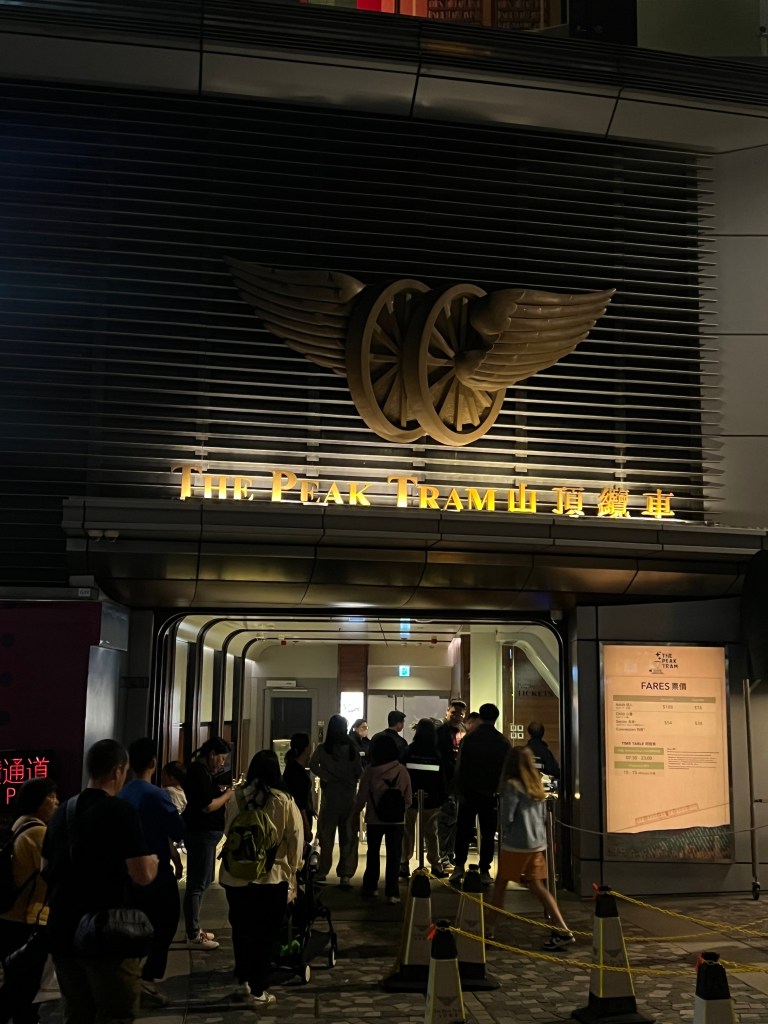
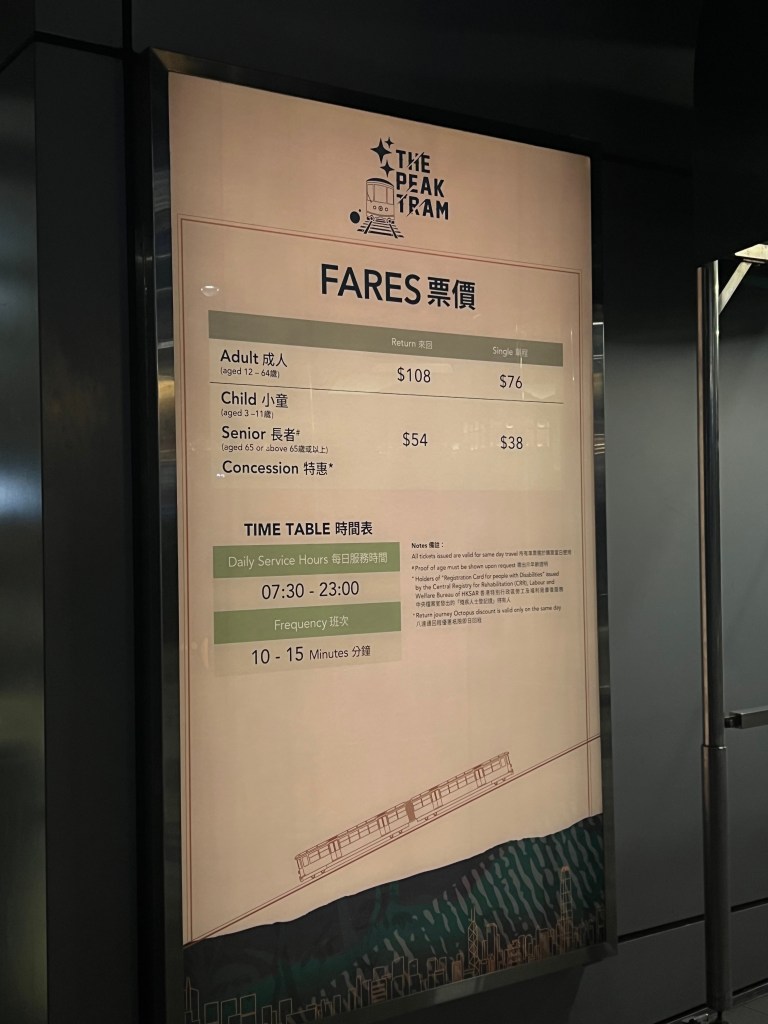
After sunset and admiring the HK city at night, we took a bus then the MTR to Temple Street Night market for some food and souvenir shopping before returning to our hotel. You also have the option of taking "The Peak Tram" from Victoria Peak, but for less than the half of the price you have the bus and it works perfectly well.
Temple Street MarketTemple Street MarketTemple Street MarketPeak TramPeak Tram faresBus Station at Victoria Peak
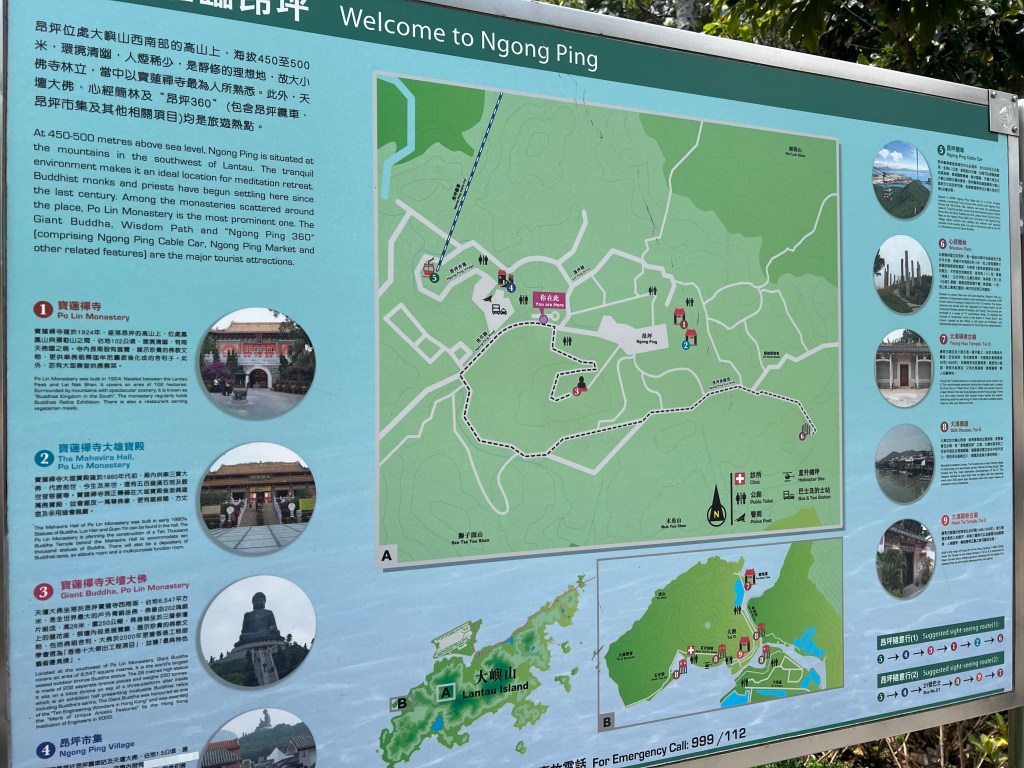
Day 2 – Lantau Island, Tian Tan Buddha, Yick Fat Building, Braemer Peak and the Light Show. Computer and toy markets and finishing with dinner in Ichiran Ramen.
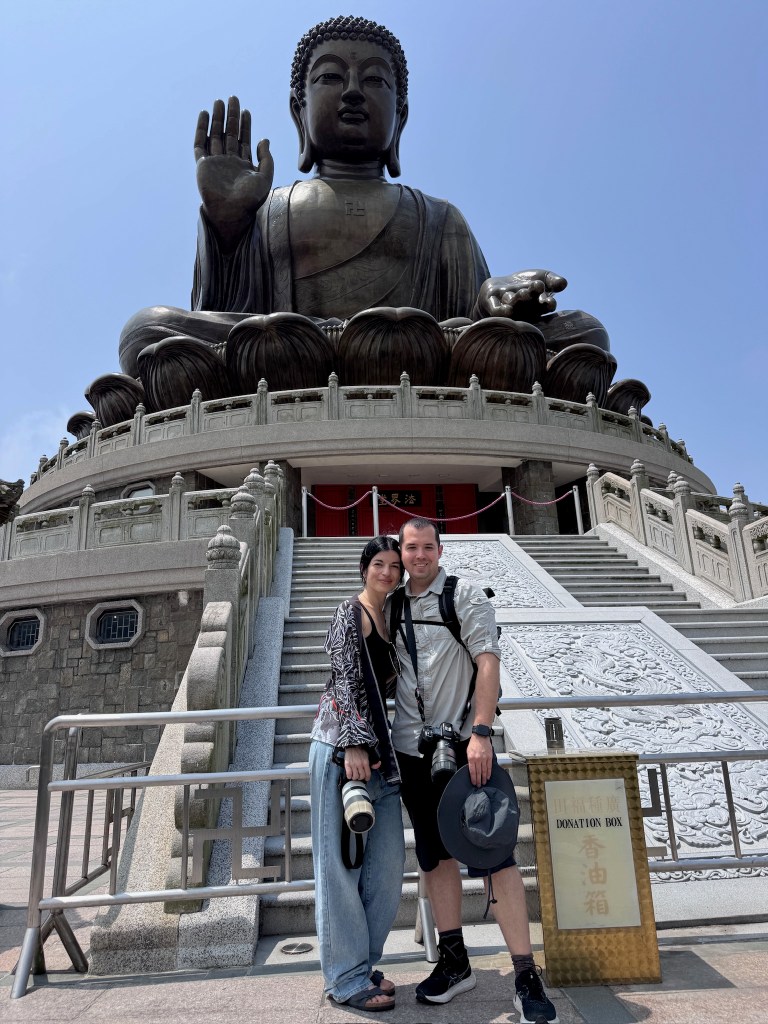
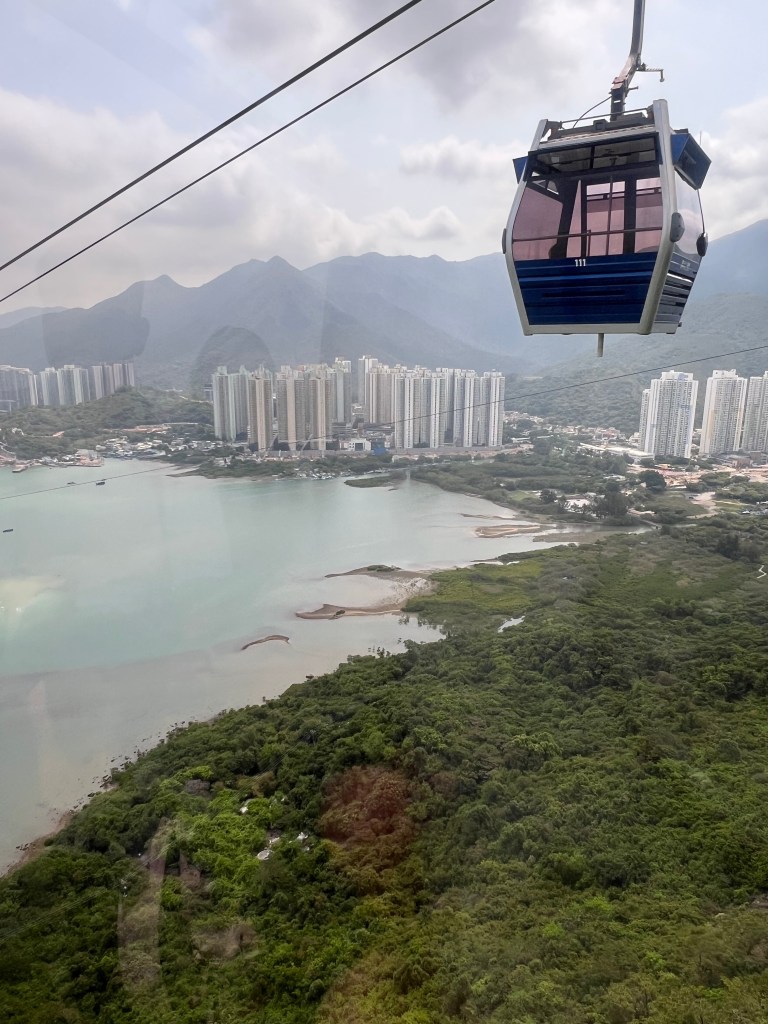
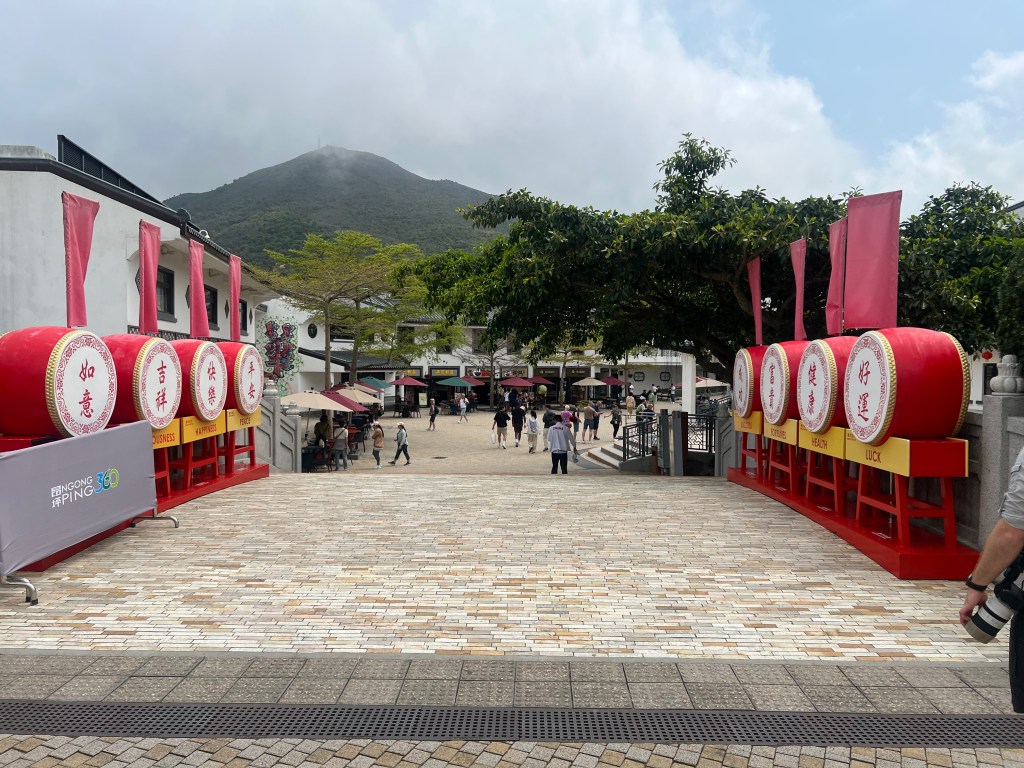
Day two we headed out first thing to Lantau Island, from Central you take the MTR to Tung Chung, its then a short walk to the Ngong Ping Cable car station which was well signed. Its approximately a 30 minute cable car ride so sit back and enjoy the scenery (on your way up you have a panoramic of HK International Airport!) For the cable car the return tickets are £21 per person (if you buy them online), you also have the option of getting the 360 cable car where the entire cabin is made of glass and the price is around £39. Once you reach the top, you can visit the Buddha and the village and you can also explore the Po Lin Monastery and if you have time walk the Wisdom Path as well (in our opinion, the highlight here is the Buddha, we didn't spend much more time around after this). Once you’ve finished it’s the cable car back down.
Visiting the BuddhaCable Car stationCable Car viewsNgong Ping villageNgong Ping map
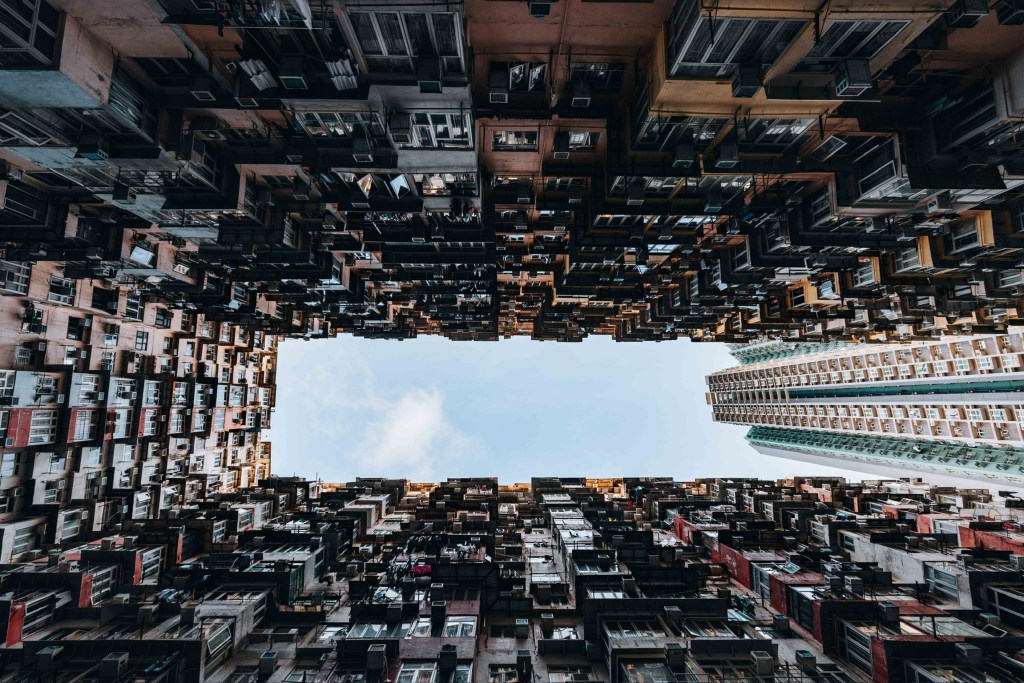
Before taking the MTR back we had a wander around the Citygate Outlets for some retail therapy and grabbed some food. Once back on Hong Kong Island we went to the Yick Fat Building (Monster Building) which became famous after Transformers: Age of Extinction was filmed there it’s a short walk from the Tai Koo MTR station and yes, you can expect this to be busy but fortunately wasn't too bad.
Yick Fat Building
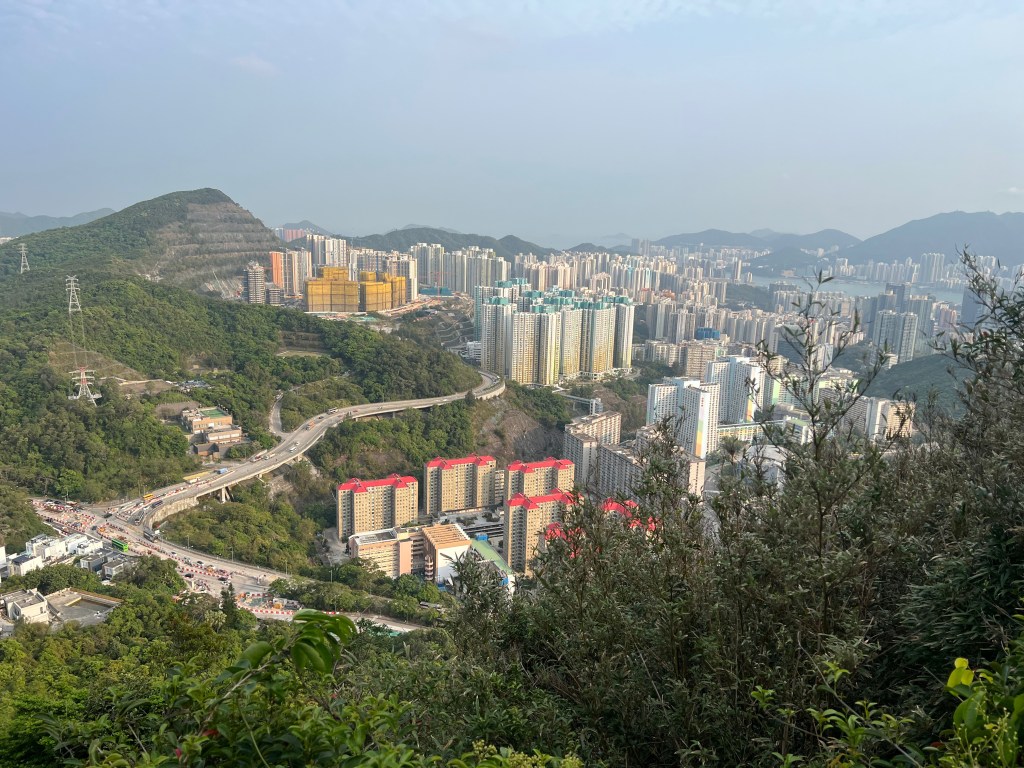
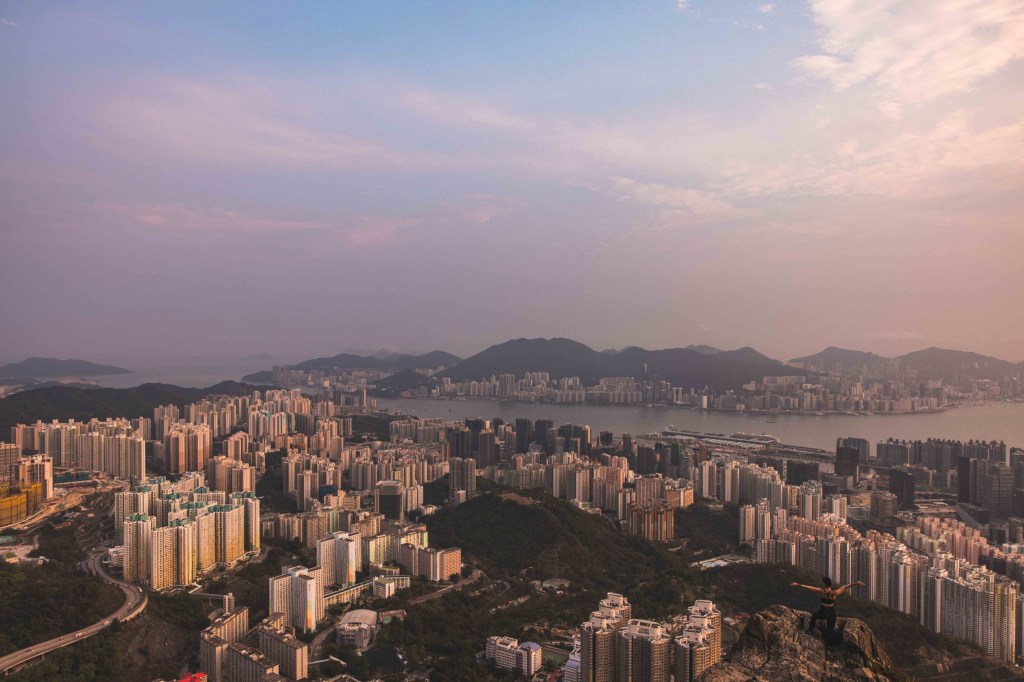
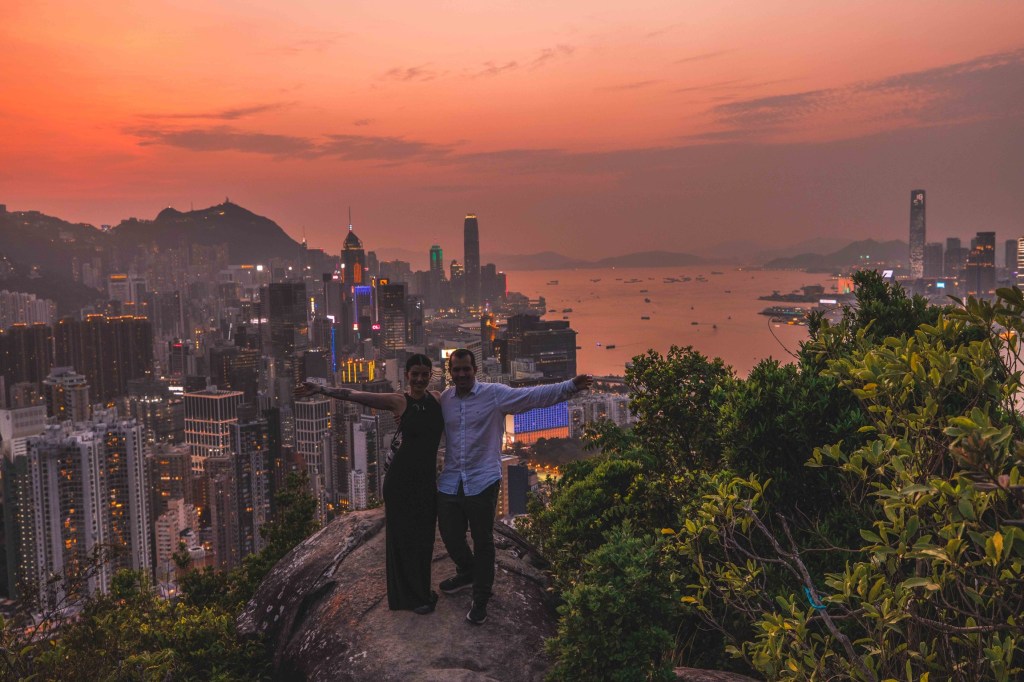
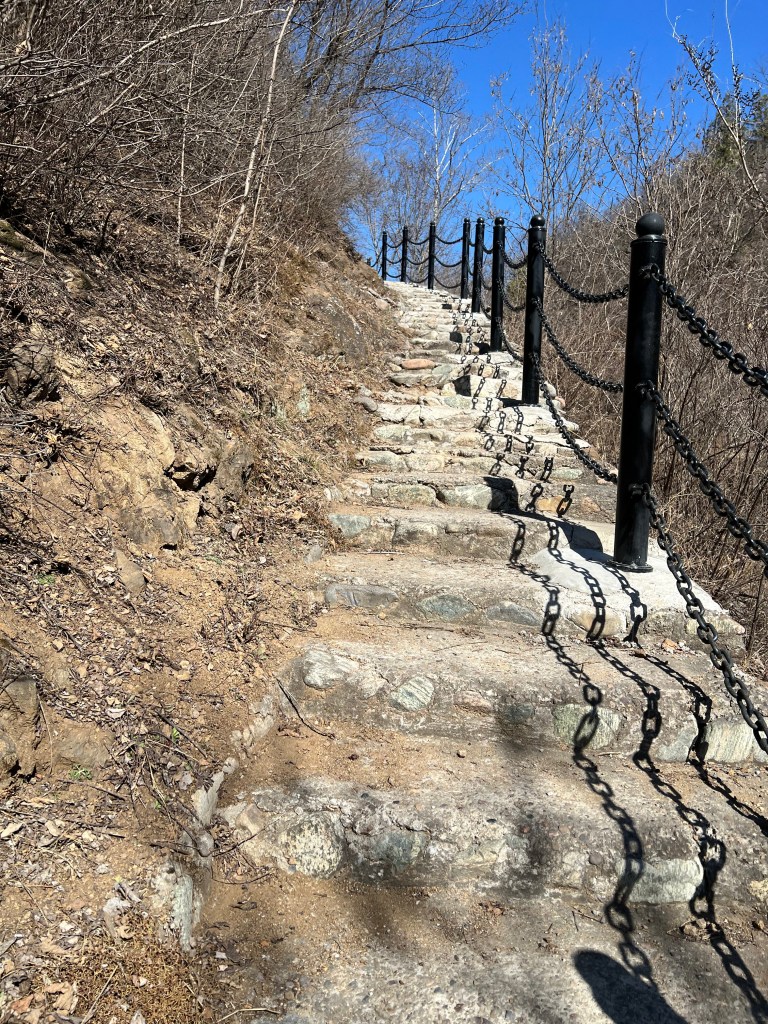
For Sunset we headed up to Braemar Hill Peak, there is actually a rock just before the peak which involves a small scramble which in our opinion offers the best view. Read more about this location and how to get there here.
Braemar Hill Peak
After sunset we headed to the promenade on the Kowloon side to watch the light show before taking the MTR to Yau Ma Tei where you can find In’s Point (Large toy store) and then we headed to Mong Kok to look around Mong Kok computer centre. Honest opinion here, the toy store wasn't what we had in mind at all, it is good but most of the shops seems to have the same products. Regarding Mong Kok computer centre was okay although many of the shops were closed. We visited another computer centre at Wan Chai, (Wan Chai computer centre) which was really good with lots of variety and good deals, if you got to visit one we would definitely recommend the last one.
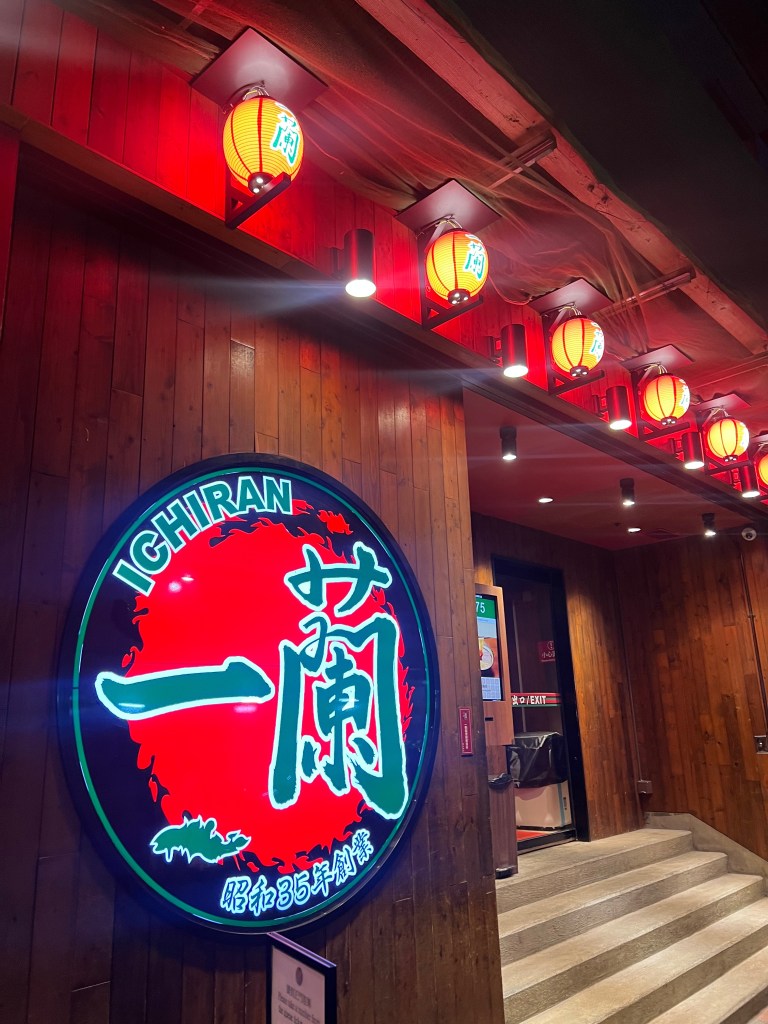
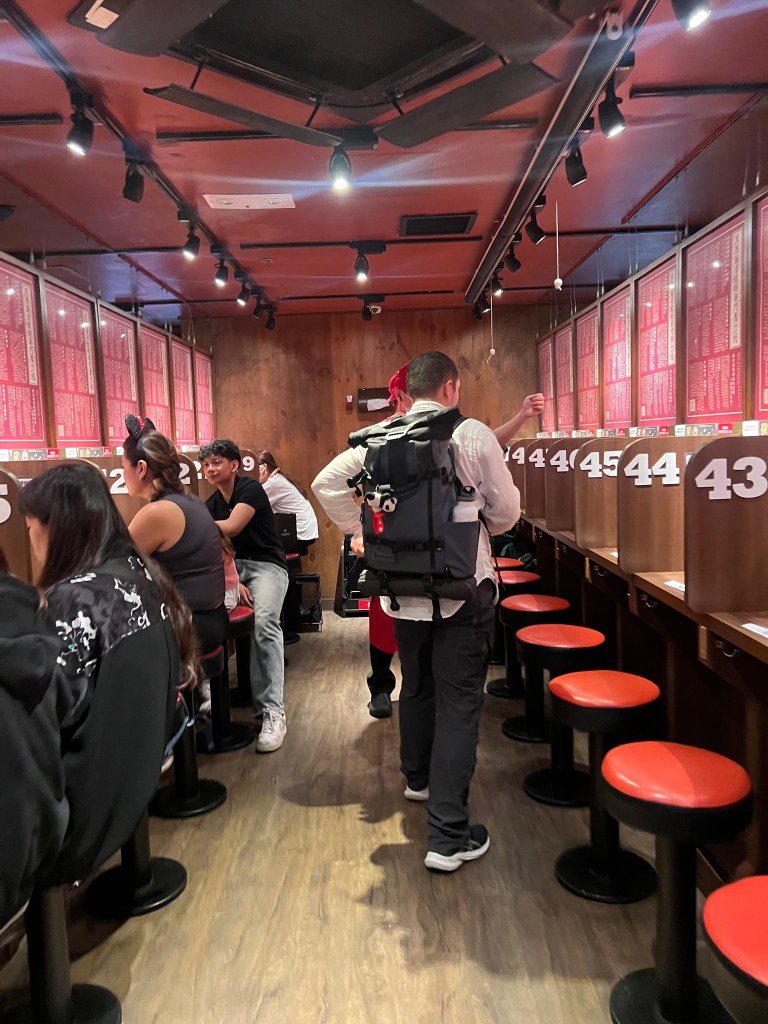
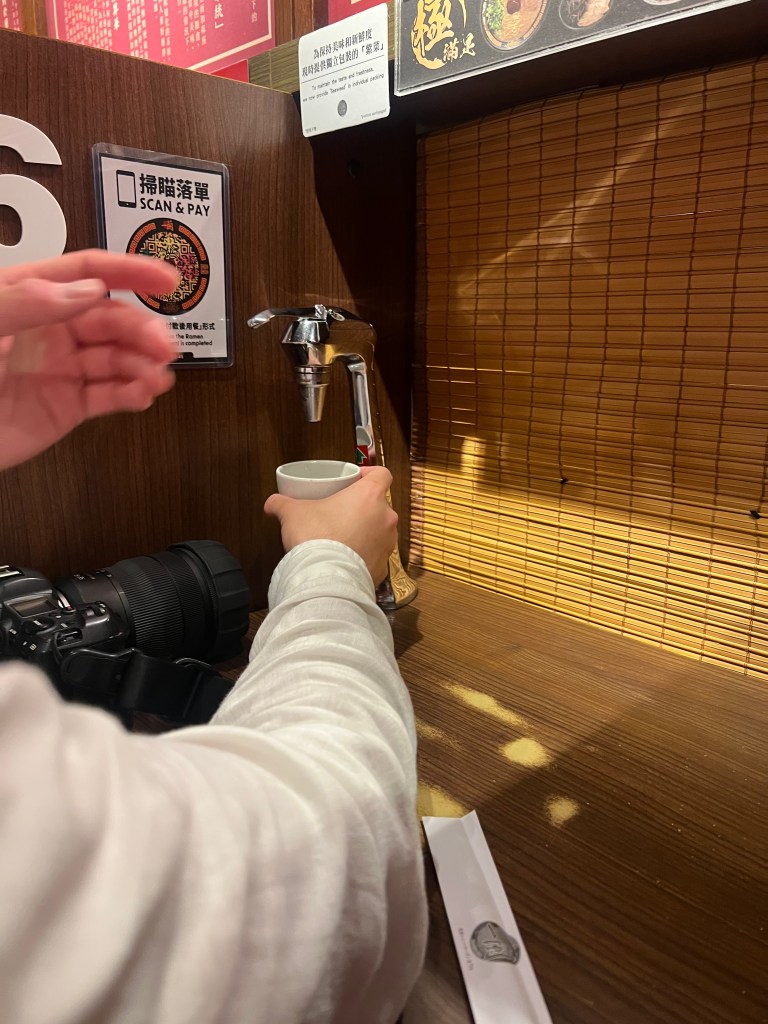
Finally to finish the night, we grabbed some food at Ichiran for the best ramen we’ve ever tasted! Ichiran is also open until late, the prices are for everyone and the experience is unique, so if you like ramen as we do, then this is your place!
Ichiran RamenIchiran Ramen, so authentic!Ichiran Ramen
Day 3– Victoria Peak sunrise, wandering around the city and art lane. Victoria
Harbour from the promenade, Choi Hung Estate, Suicide Peak and back to the Temple Night Market.

Back to Victoria Peak at Luggard Road Lookout for sunrise, unfortunately it was quite murky but the clouds made it very atmospheric and gave us the chance of taking some amazing photos.
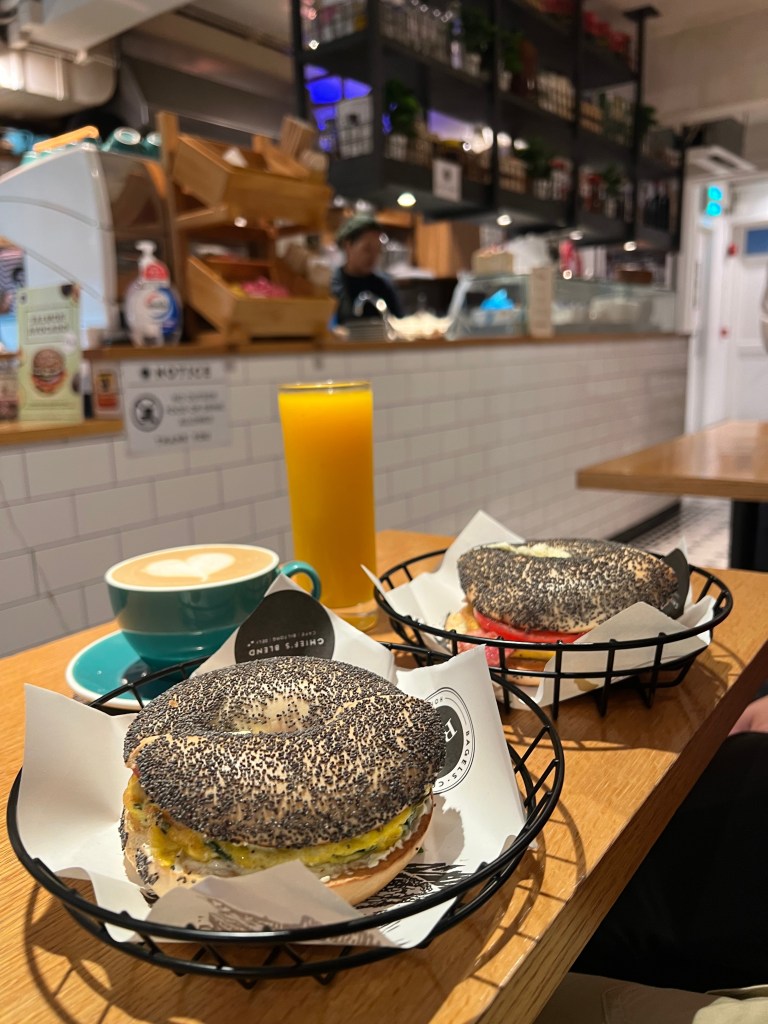
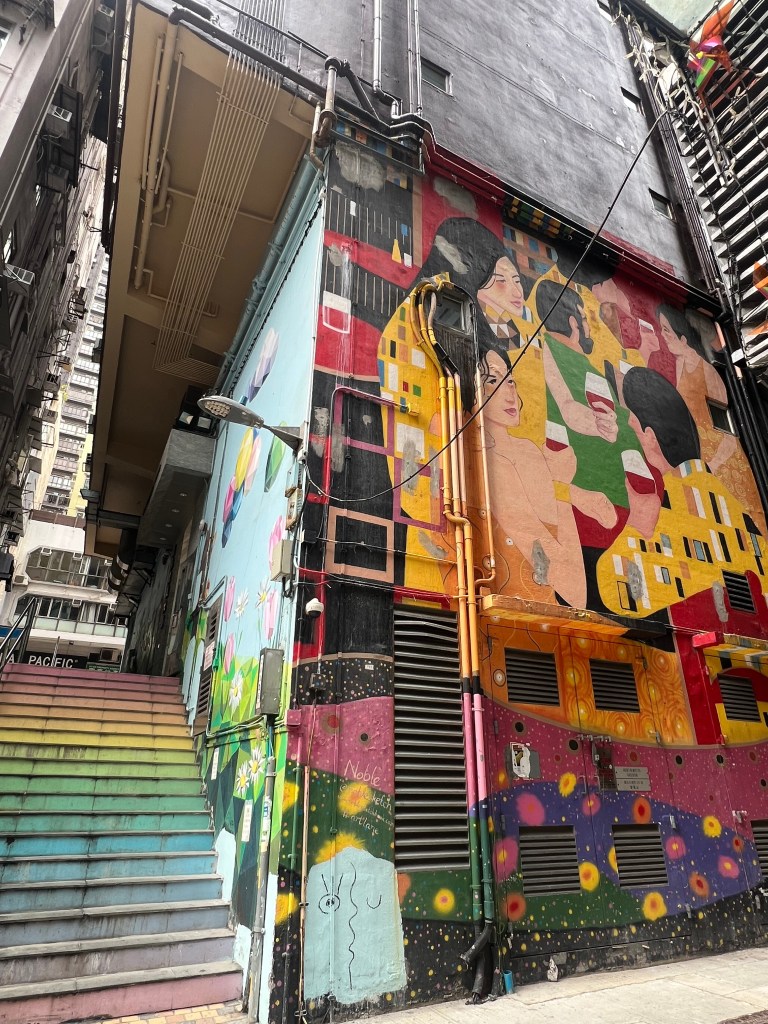
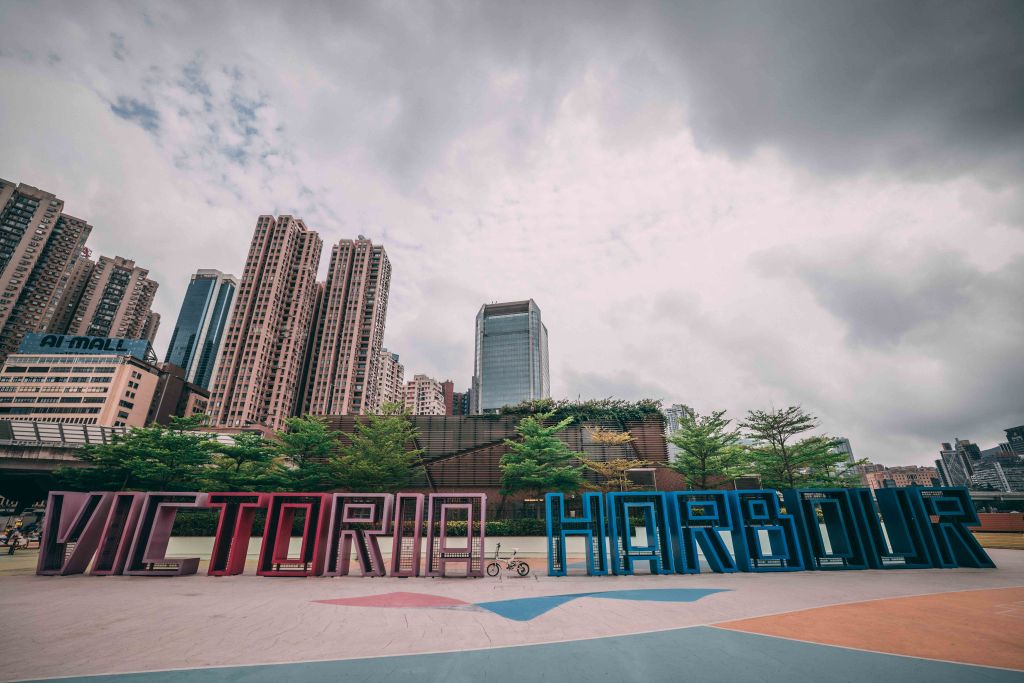
We took then the bus back down to the city (bus No. 1 will take you there in about 20min), grabbed some breakfast at R&R Bagels (a must) and then
wandered around central to Art Lane and back towards the Bank of China to do some street photography before taking the Star Ferry across to the promenade to see the Harbour view in the daytime. The Star Ferry
costs less than £1 and here you can also pay with Octopus card, so definitely worth doing so for the experience!
R&R Bagels, amazing!Art LaneArt Lane
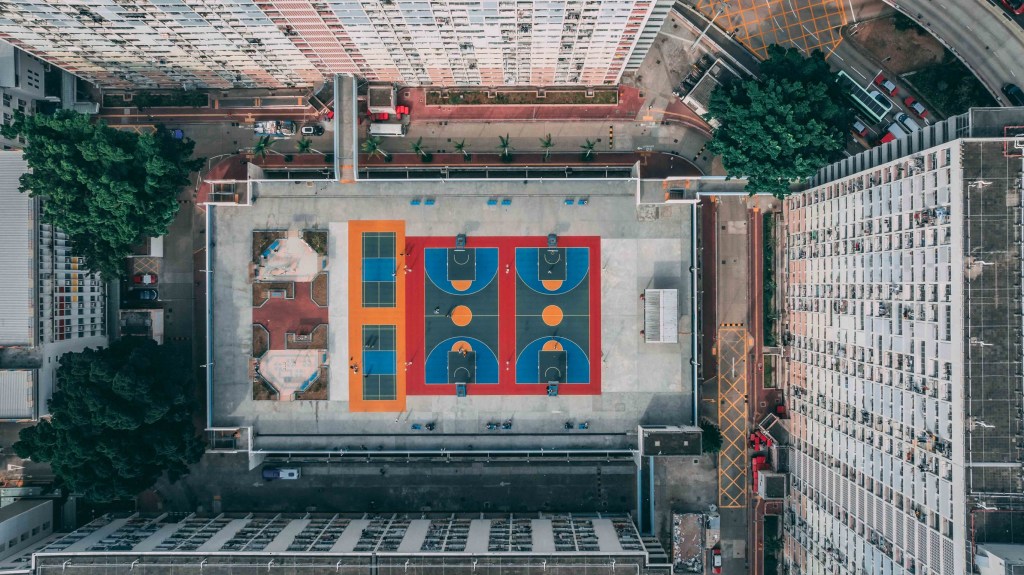
We then headed over to Choi Hung Estate (MTR to Choi Hung station) to photograph the colourful buildings and basketball court, it wasn't too busy and here you can fly drones!
Choi Hung Estate
Our last stop of the day was hiking up to Suicide Cliff, there are several different routes to this spot. We took the shortest but hardest route which involved a lot of scrambling uphill for about one hour, to learn more about it click here.

Once at the top though the views were definitely worth it!
Suicide Cliff
On the way back to the hotel we decided to stop by Temple Street again for some more delicious food.

Day 4 – The Whampoa, East Coast Park Precinct, Causeway Bay , a very cool 3D printing factory, and Braemar Hill again before leaving.

Our flight was late in the evening so we tried to make the most of this day before we had to leave for the airport. Fortunately where we were staying they let us do a late check out (without additional charges) and they storaged our bags until we left to the airport, this allowed us to move around without the hassle of having to carry the bags!
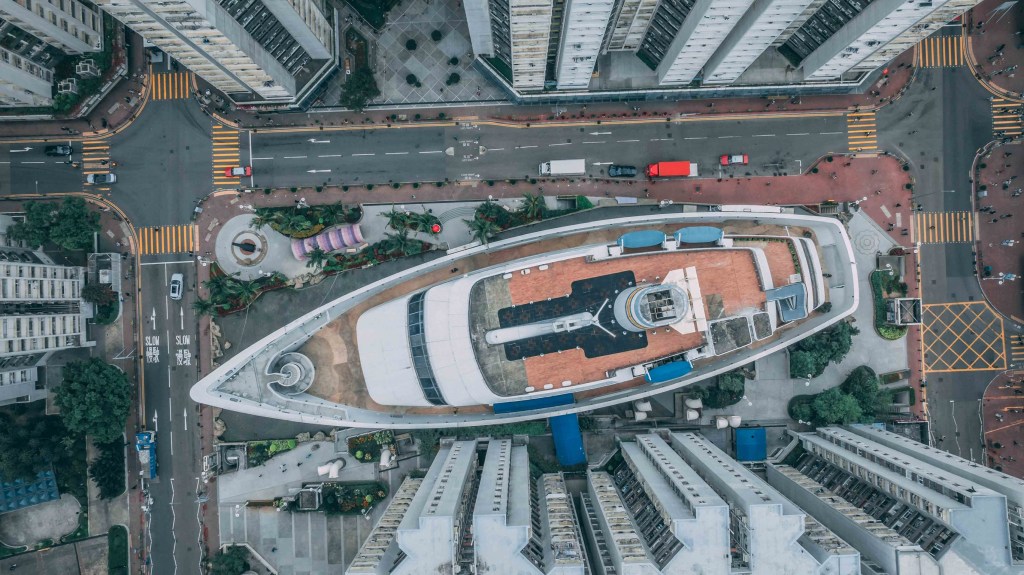
First we headed out to The Whampoa which is a large mall of over 300
shops and several themed worlds, including a ship! Here you can get a very cool shot with the drone. Then we took the MTR to East Coast Park Precinct before wandering up into Causeway Bay, we found here a super cool 3D printing shop called dot 3D which is definitely worth a look!
The WhampoaVictoria Harbour
Finally we decided to wander up Braemar Hill once more to fly our drones and to finish off our stay in HK before heading to the airport.
Braemar Hill
Short but intense, we feel like we made a lot considering that we just spent three days in Hong Kong. In our opinion, in the last day we could have also do the hike to The Dragon's Back, but we had to choose one. However, Hong Kong is a city to come back that's for sure so it will be in our list next time.

If you enjoyed this post don't forget to subscribe and if you have any other tips or recommendations for a short stay in HK, let us know in the comments, we will love to hear about it!
THE GREAT WALL – ROUTE TO 4 DIFFERENT SECTIONS AND HOW TO GET THERE
Visiting The Great Wall of China was a dream that always seemed to be very far from being achieved. The distance, the different language, the time to do it, the uncertainty of what are you going to find once you are there...all this things that cross our mind when something feels too big to do it! Luckily, we decided to step forward and do it (not just one section but four) and with this travel guide, I hope we can help you to achieve your dream too.

Here you will find how can you visit The Great Wall in a safe way, along with some tips, recommendations and prices, everything according to our own experience.
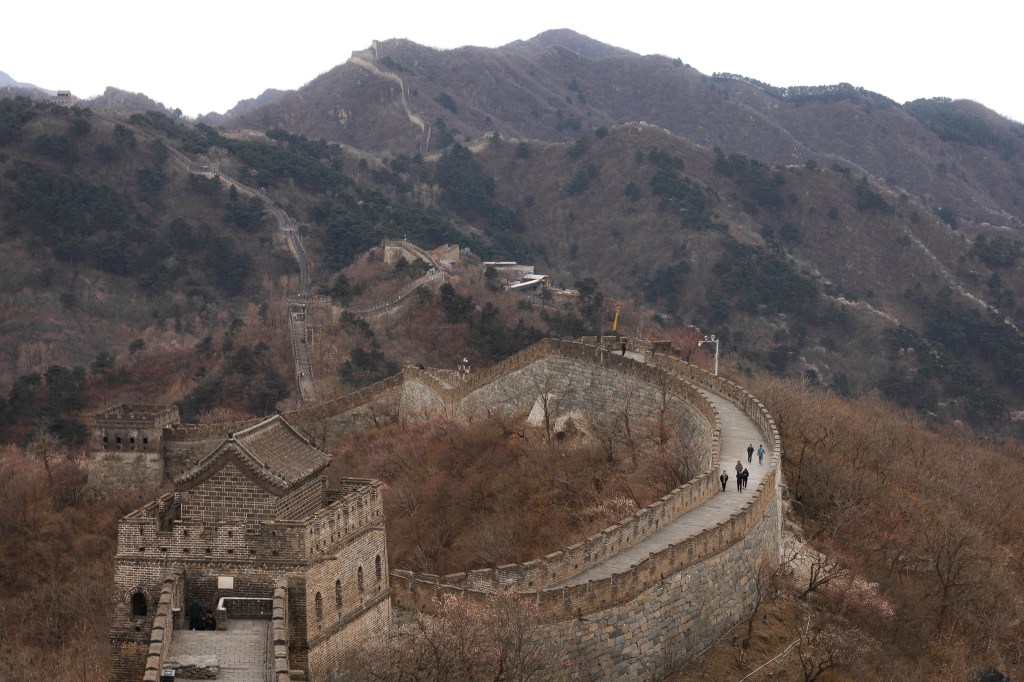
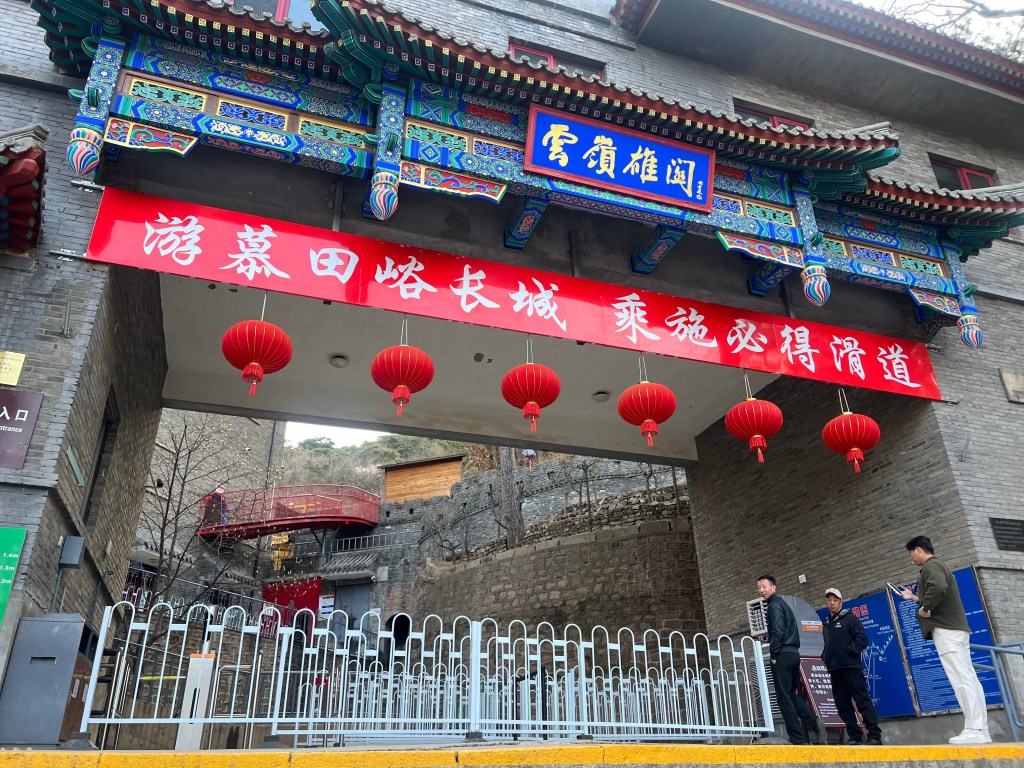
MUTIANYU GREAT WALL
Mutianyu is one of the most popular sections of The Great Wall. To get there we arranged a pickup by car from Beijing to Mutianyu with the host from the accommodation where we spent the night and at the same time, they sorted the tickets for us. Of course, there's another alternatives from Beijing as the tourist buses or the public bus, but here we will talk about our own experience and in our case, since we spent the night in Mutianyu and with the luggage and after a very long day visiting Beijing (23km walk!) the private car was definitely our best option. As well, if you just want to visit The Great Wall, you could go to Mutianyu straight from Capital Airport or from Beijing Daxing International Airport via Express train and a bus.
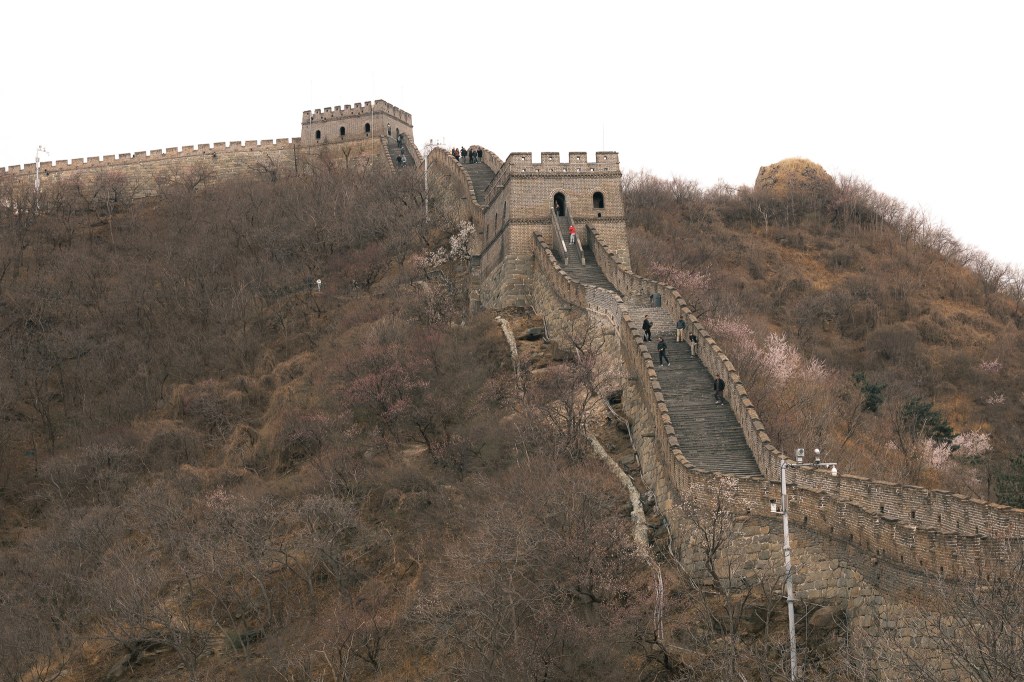
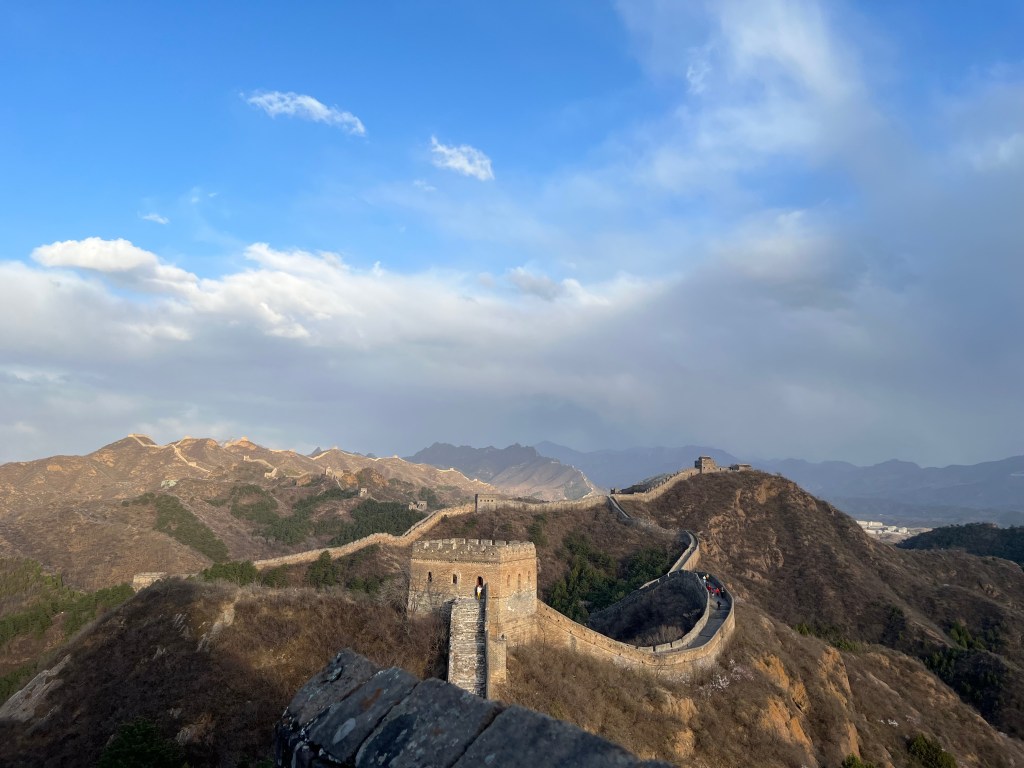
Mutianyu Great Wall (views from Tower 13)
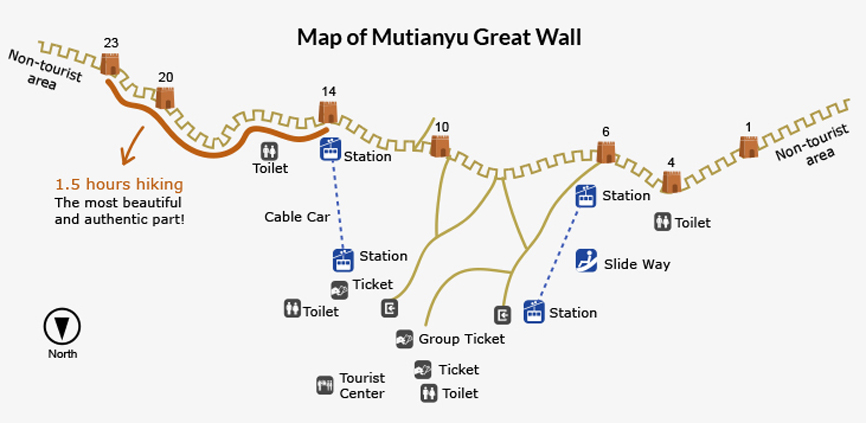
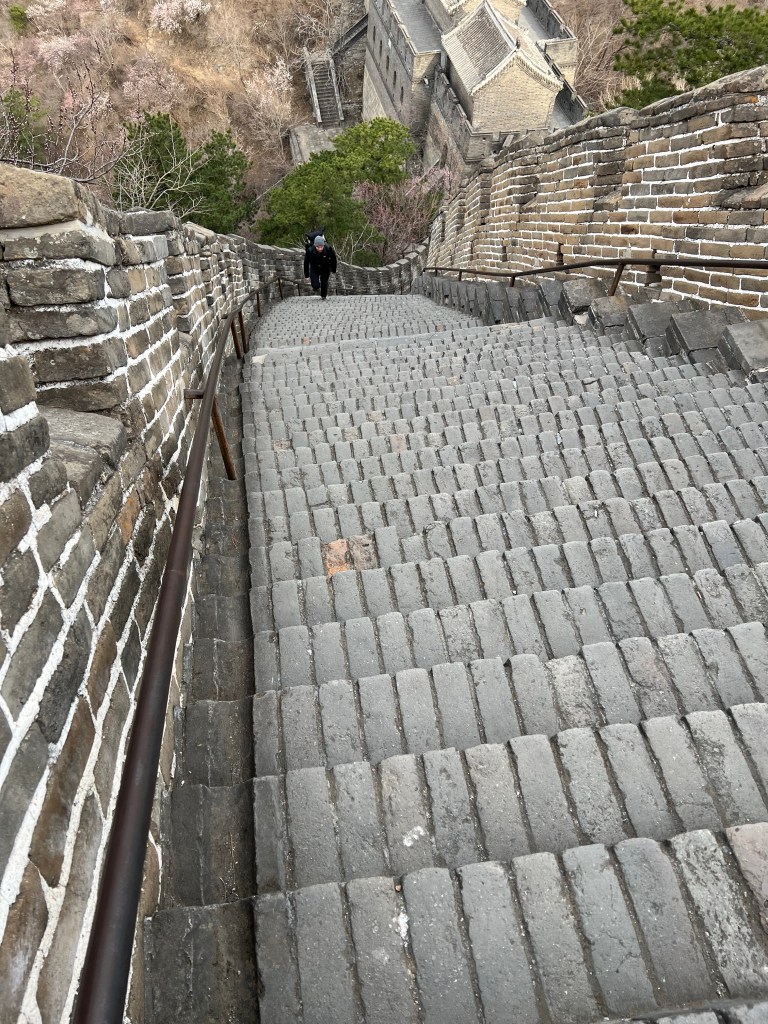
After a well deserved night rest, we woke up early in the morning to have breakfast and to be dropped off in Mutianyu entrance (our hotel was 5 minutes away by car from the main gate). The tickets if you don't have them pre booked, you can easily buy them in the day but I would suggest to try to get there the early you can, remember that Mutianyu is one of the most touristic sections and doing it this way you will avoid the crowds! What we did was take the chair lift (it will take you to the top between Tower 6 and 4), once we were at the top, we walked from Tower 6 to Tower 1, and then all the way back to Tower 14 and back to Tower 6 to take the toboggan slide (this is included in the ticket) to go down. Regarding this
Mutianyu Great Wall SectionMutianyu GateSteps at MutianyuToboggan SlideBooking.com UK Homepage
OVERVIEW
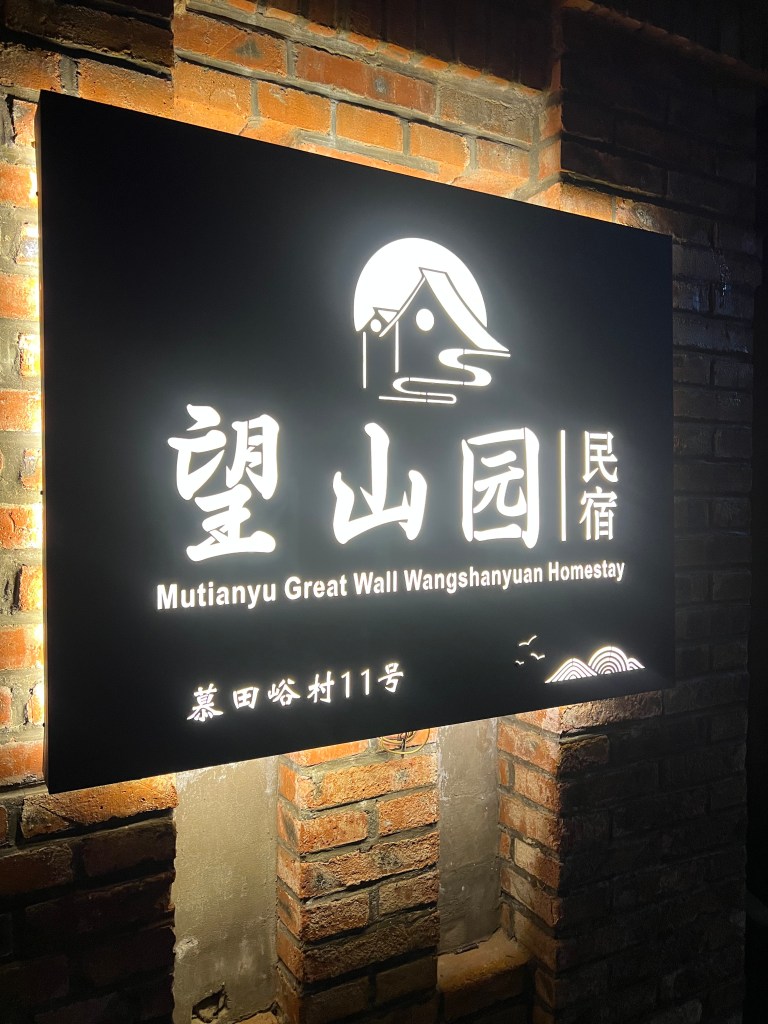
Price: Mutianyu Ticket + Toboggan slide or cable car both ways £19.30
Accommodation: Wangshanyuan Homestay £85 per night (food is absolutely amazing and the place and location is fantastic. The room was really cozy and comfortable and our hosts helped us with everything we needed). You pay on arrival and you can book with free cancellation up to certain date close to your trip.
Private drive Beijing - Mutianyu: £55 (1.5h to 2h route). It might sound pricey, but this split between two is not bad at all considering what would it cost you in other places in the world, also, this allowed us to make the most of our day in Beijing and not having to rush because we would miss the bus! Personally, we found easier in this stage of the trip (The Great Wall route) to organize the drives with the hosts where we were staying, but you also could use Didi which is like Uber but in China. We used it several times during the whole trip and it never disappointed!
Season: We visited Mutianyu at the end of March, this is during the low season and I would say the space to move around and to visit without crashing with each other was a 9/10 (the trees starting to blossom are definitely a plus too and it was just perfect to do photography).
Temperature:  It ranges between -2 at night and 11 degrees celsius during the day. Make sure you are wearing warm layers, remember you will be walking (a lot!).
Difficulty level: Easy, the whole walk can take around 4 to 5 hours but this is counting with lots of stops to do photography and actually enjoying the experience. The Wall has been restored in this section and the main challenge you will face will be a lot of steps.
Points of interest: There are toilets in each cable car station, so one thing less to worry about and if needed you also can buy water or snacks on the stations (ideally bring your own water bottle everywhere and keep it topped up). Make sure you take tissues with you, in China there's not tissues or paper in every public bathroom and it's actually good to keep this in mind.
Photography tips: From Tower 14 you can get one of the most beautiful views. Also, there's an extension of the wall after Tower 10, from there you can take some beautiful shots!
Mutianyu Great Wall
JINSHANLING GREAT WALL
After we finished visiting Mutianyu, we were taken by car (about 2h route) to our hostel in Jinshanling. There is the option to go by train but you have to book at least two taxis still and the train works twice daily and this option for us, that we were planning to do sunset at Jinshanling, wasn't ideal.

Jinshanling was with difference our favourite section of the Wall from the four sections we visited. It is considered not just one of the most scenic areas but one of the less crowded too which make the experience even better. The tickets you can buy them on-site, via WeChat or you can arrange this with your host as we did by simply asking, there wasn't an extra cost for this and this will help you to get everything organised in advanced. If you can , try to book your hostel or hotel near the main gate, this is what we did and it was the best decision ever, 2 minutes walk and we were in the entrance! For Jinshanling, this is what we did (and what the locals recommended us).
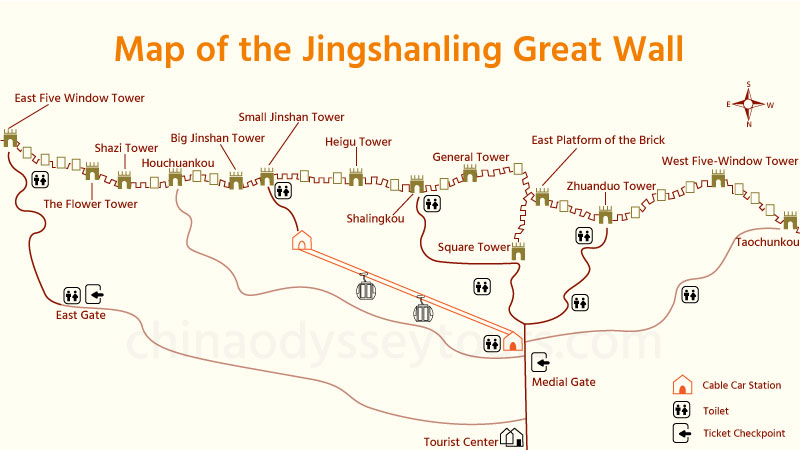
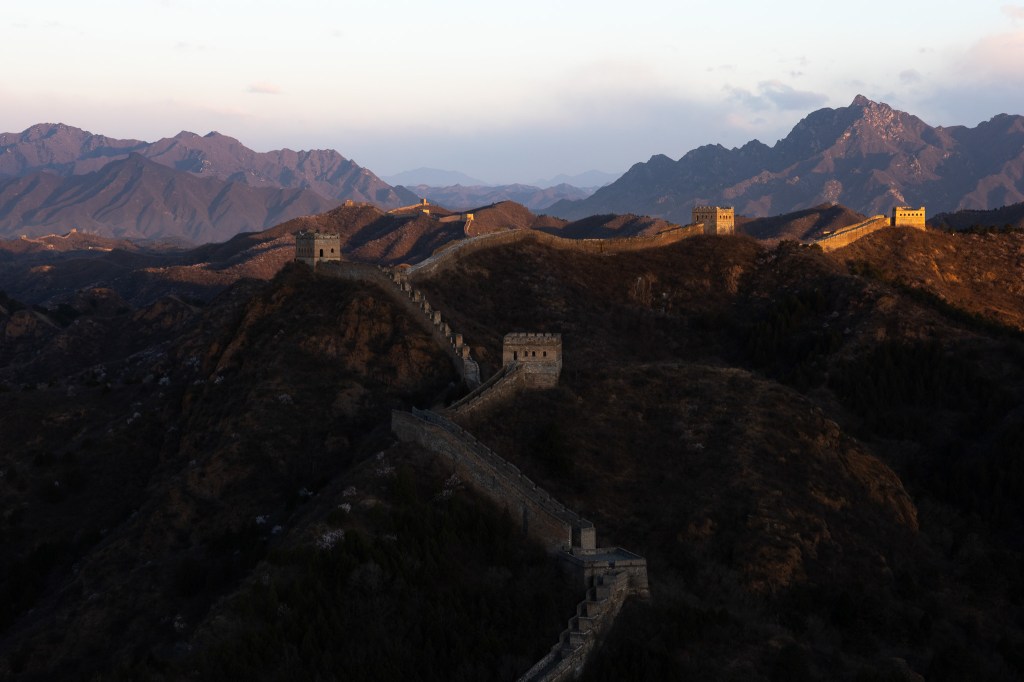
Jinshanling Great Wall mapHostel ZhouhaijunHostel ZhouhaijunJinshanling TownMural at the Middle GateWest Five-Window TowerSunrise at Jinshanling
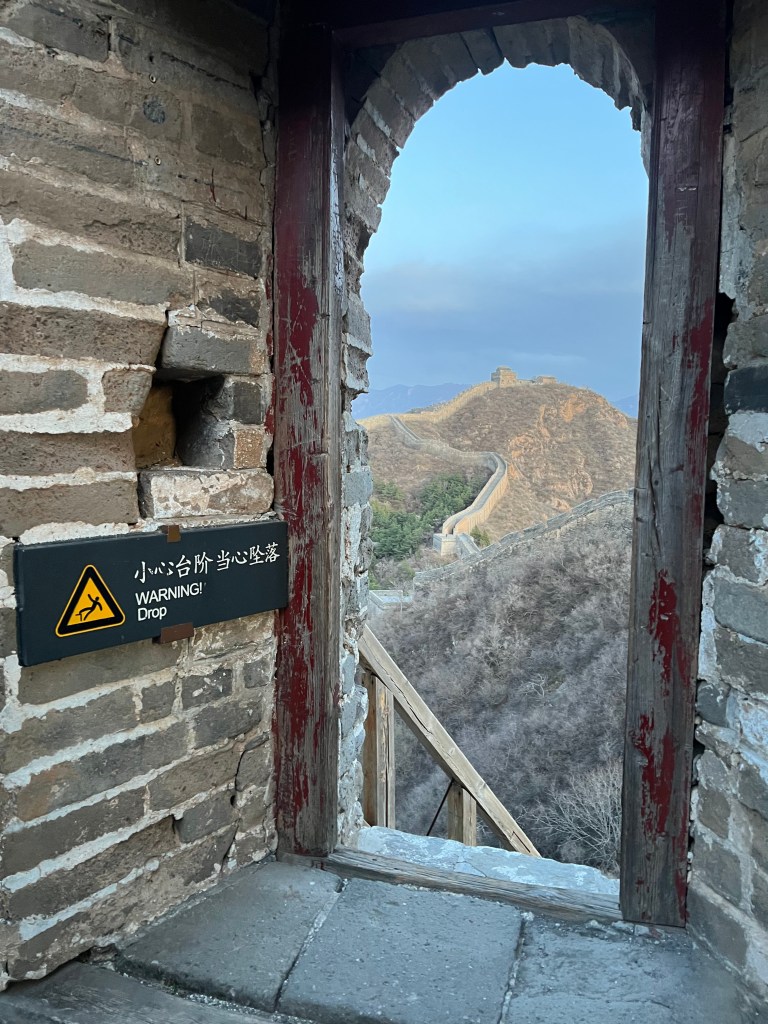
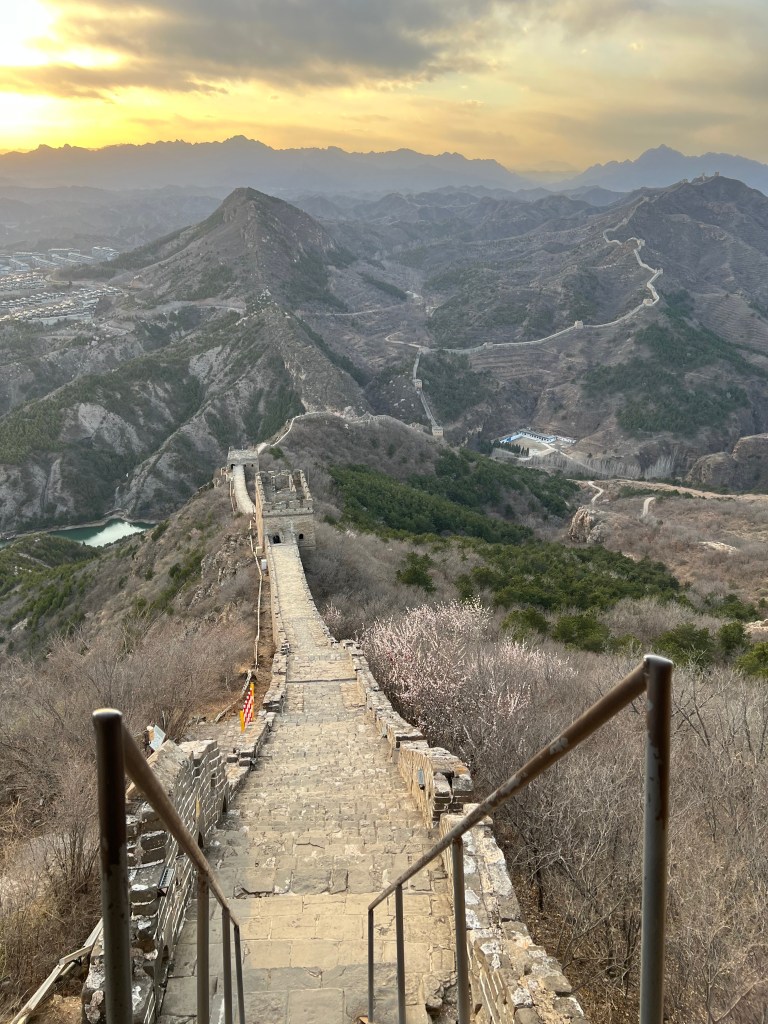
On our arrival and after checking in our hostel, we walked to the gate (Medial Gate in the map above), and we take the pathwalk that would take us to Zhuanduo Tower (about 20 minutes walk). Once we reached the top, we walked towards the West Five-Window Tower to get ready for sunset, it is an easy walk but some parts still wild (not renovated) so be careful with the drops! After this point, you can keep waking to the next tower but from here we had the best views for sunset.
Sunset at West Five-Window TowerWalking to West-Five Window Tower
The walk back wasn't too bad considering it was dark, the fact that there are steps all the way to the bottom make it easier and from there is just a pavemented road to the exit, but make sure you are taking with you torches and overall, warm layers! The temperature at night was around -2 degrees celsius and it was quite windy at the top.
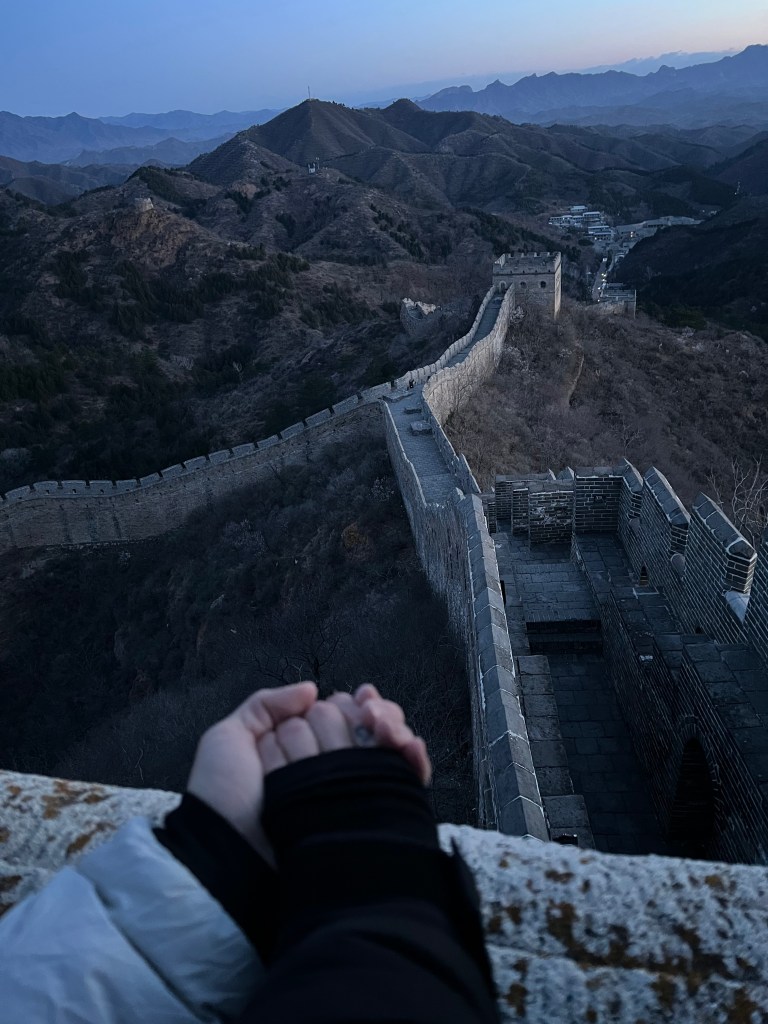
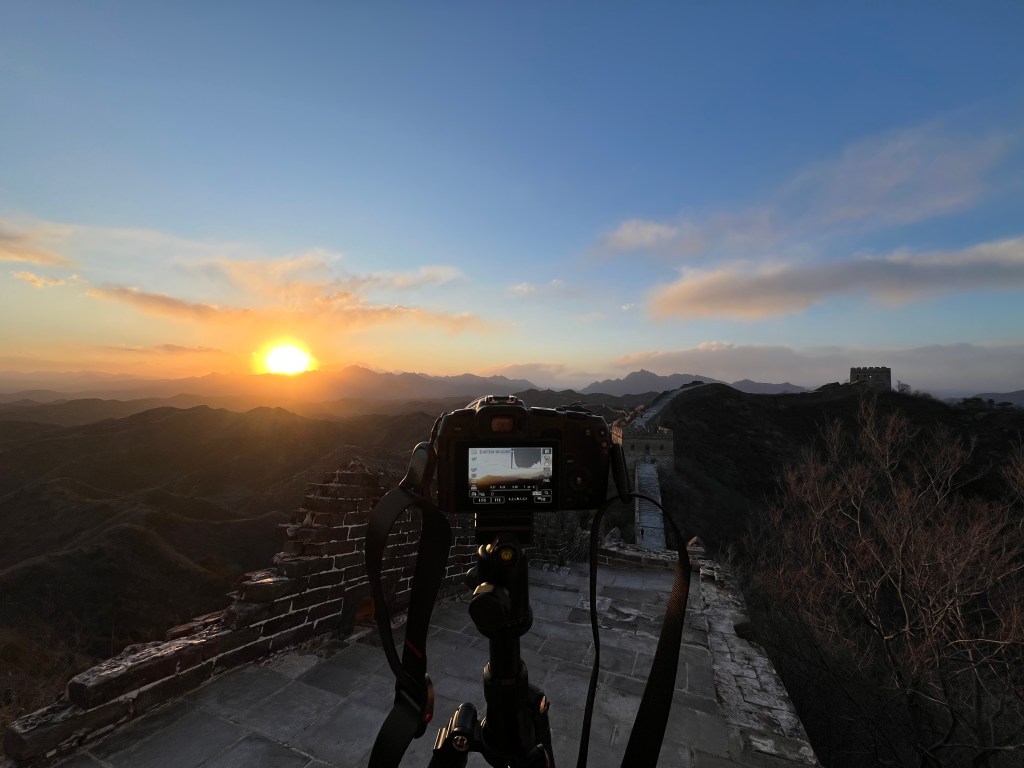
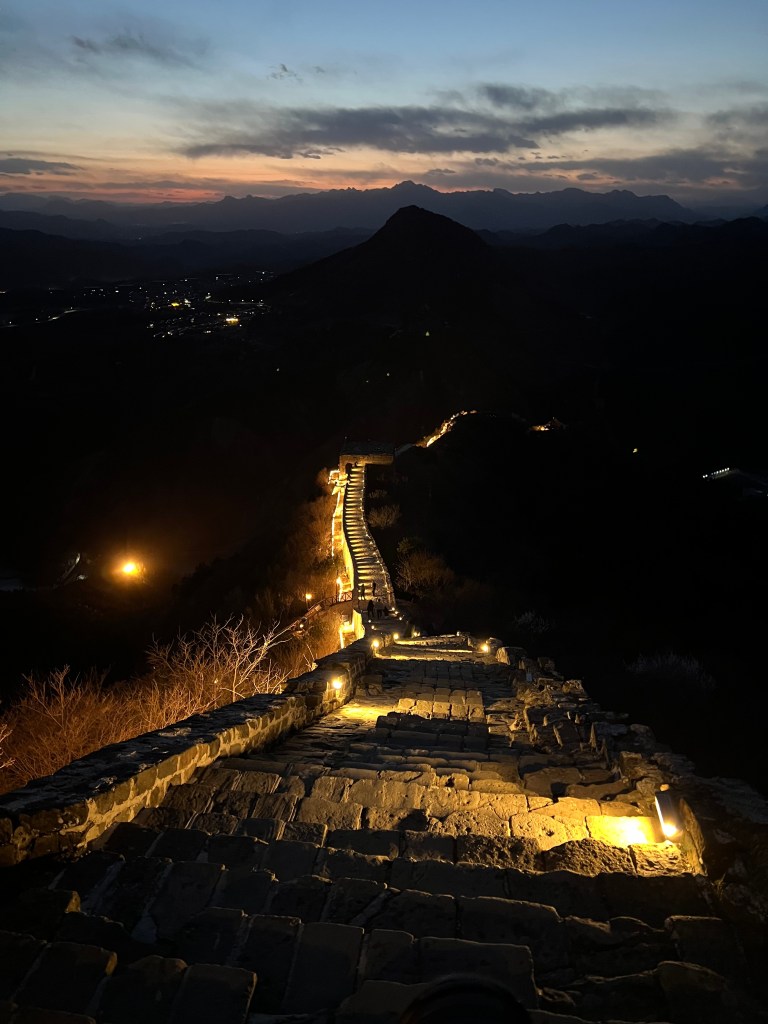
For sunrise, we were at the gate at 0500am and there was already someone to let us in. We were the only people in the place apart from a lady that walked with us all the way to the top to show us the best spot (we don't really know if the hostel asked her to be there or if she was there by pure coincidence but we were glad she came with us. All what she asked for on the way back was for us to buy something from her and of course we did!). We walked the same path to get to the top, but instead walking towards the West, we were heading towards the East, this time to see sunrise from The General Tower, there was -7 degrees but it was totally worth it! Here we also had the opportunity to fly our drones, but the woman that was with us was very clear when she said that flying towards the West wasn't a good idea, since this could result in our drones being shot by the military so remember, if you decide to take the risk, stick to the area you are, keep your drone always in sight and always towards the East!
Jinshanling at sunrise
OVERVIEW
Price: Jinshanling Great Wall ticket fee £11 (it allows you to go in twice, we used it for the sunset and on the next morning for sunrise). Here your passport is basically your ticket, not just here but almost everywhere actually so always take it with you since you will be asked for it even in the most random places.
*Check above to found how can you book your tickets.
Accommodation: Hostel Zhouhaijun £27 per night (we paid an extra £10 for food which by the way, was amazing!) This hostel you will not find it booking.com, it was a booking through an agent from China Highlights, if you look for this in internet you will find a lot of helpful information in their website.
Private drive Mutianyu - Jinshanling: Around £55 - £85 (about 2h route and depending if you use Didi or private drive). Again, it might sound pricey, but considering the other alternatives wasn't an option for us due the time and plans we had, but if you have plenty of time it is definitely worth having a look.
Season: We visited Jinshanling at the end of March, if I say it was empty I wouldn't be exaggerating! For sunrise it was just the two of us.
Temperature:  It ranges between -7 (at sunrise) -2 at night and around 10 degrees celsius during the day, definitely the colder section we visited so stay warm and don't forget your gloves.
Difficulty level: Moderate. Getting to the top is really easy but once in The Wall due the unrestored parts you can face very steep steps and some of the walks between the towers doesn't have a protection wall anymore. However, I think anyone could do it!
Points of interest: In the areas we visited there was not toilets and the ones we pass in our way to the top were closed due the time of the day.
Photography tips: West Five-Window Tower for sunset 10/10, General Tower for sunrise 12/10! Remember to keep your drone in sight and towards the East and also, before just assuming you can fly, first ask! Here you need to be very cautious about where you take off and making sure it is allowed.
Aerial from Jinshanling (RAW) We were standing in the red circle!
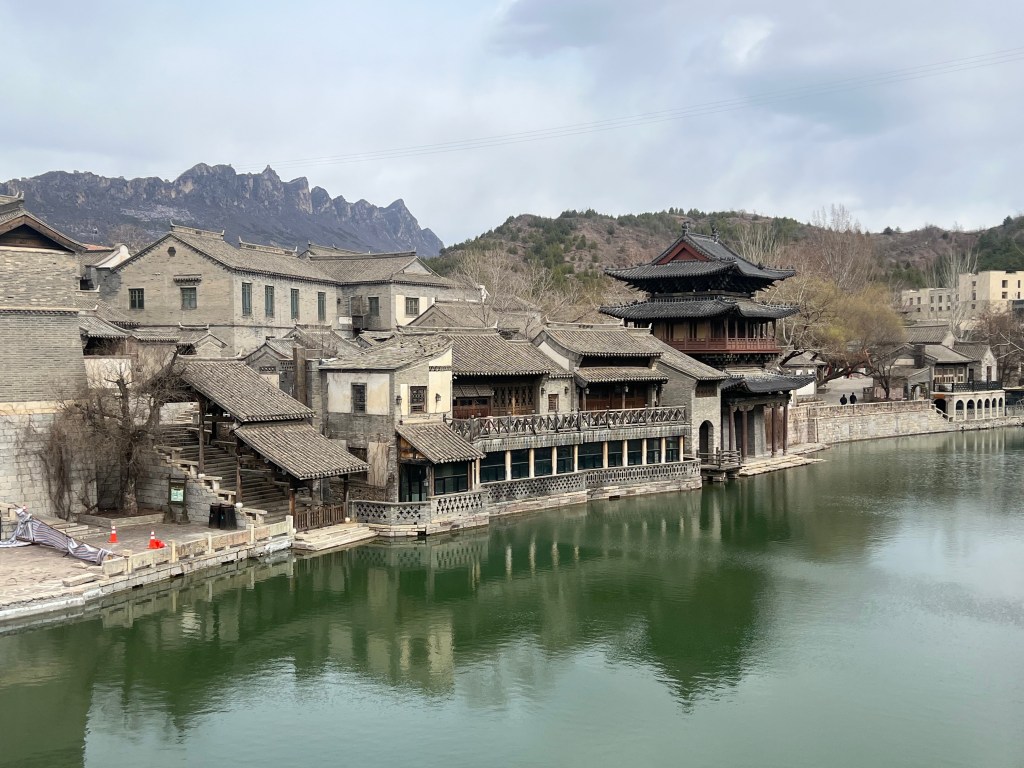
Simatai + Gubei Water Town
After the most beautiful sunrise at Jinshanling, we get back to our hostel to have breakfast and to move to our next destination, Gubei Water Town where we will be visiting Simatai Great Wall at night.
The distance between Jinshanling and Simatai is not too long and our next host agreed to pick us up for a very reasonable price which you will find below.
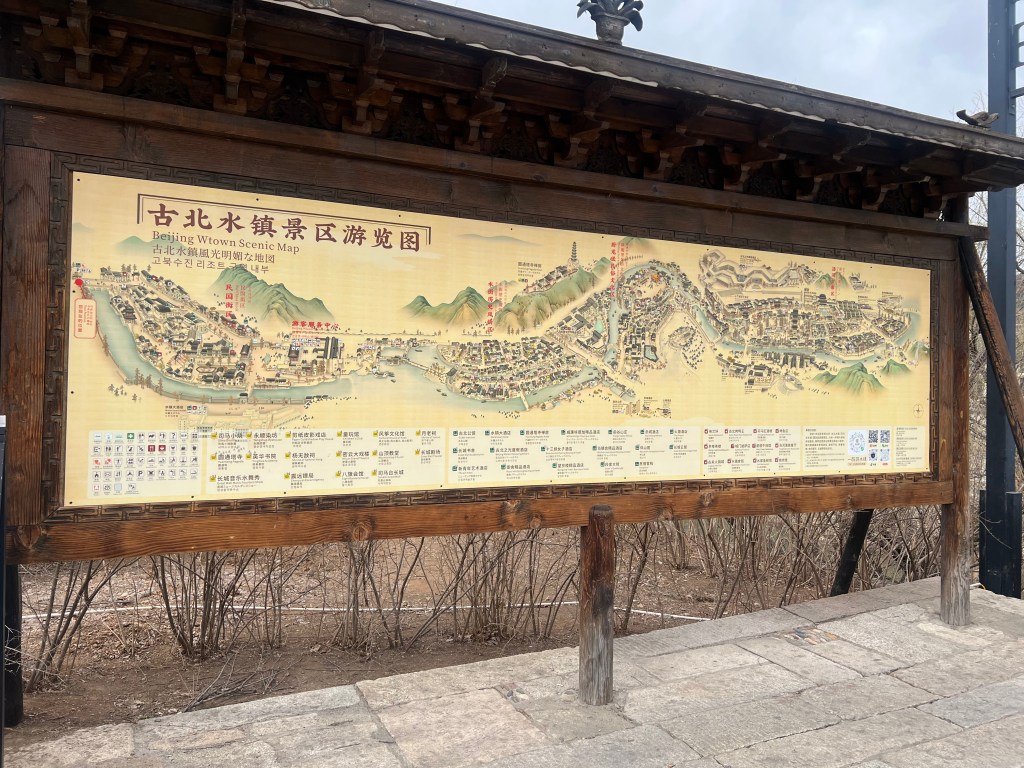
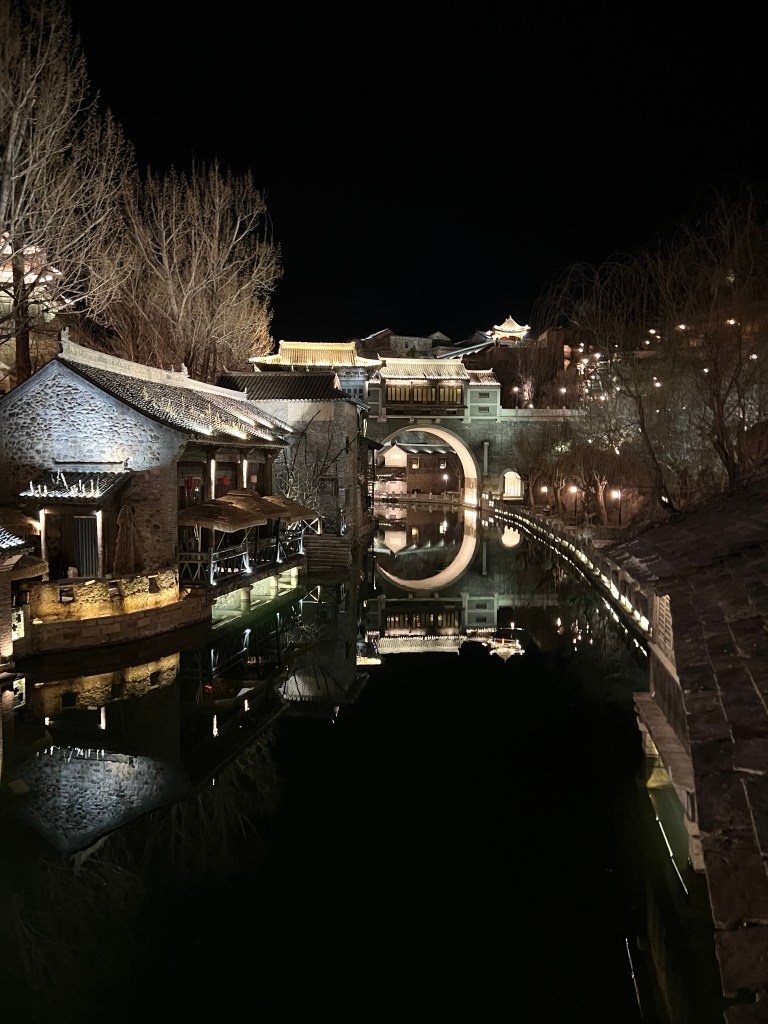
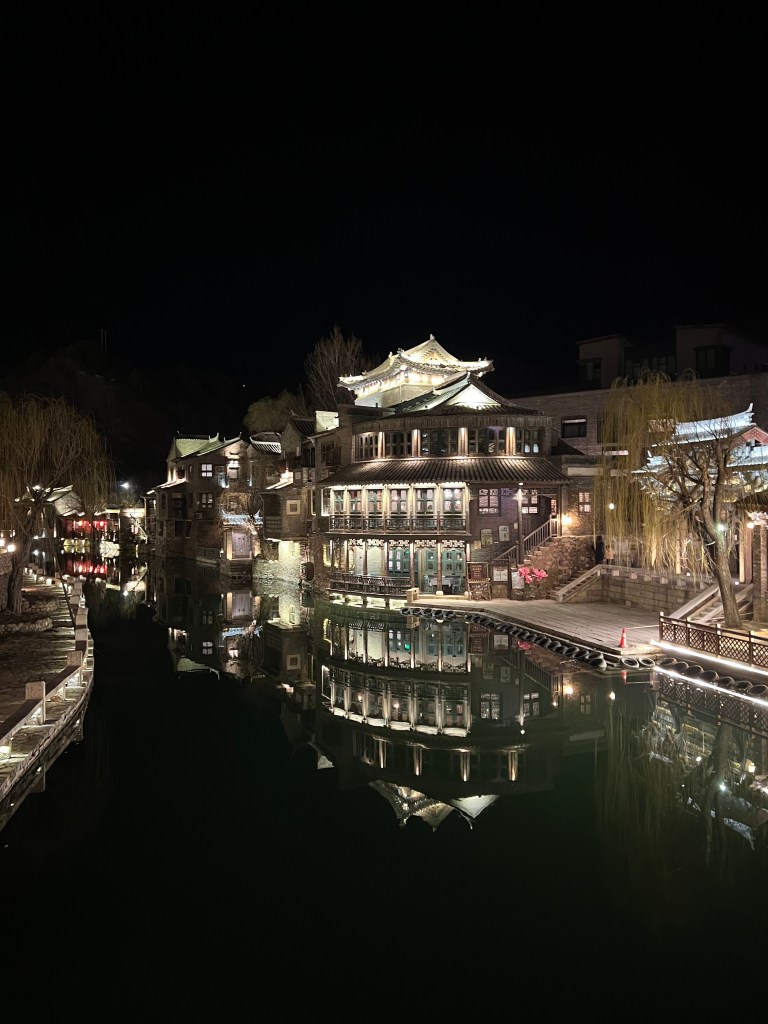
Once we arrived to our hostel, first thing we did was taking a good rest and a shower to then have lunch and to be taken to Gubei Water Town later on the day. We decided to visit Simatai at night because it is one of the rare sections that is open at night for tourist, but you also can visit it during the day and in this case you can decide if you want to visit Gubei or not (you have to pay a fee to visit Gubei Water Town). I personally think that you should visit the Water Town if you go to Simatai, there's different opinions about if it is too touristy or not but it still a little magic place worth to see at least once! To pay the fee you actually need to walk into the town, you will see a map just before the bridge where the car park is, cross the bridge and go right, then keep walking and you will find a big tourist centre. There you pay the fee for the town and for the ticket for Simatai at night. From there I would say it is quite easy to move around, there's a river and there's not way to get lost but it can get quite confusing to find the cable car for the Great Wall although there are signals everywhere so don't worry!
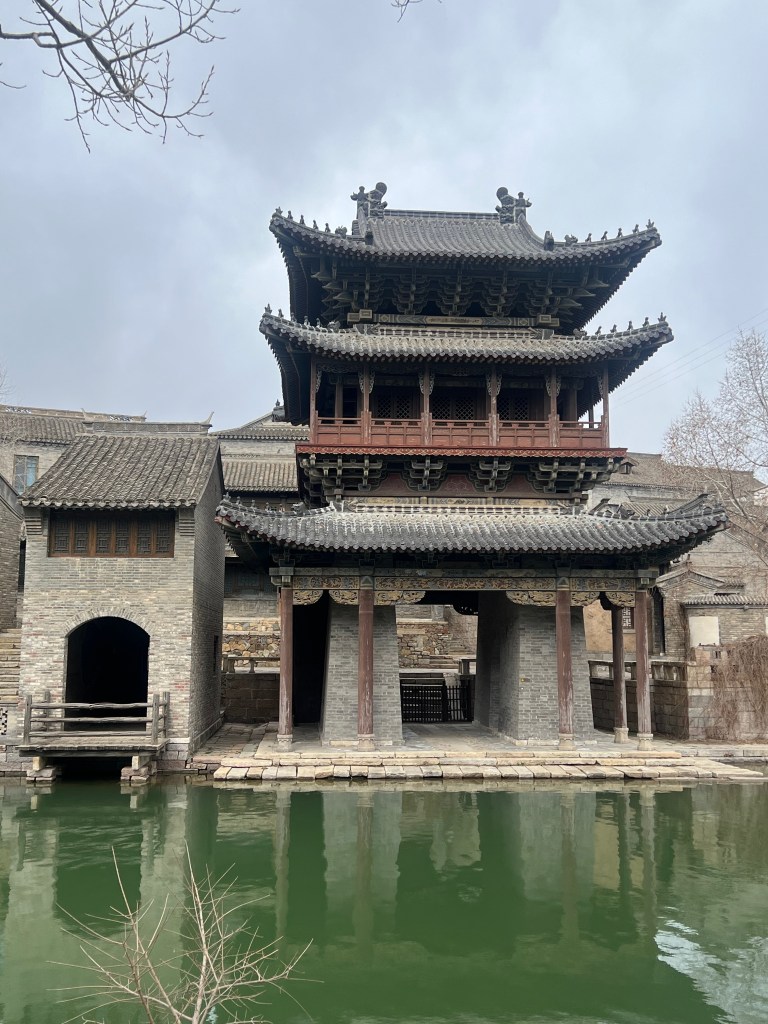
Gubei Water Town mapGubei Water TownGubei Water Town
At 1800pm, we were at the cable car waiting to go up to the Wall. They open section for  tourists at 1730 and the cable car goes up every 10-15 minutes (of course we wanted to get there for sunset too!). It is important to note that if you decide to go for the night option, hiking is not allowed for security reasons and the only section open and lighted up is the one between towers No. 5 and 6.

Once we were there, we save our spot for sunset and just waited for the magic to happen!
Simatai for sunsetSimatai at night
Despite being a great experience, I think I would do it just once. Don't take me wrong, I would come back to Simatai but probably to do it during the day and to experience the whole hike. I would say if you are planning in doing another sections as we did, then yes, doing Simatai at night is a great adding to your trip and on the way back visiting Gubei illuminated is worth it. Also if you stay in the Wall long enough, you will be able to see the drone show! But if Simatai is the only section you are visiting, then seeing it during the day is priceless.
Gubei at nightGubei at night
OVERVIEW
Price: Simatai at night + Gubei Water Town fee £31 (you buy this in the tourist office in Gubei)
Accommodation: Great Wall Jumanyuan £27 per night. The place was okay although the bed wasn't comfortable and the hosts ad food (not included in the price) were fantastic however, when we booked it (through booking.com) according to the description it looked like it was inside gubei water Town, this is the reason we book it but for our surprise it wasn't there but nearby, so be careful when booking your hotel and make sure the location is accurate!
Private drive Jinshanling - Gubei (accommodation) : £13 (this price was perfect but because of the location, we had to pay an extra to be dropped off at Gubei Water Town £4)
Season: We visited Simatai + Gubei at the end of March, Simatai wasn't too busy but Gubei Water Town was, overall at night.
Temperature:  It ranges between 8 and 15 degrees celsius, not too bad!
Difficulty level: Easy. Getting to the top is all about the cable car and some steps, to walk in the wall is a bit steep but nothing you can't survive to.
Points of interest: You can get very nice views from where the church is at Gubei, there's also a cafe with a viewpoint but it's quite expensive. If you go back to the town too late everything will be closed, that's what happen to us, we wanted to have dinner but everything was closing down by 2130 so we had dinner at the hostel.
Photography tips: If you can try to go to Simatai before sunset, it is stunning and try to leave around 2100, this way you will probably see some of the drone show from the wall. Gubei at night is espectacular! You can do some really nice shoots.
Gubeikou Great Wall
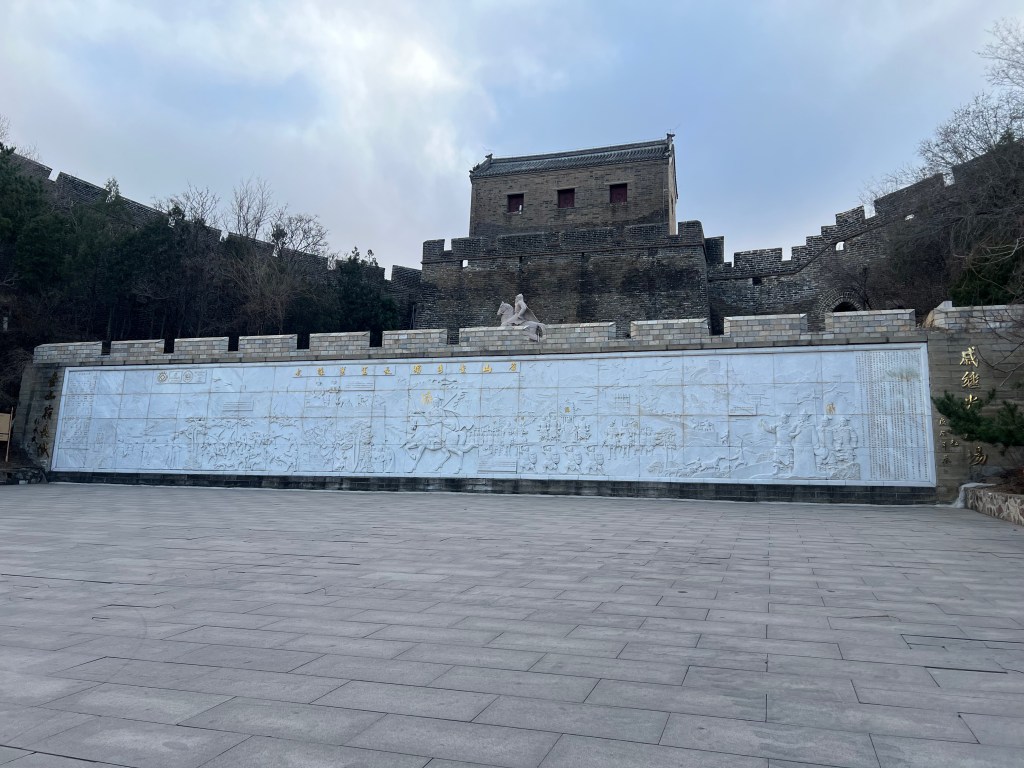
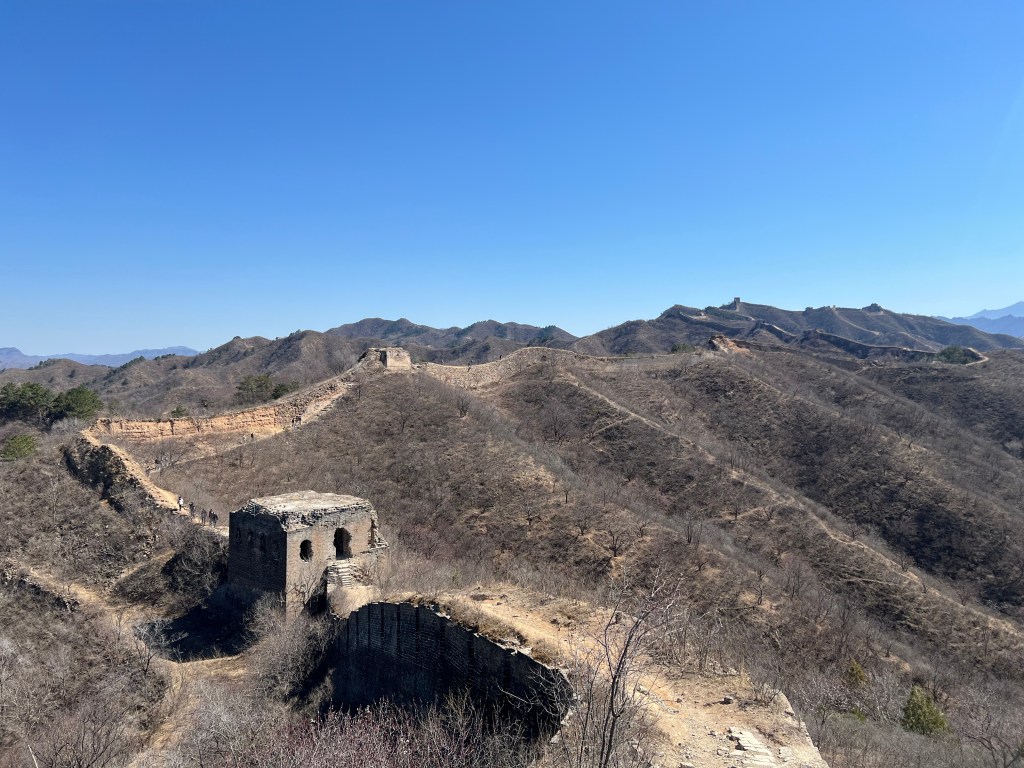
Gubeikou was one of our favourite parts from our Great Wall route, the wilderness here and the fact that it is untouched, makes the experience really special.

This section is just 10 minutes away driving from where we were staying so in our last morning in the outskirts of the Beijing region, we decided to do our last hike (for now) in the Great Wall. Here there's not cable cars or anything similar so you have to get to the top walking, it took us around 30 minutes to reach the top of The Wall and along the way you will walk through what it seems to be some kind of military training area. Gubeikou is connected to Jinshanling and if you want you can do the hike all the way to Jinshanling however, there's a part of the route where you must leave the wall, nowadays it is a military base and well, clearly is not just prohibited to walk through it but as you can imagine it is not a good idea!  Below there's some pictures of the way up to the top.
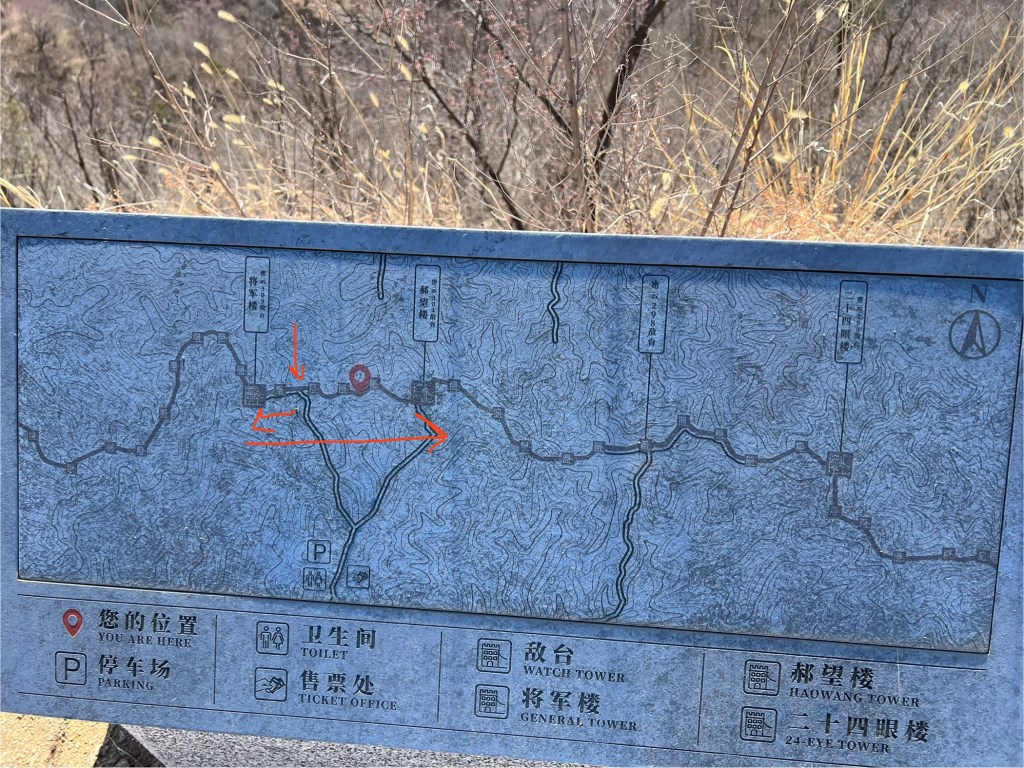
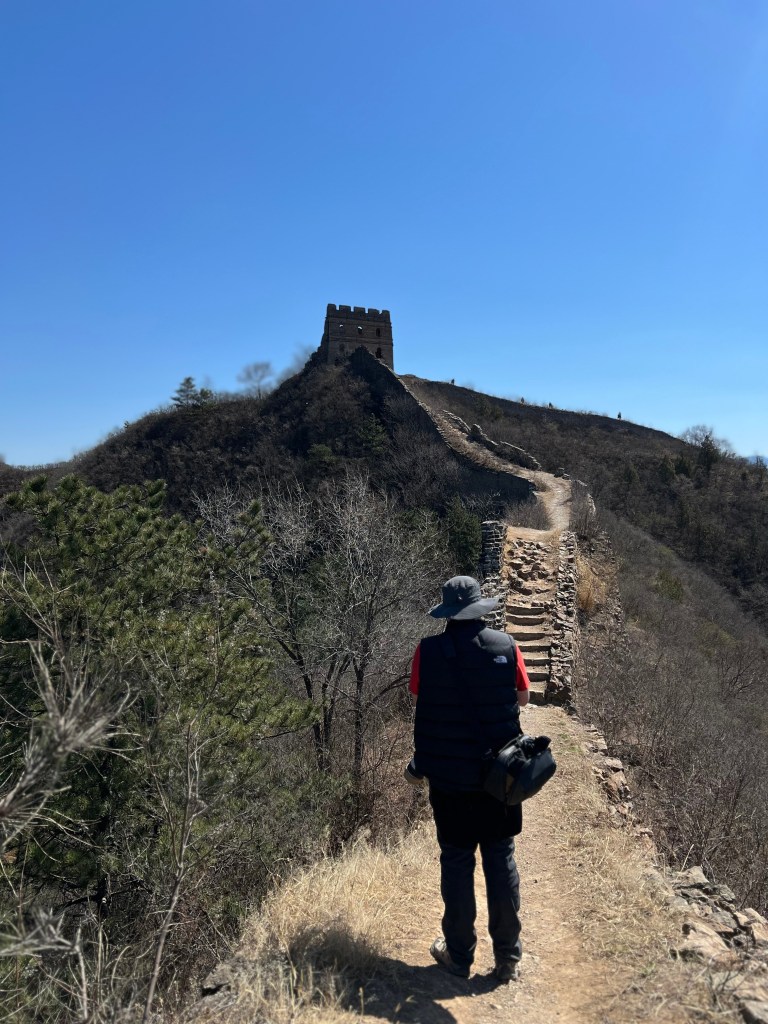
We arrived to the top to a point between Tower No. 307 and 308, from here we walked to the general Tower (309) and then all the way to the 24 Eye Tower (here the paths and the ground is very unstable by parts since as mentioned, it's completely untouched).
Gubeikou Great Wall map
The hike took us around 4 hours in total, but the views you get from the 24 Eye Tower will leave you speechless. After this Tower you need to leave the Wall if you want to carry on walking to Jinshanling!
Gubeikou Great Wall
To come back down was the easy part, the path is very well prepared and will take you to the same point where you started. Here we were picked up to go back to the hostel to collect our bags, it was time to go to the airport to carry on with our journey!
Gubeikou24 Eye Tower in the backgroundOn the way back down
OVERVIEW
Price: Gubeikou is free Accommodation: Great Wall Jumanyuan £27 per night. We just stayed for one night though, we did Gubeikou the morning we were checking out :) Private drive Gubei (accommodation) – Gubeikou Great Wall : £12 (return trip) Season: We visited Gubeikou at the end of March, 100% recommended. There was a small group of visitors (around 8 people) apart from us in the entire section. Temperature: There was around 12 degrees celsius and very sunny, just perfect for the hike! Difficulty level: Moderate – Difficult. Getting to the top is alright, but once there not everyone would be able to do this hike overall because of the conditions of the wall. There’s some narrows parts and zero protection in both sides of the wall, also some of the steps are basically non-existent. To get into the 24 Eye Tower was quite tricky as well, some of the bricks that were part of the steps were gone and the ones that would still there weren’t stable at all. However, if you take your time and are cautious you can do it as well. Points of interest: There’s not one single toilet around so make sure you are all good before leaving your hotel! Try to pack light, you don’t want to do a 4 hour hike with a very heavy bag. What we did was that we packed one bag and we shared the weight (best decision ever if you are not going solo of course!). Bring a hat with you, despite the chilly weather the sun can get very strong. Photography tips: Jump on the top of the General Tower, the views are amazing. In the 24 Eye Tower you can make really nice compositions with the windows. Drones are strictly prohibited in the whole section (the reasons are obvious!).
This is our experience visiting this Wonder of the World, and the route we organized in order to make the most of our time in the Great Wall for the very first time. In my opinion it was one of the most expensive (and still reasonable) parts of our entire trip because of all the drives, but it was the best thing we did since otherwise, we wouldn’t have been able to visit some sections as Gubeikou for example or the sunset in Jinshanling. We hope this helps you or that can serves you as a “guide” if you decide to visit this side of the world and if you enjoyed this post, subscribe for more updates, it is free!
Have you been in the Great Wall before? Then if you have any other tips or recommendations, please leave it in the comments, we would love to hear your opinion, and if you have any questions just let us know below!
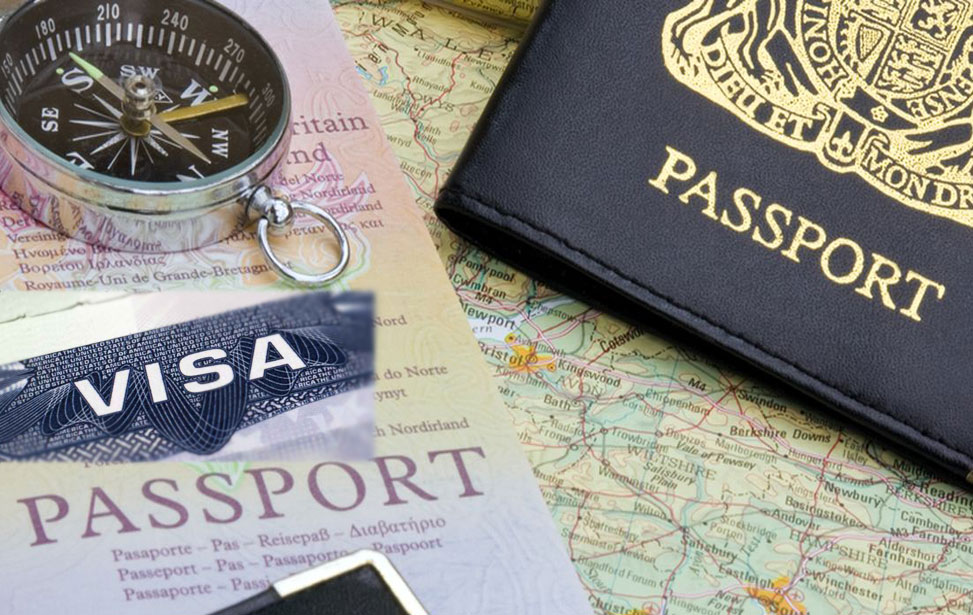
Before travelling to a different country, one of the first things in our checklist should be our Visa. Is it required and if so, what’s the application process, duration or if there’s any exemptions (as it was my case due my Spanish nationality). This should be one of the most important things to keep in mind since without this, we won’t go too far! In this post, Tom will discuss his experience to obtain a visa to travel to the China mainland as a British Citizen living in the UK.
Firstly, there are several different options for visitors travelling to China.
VISA EXEMPTION
For around 40 nationalities, China offer an exemption for up to 30 days (recently extended from 15 days), this may be extended but for now it is only as long as you travel before the end of December 2025. Here is the list of the current countries included:-
Switzerland, Ireland, Hungary, Austria, Belgium, Luxembourg, France, Germany, Italy, The Netherlands, Spain, Malaysia, New Zealand, Australia, Poland, Portugal, Greece, Cyprus, Slovenia, Slovakia, Norway, Finland, Denmark, Iceland, Andorra, Monacco, Liechtenstein, South Korea, Brunei, Bulgaria, Romania, Croatia, Montenegro, North Macedonia, Malta, Estonia, Latvia and Japan.
VISA FREE TRANSIT
China have also recently upgraded their China visa-free transit policy, this only applies if you have a interline ticket (connecting ticket) with the confirmed departure date and seat number leaving for a third country or region within 240 hours of arriving (10 Days). Please note that it must be a third country so you can’t simply return back to your original travel country!
The nationalities this applies to are as follows:-
Austria, Belgium, Czech Republic, Denmark, Estonia, Finland, France, Germany, Greece, Hungary, Iceland, Italy, Latvia, Lithuania, Luxembourg, Malta, Netherlands, Norway, Poland, Portugal, Slovakia, Slovenia, Spain, Sweden, Switzerland, Russia, United Kingdom, Ireland, Cyprus, Bulgaria, Romania, Ukraine, Serbia, Croatia, Bosnia, Herzegovina, Montenegro, Macedonia, Albania, Monaco, Belarus, United States, Canada, Brazil, Mexico, Argentina, Chile Australia and New Zealand, South Korea, Japan, Singapore, Brunei, United Arab Emirates and Qatar.
TOURISM VISA
For myself as a British Citizen I unfortunately couldn’t take advantage of the transit visa as while I was travelling onwards to Hong Kong my stay in China would be 14 days so applying for an official tourist visa was my only option.
Fortunately while there were a lot of steps the whole process was very smooth for me, hopefully this will give you the information for you to do the same thing.
Step 1 – Find your visa centre
First of all you can only apply for the visa when you are within 3 months of your travel date, you can complete all the paperwork before this date however if you wish which I will come onto in step 2! The UK has four dedicated Chinese Visa Application Centres located in London, Manchester, Edinburgh and Belfast. You will have to attend in person at which every location you choose. Manchester was just over a two hour drive for me so was the most ‘convenient’ for me to pick. Select your choice on the website here: https://www.visaforchina.cn/ , you can then create an account to be able to start your application.
Visa Application Centre, Manchester
Step 2 – Collection or Postage options
Before starting the paperwork I would recommend obtaining a passport style photo which is needed for the application, you are required to upload a photo to the website as well as bring a hard copy to the application centre. Most photobooths readily available in many locations will give the option to email you the photos as well nowadays, I went to a local Tesco superstore to get mine.
The other option you want to decide now is whether you want to go back to the application centre to collect the visa once it has been approved or have it returned by post. While there was an extra charge (covered in more detail later) it was more convenient for me to have mine posted back. You passport is retained as the visa is directly stamped in so I opted for special delivery to have mine returned, you have to purchase a prepaid envelope from a post office for this which costs approximately £8, this is not provided by the centre. Make sure you write the return address clearly onto it. If you decide you want to return in person then skip this process
Step 3 – Paperwork
So for this application be prepared to give literally every bit of information you can think of! All you personal details as well as your parents, work history, education etc and references to back it up!
With regards to your planned trip they want all your accommodation information, your departure/arrival flight numbers and a general itinerary.
This part takes a bit of time especially to collate all the information and double triple check everything matches, I know someone who’s visa got rejected because their names didn’t match their passports exactly on the forms it’s very strict!
You are then required to print and sign the application bringing it as well as all the documents to the visa centre to be checked.
Please note:
A recent update to the application process means that now all the paperwork can be uploaded to the visa application for an online review, additional documents may be requested. Once you have passed the online review you will still need to visit the visa centre but this streamlines the process.
Step 4 – Visa centre visit
Appointments are not required, I arrived early as I wasn’t sure how busy it would be. No photos are allowed to be taken inside but I snapped this before entering. You are given a ticket number and called to a desk once it is your turn. All the documents are reviewed with copies taken, your passport will also be taken so bear this in mind. Your fingerprints are also scanned and finally you pay the visa fee. Overall this process was very smooth and I was only inside for about 15 minutes, there was a lot of seats and 8 counters though so maybe it can get a lot busier at times. It’s worth noting that I was told I would receive no email updates during the processing time unless any further information was required, so in this case no news was good news!
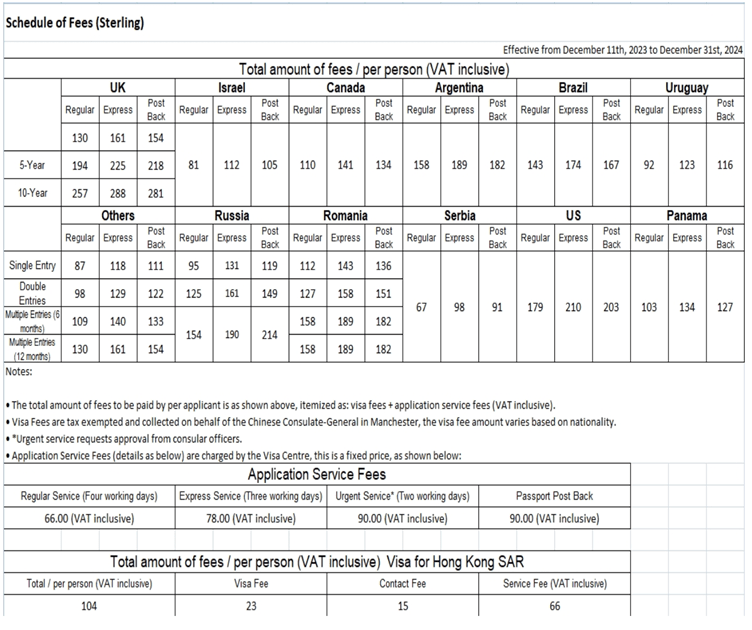
Step 5 – Fees overview
As a UK passport holder I was charged £154 which included a £90 post back service fee as shown in the schedule of fees table below (fees could change in the future). A pleasant surprise was also that while I only requested a one time entry visa I was told I would get a two year visa allowing travel up to 90 days at a time which was a bonus!
Step 6 – Receive visa
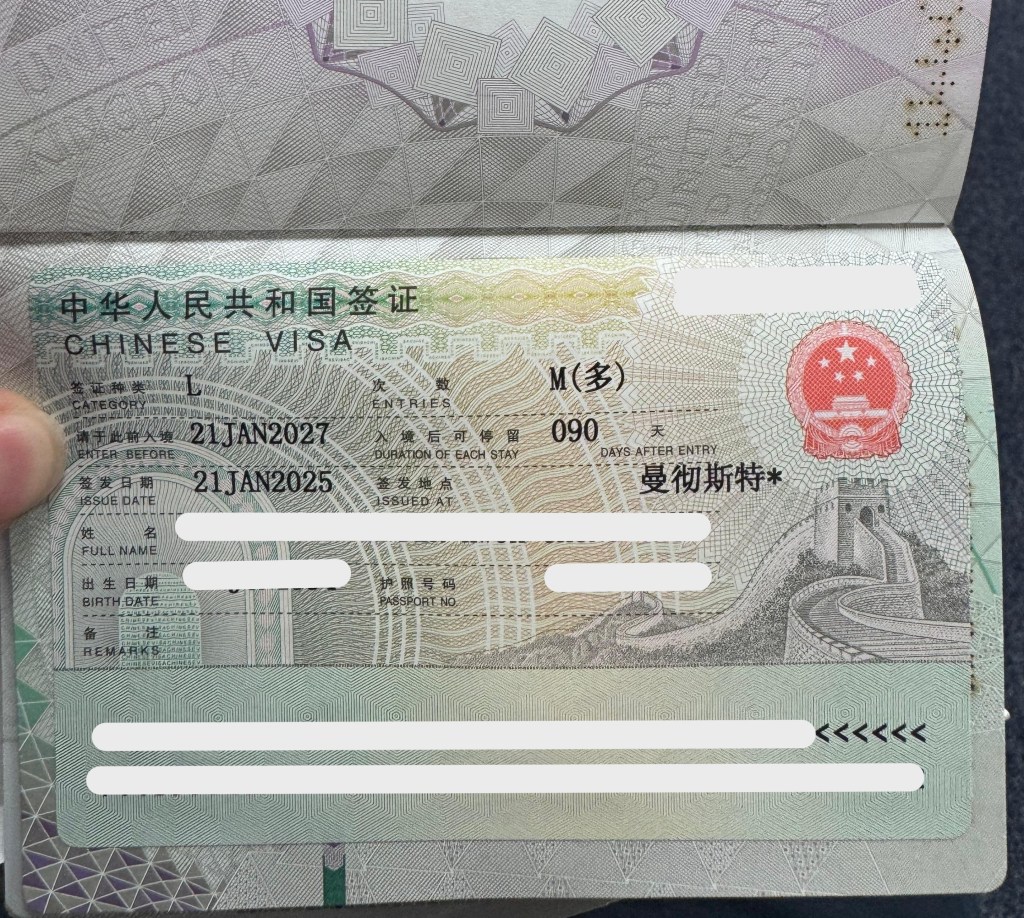
I submitted my application on a Monday and as promised I received a tracking update Wednesday evening stating that my passport would be delivered Thursday in line with their stated four day processing time. Here is a picture!
Chinese Visa
Overall while a lot of time went into preparing the application I found the process streamlined and encountered no issue, I hope the same goes for you as well!


Leave a comment